Do you have a question about the Haas SL-30 and is the answer not in the manual?
Attaching and positioning the steady rest head unit on the platform.
Guidelines for safe and effective steady rest usage and pressure limits.
Description of crowned and straight rollers and their applications.
Procedure for aligning and setting up the steady rest without a tailstock.
Explains M codes for automatic steady rest open/close control.
Outlines routine maintenance tasks, including roller inspection.
Steps to realign the steady rest platform after a crash or removal.
Specifies travel dimensions for SL-20L and SL-30L models.
Provides travel dimensions for SL-30 and SL-40 models.
Details travel dimensions for the SL-40 Long Bed model.
Dimensions and base pattern for the SL-20L steady rest mount.
Dimensions and base patterns for SL-30, SL-30L, SL-30B mounts.
Dimensions and base patterns for SL-40, SL-40B, SL-40L mounts.
Visual representation of the SL-20L steady rest envelope and clearances.
Visual representation of the SL-30 series steady rest envelope and clearances.
Visual representation of the SL-40 series steady rest envelope and clearances.
This document describes the Steady Rest Option for Haas SL-20/30/40 Lathes, providing detailed information on its function, installation, operation, maintenance, and various dimensional specifications.
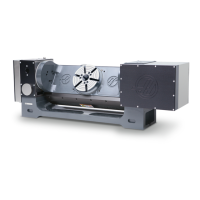
The Steady Rest Option is designed to provide increased support for longer shaft turning and boring operations. It utilizes automatic hydraulic aftermarket steady rests to enhance stability during machining. The steady rest mounting platform is manually positioned along the Z-axis and secured in place by a mechanical clamp. This option can be used in conjunction with the tailstock, offering versatile support for various workpieces. The platform features industry-standard mounting holes, making it compatible with a wide range of aftermarket steady rest grippers from manufacturers such as LMC, Forkhardt, SMW Systems, Rohm, and SMW Autoblock. It is important to note that some steady rest brands or models may not fit the Haas bolt pattern, potentially requiring a special adapter plate to be fabricated by the customer.
Installation of the steady rest head involves mounting it onto the platform. Initially, the mounting bolts should not be fully tightened, as the head unit will require alignment during the part setup process. The existing hydraulic hoses from the lathe are then attached to the steady rest head. These hoses are located just inside the lower sheet metal, above the chip tray, and feature female JIC-4 fittings. The hose designated for clamping the steady rest connects to the top tube, while the unclamp hose connects to the lower tube. It is crucial to secure these flexible hoses to prevent them from interfering with any chip removal system. To position the steady rest along the Z-axis, the clamp handle is pulled toward the spindle to release the clamp, allowing the steady rest to be moved to the desired location before reengaging the clamp.
For proper operation, it is essential to adhere to the steady rest manufacturer's operation manual for additional alignment instructions. Users must not exceed the recommended maximum pressure for the steady rest. All bolts securing the steady rest to the platform should be checked and torqued properly: 1/2-13 bolts to 110 ft-lb and 5/8-11 bolts to 180 ft-lb. Safety is paramount, so users must keep hands, loose clothing, tools, and other objects away from the steady rest as it closes. The workpiece must have a smooth, concentric diameter to ensure proper clamping, and rough material should not be placed in the steady rest jaws.
The steady rest unit can accommodate different types of rollers: crowned and straight. Straight rollers are used for standard cylindrical parts, while crowned rollers are suitable for tapered workpieces. A warning is issued regarding the use of the tailstock, advising users to be aware of the steady rest platform's current position to avoid collisions.
Setting up the steady rest without a tailstock involves mounting the steady rest on the platform and snugging the mounting bolts. The workpiece is then clamped in the chuck and the steady rest. The hydraulic pressure to the steady rest is adjusted using the pressure regulator located on the left side of the lathe. To verify alignment, a dial indicator is placed on the turret, and its tip is positioned on the part's diameter. The workpiece is rotated by hand to check for deflection, which should not exceed 0.001". If deflection occurs, the pressure to the steady rest should be checked, as incorrect pressure can cause part deflection. Any detected deflection must be corrected, and the steady rest mounting bolts should then be tightened. The steady rest should be opened and closed, and deflection checked again. If the pressure to the steady rest unit is changed, these steps must be repeated to ensure the part is turning true. Improper alignment of the steady rest head will negatively impact part accuracy, causing the material to not turn true and potentially leading to the part being thrown from the chuck.
Programming the steady rest involves using M Codes for automatic opening and closing. M59 P1155 is used to clamp the steady rest, and M69 P1155 is used to unclamp it. A note clarifies that if the M code commanded results in the reverse action, the hydraulic lines are installed incorrectly and should be swapped at the steady rest head.
Maintenance is crucial for the longevity and performance of the steady rest unit. Each unit requires occasional maintenance, with schedules ranging from daily, weekly, monthly, to even a few hours, depending on usage. Lubrication and maintenance schedules are detailed in the manufacturer's manual, and these instructions should be followed diligently. Daily inspection of the steady rest rollers is recommended to check for play in the bearings. If play is detected, the roller should be replaced, as excessive play can prevent the part from turning true in the jaws, leading to poor accuracy and the risk of the part being thrown from the chuck. Rollers are considered normal wear items, and the manufacturer's manual provides details on how to replace them and lists part numbers for ordering.
Steady rest platform alignment may be necessary after a crash or if the platform has been removed. The alignment procedure involves several steps. First, a magnetic base indicator is mounted on the face of the turret. The four upper base mounting nuts are then loosened. The side of the steady rest platform is swept at the indicated location by moving the turret in the X-axis. The steady rest platform must be parallel to the X-axis within 0.001”. Once alignment is achieved, the four upper base mounting bolts are retightened.
In cases of severe misalignment, the lower base may also need realignment. This process begins by verifying alignment by mounting a magnetic base indicator to the face of the chuck. The chuck is then rotated manually, and the side of the steady rest platform is swept at the shown location. The steady rest platform must be perpendicular to the Z-axis within 0.001". If alignment is required, the 8 (or 16 on SL40 series) mounting bolts are loosened to align the platform. After the alignment is completed and the lower base is retightened, the alignment of the upper base should be rechecked and adjusted as needed.
| Brand | Haas |
|---|---|
| Model | SL-30 |
| Category | Industrial Equipment |
| Language | English |