Do you have a question about the Haas TRT160 and is the answer not in the manual?
Overview of the procedure for installing a TR, TRT, or T5C rotary on a Haas VMC.
Lists essential requirements before starting the rotary installation, including technician and machine needs.
Details VMC compatibility and necessary cable changes for different machine models and software versions.
Perform initial machine setup steps including ZERO RETURN, EMERGENCY STOP, and air supply connection.
Install eye bolts and lifting chains/spreader beam for safe handling of the rotary.
Mount the rotary onto the machine table using T-Nuts and studs, ensuring proper alignment.
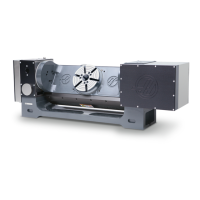
Remove standoffs and shipping brackets from specific locations on the rotary unit.
Clean rotary surfaces, jog axes, disconnect air hose, and prepare cable clamps.
Turn off power, set main circuit breaker to OFF, and apply lockout procedures.
Route the rotary air hose and cables into the machine enclosure and connect them.
Ensure cables are straight, properly tensioned, and secured with clamps and zip-ties.
Connect the TILT and ROTARY axis cables to the control cabinet, including scale cables.
Follow the NGC procedure to enable and disable the rotary and proceed to step 13.
Set Parameter 30 (4TH AXIS ENABLE) to NEW and select the correct rotary model.
Set Parameter 78 (5TH AXIS ENABLE) to NEW and select the correct rotary model.
Perform ZERO RETURN, check axis travel limits, and install remaining studs/washers/nuts.
Procedure to make the platter parallel to the Y-Axis movement by adjusting Parameter 212.
Procedure to align a multi-axis trunnion to the table, ensuring platter parallelism to the X-axis.
Guidelines for lifting rotary tables with lift rings to prevent gear set damage, using air supply.
| Brand | Haas |
|---|---|
| Model | TRT160 |
| Category | Industrial Equipment |
| Language | English |