Eclipse Installation, Commissioning & Operating Manual Approved Document Ref: UI-ECL-01 Issue 8.0
22
SETUP & PROGRAMMING
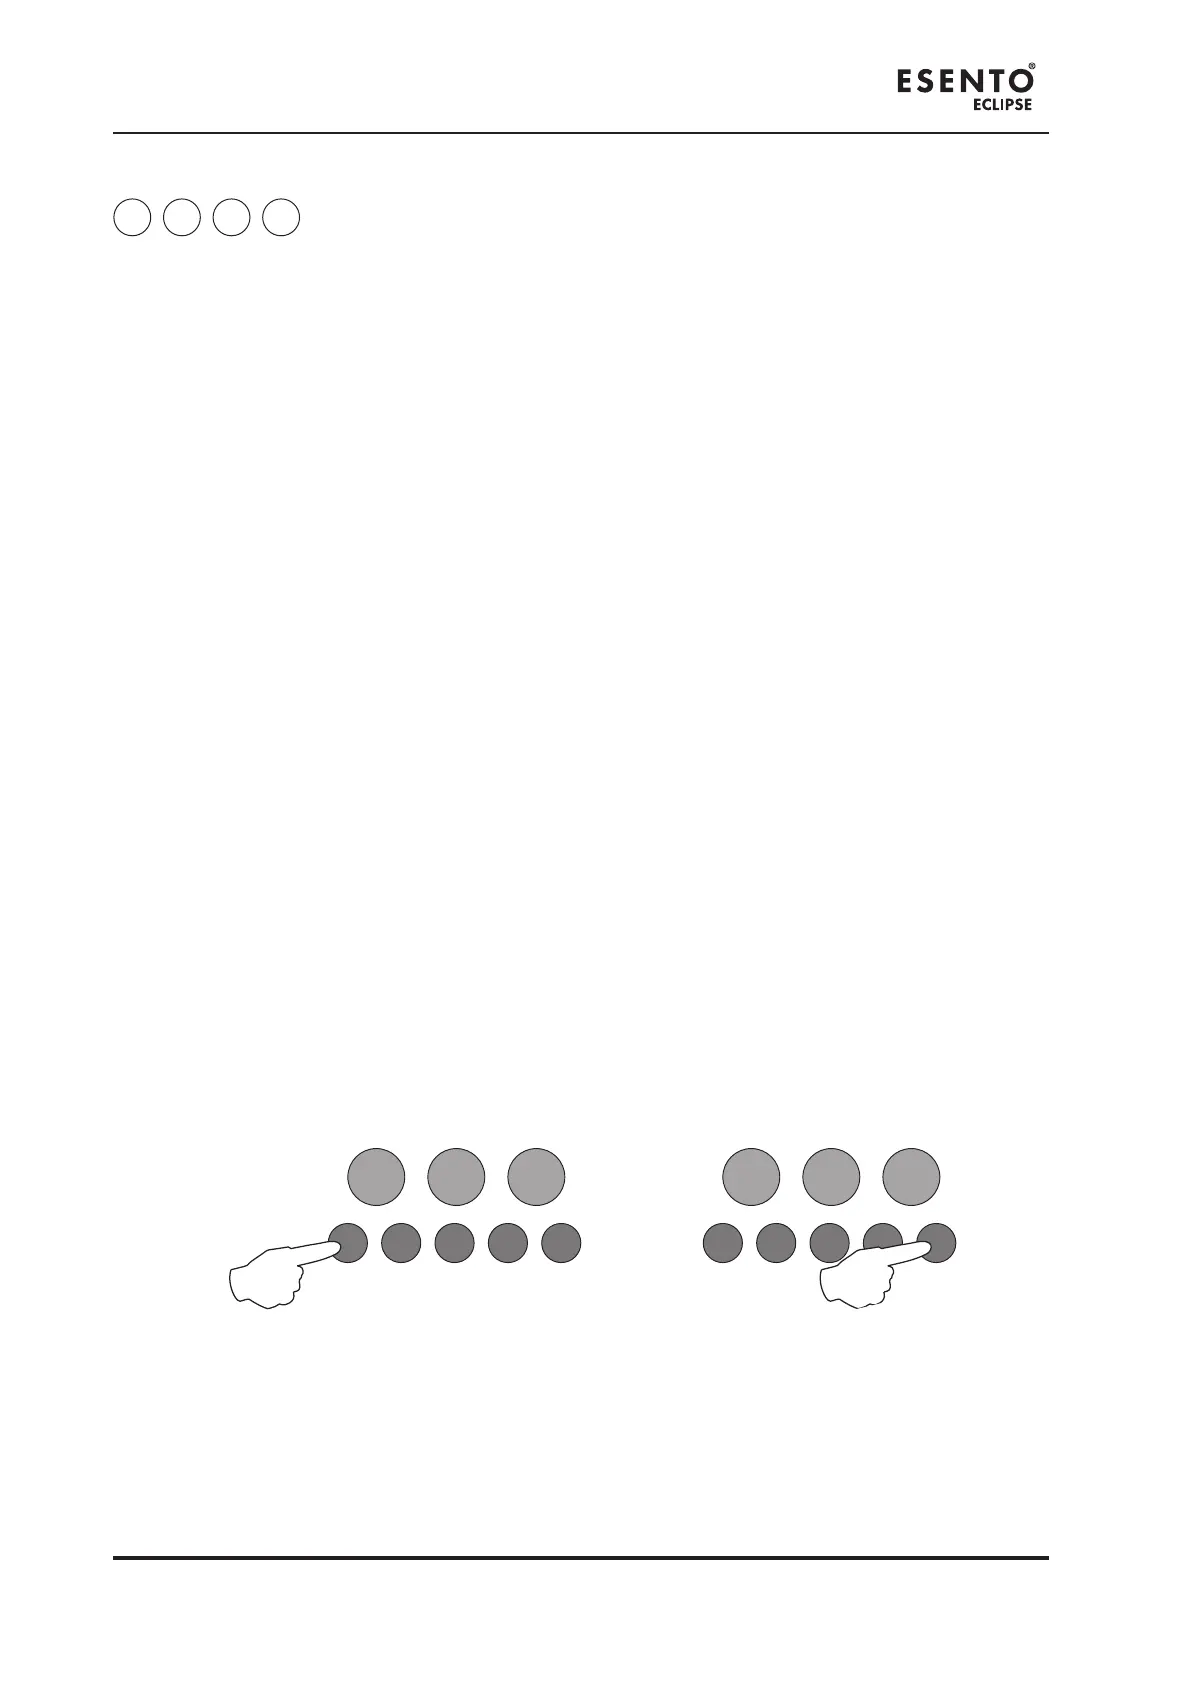
2 1 1 4
Type ‘A’ dependency mode.
Dependency ‘A’ (conrmation alarm) is a requirement by some monitoring stations and local re authoities
to reduce the possibility of false alarms.
Dependency ‘A’ zones will apply the following sequence:
1. 1. The rst detector alarm is inhibited.The rst detector alarm is inhibited.
2. 2. The panel resets and re-checks the inhibited zone within 15-30 seconds.The panel resets and re-checks the inhibited zone within 15-30 seconds.
3. 3. If an alarm is detected then the panel activates a full re condition.If an alarm is detected then the panel activates a full re condition.
4. 4. If no alarm is detected, the panel stays in an alert condition for 30 minutes. Any new alarm from If no alarm is detected, the panel stays in an alert condition for 30 minutes. Any new alarm from
the same zone within this time activates a full re condition.the same zone within this time activates a full re condition.
5. 5. After 30 minutes or if RESET, the panel reverts to step 1.After 30 minutes or if RESET, the panel reverts to step 1.
Note: 220Ω ‘Evacuate’ call points should be used on such zones to provide an instant un-delayed alarm.
A 470Ω call point will be included in the dependency delay sequence.
By default this is set to ‘off’ for all zones.
To set zones to Type ‘A’ Dependency, enter the above code and press the ENTER button. The Aux Output
Status LED will pulse slowly. Zone Fault/Disabled/Test LEDs will show their current status (see below) with
Zone 1 pulsing to indicate it is under selection.
Use Button 1 (Disable Mode) to move to the zone for programming (indicated by a pulsing LED) and press
the ENTER button to change the status. Pressing the ENTER button again will toggle the status, indicated
by a rapid or slow pulsing LED (see below). Then use Button 1 to move to the next zone. If the zone has
been set to conrmation alarm mode, the LED will remain on. If kept as standard alarm mode then the
LED will be off.
Slow Pulse = Zone is under selection and is set to standard alarm mode.
Rapid Pulse = Zone is under selection and has been set to conrmation alarm mode.
LED Off = Zone is set to standard alarm mode.
LED On = Zone has been set to conrmation alarm mode.
When nished, press and hold Button 1 (Disable Mode) for 3 seconds or alternatively wait approx 10
seconds and the panel will save the settings and revert back to Level 3 access mode.
Enter the next programming code or disable the controls and return DIL switch 3 to ‘OFF’.
RESOUND SILENCE RESET
ENTER
1 2 3 4
Disable
Mode
Test
Mode
Mute
Buzzer
Test
Lamps
RESOUND SILENCE RESET
ENTER
1 2 3 4
Disable
Mode
Test
Mode
Mute
Buzzer
Test
Lamps