For increased life of the device, dog the push bar down during high traffic periods of the day. Dogging is not available on fire-rated
models.
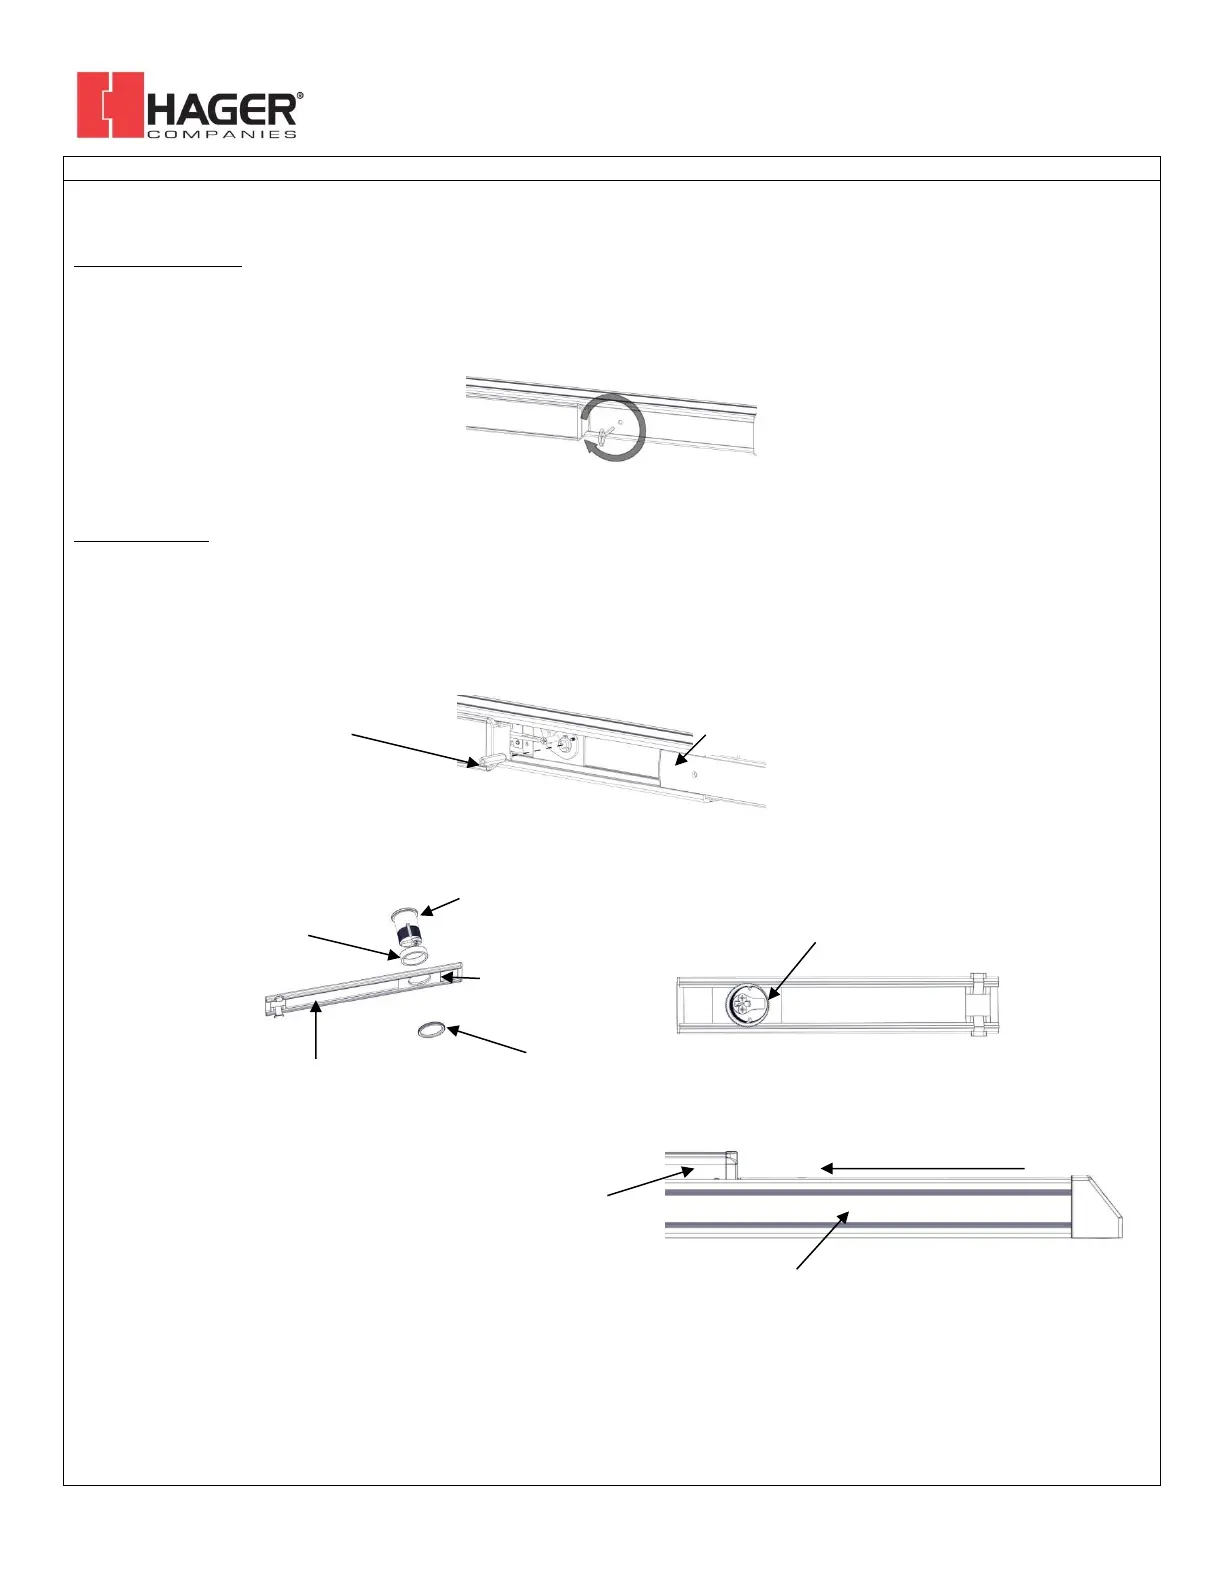
Hex Wrench Dogging
To dog the device, press the push bar, insert the hex dogging wrench and turn clockwise 35 degrees. The push bar will remain
depressed and the latch will stay retracted. To release the dogging, hold the push bar down, insert the hex dogging wrench, and turn
counter-clockwise 35 degrees. The push bar will return to the up position and the latch will extend to lock the door.
Cylinder Dogging
Required hardware for cylinder dogging includes one (1) mortise cylinder, lengths 1-1/8”, 1-1/4” or 1-3/8” with a standard cam (0.723”
[18mm] screw center to tip of cam); and one (1) Hager cylinder dogging kit (4926) which includes one (1) 11/32” [8.7mm] solid
cylinder collar and cashbox nut. Remove and discard the hex wrench extension. The cylinder should be oriented so the cam is
pointing away from the exit device push bar. Install the dogging cover plate with the cylinder and test the dogging. Depress the push
bar, insert the key and turn the key clockwise to dog the device. Turn the key counter-clockwise to release the dogging.
 Loading...