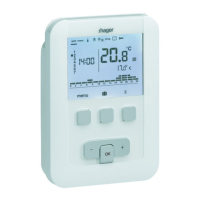
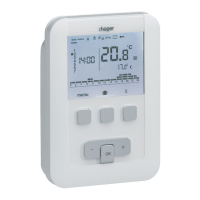
Thermostat installation
To guarantee its ambient temperature-regulation
function, the thermostat should be installed around
1.3 m above the ground, on an interior wall or using
the base provided with the thermostat, and away
from direct sunlight or any heat source such as a
television, lamp, radiator, draft, chimney, etc.
Fix the thermostat onto the flush-mounted casing
or in the slot without a casing intended for this
purpose.
For optimum quality temperature regulation, seal
the flush-mounted casing or the electrical duct.
1. Separate the product from the wall-mounting, by
pulling on the base of the product.
2. Open the flap with the help of a screwdriver and
attach the wall-mounted base using the screws.
–
+
ok
3. Insert the batteries into the thermostat.
4. Clip the front face onto the wall-mounted base.
RESET
You can also simply set the thermostat on the base
provided.
–
+
ok
–
+
ok
–
+
ok
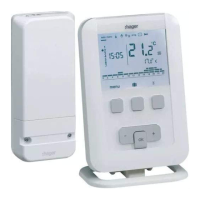
Receiver installation
For ease of installation, the programmable ambient
thermostat and wall-mounted receiver kit is
delivered with a flexible cable having four 1.5 mm
2
wires and a length of 1.20 m (not connected).
We advise using this cable for connection of the HF
receiver, observing the following colour code :
brown = live
blue = neutral
gray, black = connection to the boiler.
85 mm
85 mm
85 mm
180°
Ech 35%z
180°
1 2
3
4
Connection of the thermostat to a thermostat
input of the boiler.
entrée thermostat d'ambiance déporté
FR
L
N
Eingang für Raumthermostat
DE
L
N
remote ambient thermostat input
L
N
ingang van kamerthermostaat op afstand
NL
L
N
ingresso termostato per ambiente remoto
IT
L
N
entrada termostato ambiente desviado
ES
L
N
DZȌȀǼǰǼǿǴDZǾǹǼȀȁȉȁdzȅȓǾǼȂ
ǹDZǭǽǼǹǭǷǾȂȀǹȊǺǼǭǶȀǴdzȁȋǾǶǼ
GR
L
N
wej cie termostatu pokojowego zewn trznego
PL
L
N
2 2 15 4 3
2 2 15 4 3
2 2 15 4 3
2 2 15 4 3
2 2 15 4 3
2 2 15 4 3
2 2 15 4 3
2 2 15 4 3
ok
–
+
ok
–
+
ok
–
+
ok
–
+
ok
–
+
ok
–
+
ok
–
+
ok
–
+
tulo ulkoisesta huonetermostaatista
FI
L
N
2 2 15 4 3
ok
–
+
Connection of the thermostat to the thermostat
input of a reversible or irreversible heat pump
(HP)
entrée thermostat d'ambiance déporté
FR
L
N
2 2 15 4 3
ok
–
+
Eingang für Raumthermostat
DE
L
N
2 2 15 4 3
ok
–
+
remote ambient thermostat input
L
N
2 2 15 4 3
ok
–
+
ingang van kamerthermostaat op afstand
NL
L
N
2 2 15 4 3
ok
–
+
ingresso termostato per ambiente remoto
IT
L
N
2 2 15 4 3
ok
–
+
entrada termostato ambiente desviado
ES
L
N
2 2 15 4 3
ok
–
+
DZȌȀǼǰǼǿǴDZǾǹǼȀȁȉȁdzȅȓǾǼȂ
ǹDZǭǽǼǹǭǷǾȂȀǹȊǺǼǭǶȀǴdzȁȋǾǶǼ
GR
L
N
2 2 15 4 3
ok
–
+
wej cie termostatu pokojowego zewn trznego
PL
L
N
2 2 15 4 3
ok
–
+
tulo ulkoisesta huonetermostaatista
FI
L
N
2 2 15 4 3
ok
–
+
Connection of a heating or air conditioning
circulator
N
L
5 4 3 2 2 1
RN
ò
10A
This product must be installed
according to the local installation
standards in force.
Initial adjustment and updating
When the product is first used, the screen oers
the option to adjust the year, date and time,
without going into the parameter settings.
or
Press key 1
menu to place the cursor under
.
• The year flashes. Press key 5
+ navigation
key to adjust the current year.
Confirm using the
OK key.
• The month flashes. Now press key 5
+ or -.
Confirm using the
OK key hen proceeded in the
same manner to select the day, hour and minutes.
•
AUTO flashes. Press key 5 + to set the
installation to switch automatically between
summer and winter time (
auto) or not (off).
Confirm using the
OK key.
•
24:H flashes. Press key 5 + to select the
12 hour or 24 hour time format.
Confirm using the
OK key.
2 6LE001012C
 Loading...