Do you have a question about the Haier 2U18MS2HDA1 and is the answer not in the manual?
Key safety precautions to minimize risks of fire, shock, or injury during operation and installation.
List of specialized and common tools necessary for the proper installation of the unit.
Minimum spatial requirements for indoor units and guidelines for coastal installations.
Specifications and types of wall brackets for mounting indoor units.
Specific spacing requirements for the outdoor unit's installation and maintenance.
Criteria for choosing the optimal placement for the outdoor unit.
Guidelines for selecting an appropriate site for the indoor unit.
Procedure for securely mounting the indoor unit's wall plate.
Detailed steps for making the correct electrical hookups for the indoor unit.
Ensuring proper slope and installation of the condensate drain line for effective drainage.
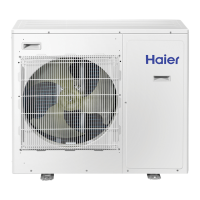
Steps to prepare the outdoor unit, including packaging removal and vibration pad placement.
Procedure for connecting power and communication wiring to the outdoor unit.
Diagrams and priority for connecting refrigerant linesets to indoor and outdoor units.
Performing pressure tests with nitrogen to check for refrigerant leaks.
Removing air and moisture from the system using a vacuum pump to achieve a vacuum.
Adding the correct amount of refrigerant to the system using a digital scale.
Conducting operational checks to ensure the system functions correctly after installation.
Guidance on demonstrating system functions and features to the customer.
Details of the extended warranty terms for registered products, covering parts and compressor.