This document is a user manual for the Haier TFE3 Series Dishwasher, specifically models HDW9-TFE3WH and HDW9-TFE3SS. It provides comprehensive information on installation, operation, maintenance, and troubleshooting.
Function Description
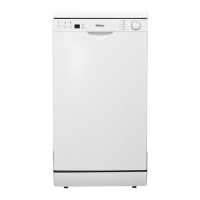
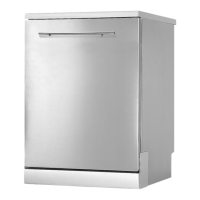
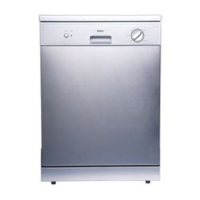
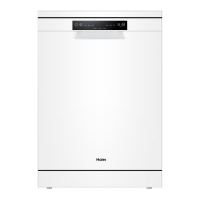
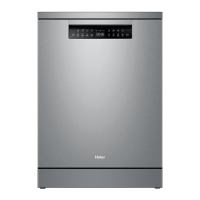
The Haier TFE3 Series Dishwasher is designed for washing household dishes and cooking utensils. It offers multiple wash programmes to cater to different levels of soiling and types of items, ensuring efficient cleaning and drying. The appliance incorporates features for detergent and rinse aid dispensing, water filtration, and spray arms to distribute water effectively.
Important Technical Specifications
- Dimensions:
- Width: 450 mm
- Depth: 600 mm
- Height: 850 mm (with top panel in place), 820 mm (with top panel removed). These heights are adjustable depending on feet height.
- Capacity: 9 standard place settings
- Water Pressure: 0.03-1.0 MPa (0.3-10 bar)
- Power Supply: 220-240V~50Hz
- Maximum Current Intensity: 10A
- Total Absorbed Power: 1950W
- Water Connection: Single valve water connection, recommended cold water connection (max 60°C).
- Drain Hose: Should not be longer than 4 m for optimal performance.
- Services Hole Diameter: Minimum 50 mm for plumbing and electrical connections.
Usage Features
The dishwasher features a user-friendly control panel with a programme selection dial and various indicators:
- ON-OFF Indicator (A) and Button (B): For switching the appliance on and off.
- "3 in 1" Indicator (C) and Button (D): For use with combination detergent products.
- Delayed Start Indicator (E) and Button (F): Allows delaying the start of a programme in 1-hour increments up to 24 hours.
- Time-remaining Indicator (G): Displays the remaining time for the selected programme.
- Low Rinse Aid Indicator (H): Illuminates when rinse aid needs refilling.
- Heater Indicator (I): Indicates when the heating element is active.
- Programme Selection Dial (J): Used to select from various wash programmes.
Wash Programmes:
- HEAVY: For very dirty dishes, pots, and pans (not for delicate items). Includes pre-wash with hot water, extended wash at 68°C, cold rinses, hot rinse, and drying. Requires 5g prewash detergent and 25g main wash detergent.
- NORMAL: For normal loads of dirty dishes, pots, and pans. Includes pre-wash with cold water, extended wash at 55°C, cold rinses, hot rinse, and drying. Requires 5g prewash detergent and 20g main wash detergent.
- LIGHT: For lightly soiled delicate items. Includes pre-wash with cold water, extended wash at 45°C, cold rinses, hot rinse, and drying. Requires 5g prewash detergent and 25g main wash detergent.
- GLASSWARE: Economic cycle for delicate items, to be run immediately after use. Includes wash at 45°C, cold rinse, and hot rinse/drying. Requires 25g main wash detergent.
- QUICK 30: For very lightly soiled mixed dishes. Short wash at 40°C and cold rinse. Requires 15g main wash detergent.
- RINSE: For dishes that only require a rinse and dry. Hot rinse at 65°C and drying. Requires 15g main wash detergent.
- PRE-RINSE: Short cold wash to prevent food residue from drying on dishes while waiting for a full load.
Detergent Dispenser: Located on the inside panel of the door, with separate compartments for pre-wash (7) and main wash (6) detergent.
Rinse Aid Dispenser: Located on the inside panel of the door. The dosage can be adjusted (1-6 settings) using a screwdriver. The low rinse aid indicator (H) signals when a refill is needed.
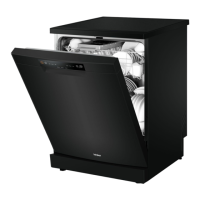
Loading: The lower rack is for difficult-to-clean items like pots and pans, while the upper rack is for more delicate items like glasses and cups. The upper rack height is adjustable.
End of Programme: Signaled by six beeps and the ON-OFF indicator (A) lighting up. The door should be left ajar after the programme to improve drying performance.
Interrupting/Cancelling a Programme: Opening the door during operation will cause beeps. A running programme can be cancelled by pressing the ON-OFF button (B) for 3 seconds or by rotating the dial to "Reset".
Maintenance Features
Regular inspection and maintenance are crucial for the appliance's longevity and performance.
- After Every Wash: Leave the door slightly ajar to prevent moisture and odours.
- Cleaning:
- Exterior and Rubber Parts: Use a cloth with warm soapy water. Avoid solvents or abrasive cleaning products.
- Interior: Use a cloth dampened with water and white vinegar or a dishwasher-specific cleaning product.
- Seals: Periodically clean with a damp sponge to prevent food residue and odours.
- Filters (8, 9): Located at the bottom of the dishwasher, they prevent food particles from reaching the pump. They should be checked and cleaned regularly by removing the coarse micro-filter (8) and then the filter unit (9), rinsing them under running water, and reassembling.
- Spray Arms (10, 11): Inspect nozzles for blockages from food residue. The lower arm (11) can be pulled upwards and lifted off, while the upper arm (10) can be unscrewed. Clean both under running water and refit securely. Ensure power supply is off before cleaning internal parts.
- Moving the Appliance: Keep in a vertical position if possible; if necessary, it can be positioned on its back.
- Holiday Care: Run an empty wash cycle, unplug, turn off water supply, and leave the door slightly ajar to preserve seals and prevent odours.
Troubleshooting: The manual provides solutions for common issues such as the appliance not starting, error displays (E2, E3, E4, E5, E6), problems with spray arm rotation, detergent dispenser issues, water remaining in the appliance, unusual foam, and poor wash/drying results. For persistent issues or specific error codes (E2, E6), contacting an authorised service centre is recommended.
Disposal: Old appliances should be made inoperable by unplugging, cutting the power cable, and removing the door lock to prevent children from being trapped. Packaging materials should be recycled.