EasyManua.ls Logo

HAKO Scrubmaster B8 User Manual

HAKO Scrubmaster B8
224 pages
Go to English
To Next Page IconTo Next Page
Page #1 background imageLoading...
Page #1 background image
Instruction manual
Scrubmaster B8 (7739.10/.20)
Cop_HAKO_Scrubmaster_B8_1ed_01-2020_49027807.indd 1Cop_HAKO_Scrubmaster_B8_1ed_01-2020_49027807.indd 1 23/01/2020 13:59:1323/01/2020 13:59:13

Table of Contents

Question and Answer IconNeed help?

Do you have a question about the HAKO Scrubmaster B8 and is the answer not in the manual?

HAKO Scrubmaster B8 Specifications

General IconGeneral
Power SupplyBattery
Voltage24 V
Brush Speed180 rpm
Working Width340 mm
Recovery Tank Capacity76 l
Brush Diameter340 mm

Summary

Technical data

1.1 INTRODUCTION

2.1 GETTING TO KNOW THE MACHINE

3.1 UNPACKING

3.1.a - Machine equipment (battery version)

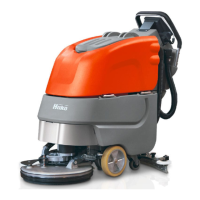
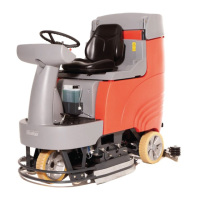
Details about machine equipment for the battery version, including supplied accessories.

3.1.b - Machine equipment (charger version)

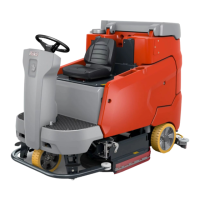
Details about machine equipment for the charger version, including supplied accessories.

3.1.c - Car battery charger (optional)

Information regarding the optional car battery charger for charging the machine's battery.

3.1.d - Machine lifting

Instructions and notes on how to safely lift the machine.

4.1 ASSEMBLING THE COMPONENTS

4.1.a - Mounting the brush

Step-by-step guide on how to mount the brush onto the machine.

4.1.b - Positioning of the handle

Instructions on how to adjust and position the machine's handle.

4.1.c - Battery mounting for the battery version only

Procedure for mounting the battery into the machine for the battery version.

4.1.d - Charger mounting for the electric version only

Procedure for mounting the charger into the machine for the electric version.

5.1 CHARGING THE BATTERY (IF EQUIPPED)

5.1.a - Battery charge from a 12V socket

Instructions for charging the machine's battery using a 12V socket.

6.1 CONTROL PANNEL (Fig. 10)

30) Start-up button

Details on the start-up button function and its indicator LEDs.

36) Water supply button

Explanation of the water supply button and its quantity settings.

37) Vacuum cleaner button.

Information on the vacuum cleaner button for normal and silent operation.

6.2 LEVER (3) FOR THE ADJUSTMENT OF THE HANDLE BAR INCLINATION / MACHINE CYCLE OPERATION (FIG. 11)

6.3 LEVER (4) FOR MACHINE CYCLE OPERATION (FIG. 10-11)

6.4 BRUSH LIFTING/LOWERING PEDAL (FIG. 12)

6.5 GROUND PRESSURE REGULATION SELECTOR FOR THE BRUSH (FIG. 1)

7.1 MOVING THE MACHINE (Fig. 1)

8.1 FILLING IN THE CLEAN WATER TANK

8.1.a - Filling in the tank on the machine

Procedure for filling the clean water tank while it is on the machine.

8.1.b - Filling in with the tank removed

Procedure for filling the clean water tank after removing it from the machine.

9.1 OPERATION

9.1.a - Checks before use

Essential checks to perform before operating the machine.

9.1.b - Preparing the machine and choosing the cycle

Steps to prepare the machine and select the appropriate cleaning cycle.

9.1.c - Using the machine

Detailed guide on how to operate the machine during cleaning tasks.

9.1.d - End of use and switching off

Procedure for correctly ending the cleaning operation and switching off the machine.

9.1.e - Storing the machine

Instructions on how to properly store the machine after use.

10.1 DRAINING THE RECOVERY WATER (Fig. 20)

11.1 MAINTENANCE AND CLEANING

11.1.a - Emptying and cleaning the clean water tank

Steps for draining and cleaning the clean water tank.

11.1.b - Cleaning the recovery water tank

Instructions for cleaning the recovery water tank to prevent scaling and bacteria.

11.1.c - Removal of the squeegee system

Guide on how to remove the squeegee system from the machine.

11.1.d - Cleaning the squeegee system

Procedure for cleaning the squeegee system components.

11.1.e - Cleaning the brush

Instructions on how to clean the brush.

OPERATIONS TO PERFORM WHEN NECESSARY

11.1.f - Replacing the brush

Steps for replacing the brush when it is worn or for different floor types.

11.1.g - Replacing the squeegee rubber blades

Guide on how to replace the rubber blades of the squeegee system.

TROUBLESHOOTING

OPTIONAL ACCESORIES

ELECTRICAL DIAGRAM

Declaration of EC conformity

Related product manuals