EasyManua.ls Logo

HAMPTON BAY 51315 - User Manual

HAMPTON BAY 51315
30 pages
Print Icon
To Next Page IconTo Next Page
Loading...
USE AND CARE GUIDE
LATHAM 52-INCH CEILING FAN
Questions, problems, missing parts? Before returning to the store,
call Hampton Bay Customer Service
8 a.m. - 6 p.m., EST, Monday-Friday.
1-877-527-0313
HAMPTONBAY.COM
THANK YOU
We appreciate the trust and condence you have placed in Home Decorators Collection through the purchase of this ceiling fan. We strive
to continually create quality products designed to enhance your home. Visit us online to see our full line of products available for your home
improvement needs. Thank you for choosing Home Decorators Collection!
Item #600-520, 600-522
Model #51315, 51353
UL model #52-LTM

Questions and Answers

  • M
    Mitchell BensonJul 27, 2025
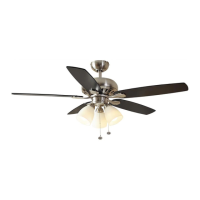
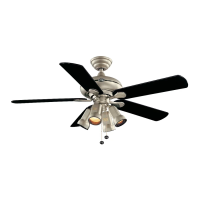
    What to do if my HAMPTON BAY 51315 Fan will not start?
    • L
      Laura GonzalezJul 27, 2025
      If your HAMPTON BAY Fan isn't starting, begin by checking the main and branch circuit fuses or breakers. Then, verify the line wire connections to the fan and the switch wire connections within the switch housing. Also, inspect the remote control's battery and ensure you're within the 10-20 feet range. Finally, turn off the power and confirm that the dip switch settings match on both the remote control and the receiver.
  • D
    Derek AlexanderAug 6, 2025
    Why is my HAMPTON BAY 51315 so noisy?
    • M
      Monica MillerAug 6, 2025
      A noisy HAMPTON BAY Fan can be caused by several factors. First, make sure all motor housing screws are snug and that the screws attaching the fan blade bracket to the motor hub are tight. Check that the wire nut connections are not rattling against each other or the interior wall of the switch housing. Allow a 24-hour “breaking in” period, as most noises disappear during this time. If you're using a light kit, ensure the screws securing the glassware are tight and the light bulbs are secure. Also, confirm that the canopy isn't touching the ceiling and that your outlet box is secure, with rubber isolator pads used between the mounting plate and outlet box.
  • C
    chris43Aug 16, 2025
    How to fix a wobbling HAMPTON BAY 51315?
    • M
      murrayseanAug 17, 2025
      To address a wobbling HAMPTON BAY Fan, start by checking that all blade and blade arm screws are secure. Most wobble issues arise from unequal blade levels. To check this, select a point on the ceiling above the tip of one blade and measure the distance. Rotate the fan to measure each blade from the same ceiling point, ensuring any deviation is within 1/8 inch. Run the fan for ten minutes.

Summary

Safety Information

Warranty

Pre-Installation

Specifications

Provides detailed specifications for the ceiling fan, including size, speed, voltage, amperage, wattage, RPM, CFM, and weight.

Tools Required

Lists the necessary tools for installing the ceiling fan, such as screwdrivers, wrench, tape, and a step ladder.

Hardware Included

Details the hardware components included with the ceiling fan, listing parts like screws, pins, and wire nuts with quantities.

Package Contents

Lists all the parts included in the fan package, identified by letter and description, with their respective quantities.

Installation

Mounting Options

Explains how to safely mount the ceiling fan to the electrical box, including warnings and illustrations of different methods.

Standard Ceiling Mount Assembly

Provides step-by-step instructions for assembling the fan for a standard ceiling mount, including preparing, routing wires, and fan assembly.

Hanging the Fan

Details the process of attaching the fan to the electrical box and hanging it onto the mounting bracket, ensuring secure seating.

Setting Remote Control Codes

Guides users on setting the dip switch codes for the remote control and receiver to ensure proper communication and prevent interference.

Installing the Receiver

Instructions for positioning and connecting the remote control receiver to the fan and mounting bracket, with safety warnings.

Making Electrical Connections

Details how to connect the fan's wires to the receiver and the house supply wires, including wire nut usage and connection order.

Mounting the Fan Canopy

Explains how to attach the fan's canopy to the mounting bracket and secure it, ensuring proper alignment and stability.

Attaching Fan Blades

Instructions on how to attach the fan blades to the blade brackets and then attach these assemblies to the fan motor.

Attaching the Light Kit

Steps for connecting the light kit wires and attaching the light kit fitter assembly to the fan motor assembly.

Installing Light Bulbs and Glass

Details on installing the light bulbs and securing the glass bowl to the light kit fitter assembly, with caution on overtightening.

Operation

Care and Cleaning

Troubleshooting

Fan Will Not Start

Checks for power, wiring connections, remote battery, range, and dip switch settings when the fan fails to start.

Fan Is Noisy

Addresses noise issues by checking screws, wire nut connections, a break-in period, glassware, canopy clearance, and outlet box security.

Fan Wobbles

Diagnoses wobble by checking blade screws and ensuring blade levelness, with instructions to contact support if issues persist.

HAMPTON BAY 51315 Specifications

General IconGeneral
BrandHampton Bay
Model51315
TypeCeiling Fan
Number of Blades5
Control TypePull Chain
FinishBrushed Nickel
Fixture Color/FinishBrushed Nickel
Indoor/OutdoorIndoor
Number of Speeds3
Reversible MotorYes
Blade Span52 inches
Motor TypeAC Motor
Motor Speed (RPM)120
Product Weight (lb.)17.2 lb
Fan Blade Length (In.)20.5
Motor Speed120 RPM

Related product manuals