EasyManua.ls Logo

HAMPTON BAY GAZEBO III - User Manual

HAMPTON BAY GAZEBO III
21 pages
Print Icon
To Next Page IconTo Next Page
Loading...
GAZEBO III 52 IN. CEILING FAN
USE AND CARE GUIDE
THANK YOU
1-855-HD-HAMPTON
HAMPTONBAY.COM
Questions, problems, missing parts? Before returning to the store,
8 a.m. - 7 p.m., EST, Monday-Friday, 9 a.m. - 6 p.m., EST Saturday
call Hampton Bay Customer Service
Item #1005 091 139
Item #1005 090 182
Model #YG836A-BN
Model #YG836A-WH
Visual instruction of how to install this fan:
Visit www.homedepot.com and enter either the Item or Model number to nd
this fan and click the link of visual instruction in the product overview section.

Questions and Answers

  • C
    Christopher MartinJul 29, 2025
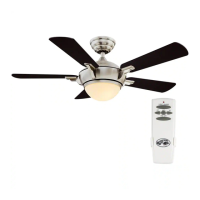
    What to do if my HAMPTON BAY GAZEBO III Fan will not start?
    • K
      krista29Jul 29, 2025
      If your HAMPTON BAY Fan isn't starting, begin by checking the main and branch circuit fuses or breakers. Also, verify the line wire connections to the fan and the switch wire connections within the switch housing.
  • S
    smithkimberlyAug 8, 2025
    How to fix a noisy HAMPTON BAY GAZEBO III Fan?
    • A
      andrewsthomasAug 8, 2025
      If your HAMPTON BAY Fan is making noise, ensure all motor housing screws are tightened. Also, check that the screws attaching the fan blade arm to the motor hub are secure. Verify wire nut connections aren't rattling against each other or the switch housing's interior. Allow the fan a 24-hour breaking-in period, as most new fan noises disappear during this time. If using a ceiling light kit, tighten the screws securing the glassware and ensure the light bulb is secure. Confirm there's a small gap between the ceiling and canopy, and that the ceiling box is secure with rubber isolator pads between the mounting bracket and outlet box.
  • S
    Samantha VaughanAug 19, 2025
    Why does my HAMPTON BAY GAZEBO III wobble?
    • L
      Lauren FuentesAug 19, 2025
      Most fan wobble issues are due to loose components. Start by checking that all blades and blade bracket screws are properly secured. After the fan is installed, let it run for about 10 minutes to allow it to self-adjust. If wobbling persists after this period, measure the distance from each blade to the ceiling; deviations should not exceed 1/8 inch. If deviations are minimal but the wobble continues, contact Customer Service at 1-855-HD-HAMPTON to request a free Blade Balancing Kit. If any deviation exceeds 1/8 inch, call Customer Service at 1-855-HD-HAMPTON to order replacement brackets.

Summary

Safety Information

Electrical Safety and Mounting

Ensures safe installation by covering electrical hazards and structural support requirements.

Operational Safety and Care

Guidelines for safe fan operation, cleaning, and maintenance to prevent injury or damage.

FCC Compliance and Modifications

Information regarding compliance with FCC rules and the impact of unauthorized modifications.

Warranty

Pre-Installation

Specifications

Technical details including fan size, voltage, amperage, wattage, RPM, CFM, and weight.

Tools Required

Lists the necessary tools for installing the ceiling fan.

Hardware Included

Lists and describes all hardware components provided with the fan.

Package Contents

Identifies all parts included in the fan package for assembly verification.

Dual Mounting Instructions

Explains the two mounting methods: standard and close-to-ceiling.

Installation

Mounting Options

Details how to mount the fan to the electrical box, including warnings and options.

Assembly - Standard Ceiling Mounting

Preparing the Canopy

Steps for preparing the canopy before attaching to the fan motor.

Preparing the Motor

Steps for preparing the fan motor assembly for mounting.

Assembling the Fan

Instructions on connecting the downrod, canopy, and motor.

Assembly - Close-to-Ceiling Mounting

Preparing the Canopy

Steps for preparing the canopy for close-to-ceiling mounting.

Preparing the Motor

Steps for preparing the fan motor assembly for close-to-ceiling mounting.

Assembling the Fan

Instructions for attaching the canopy to the motor for close-to-ceiling mounting.

Assembly - Hanging the Fan

Attaching Fan to Electrical Box

How to securely attach the fan's mounting bracket to the outlet box.

Hanging for Standard Mounting

Guides on correctly hanging the fan motor assembly for standard ceiling mount.

Hanging for Close-to-Ceiling Mounting

Guides on correctly hanging the fan motor assembly for close-to-ceiling mount.

Making Electrical Connections

Detailed steps for connecting fan wires to household wiring safely.

Single Switch Connections

Wiring diagram for controlling fan and light together via one switch.

Dual Switch Connections

Wiring diagram for controlling fan and light separately via two switches.

Standard Ceiling Mounting

Final steps for securing the canopy for standard ceiling installation.

Close-to-Ceiling Mounting

Final steps for securing the canopy for close-to-ceiling installation.

Assembly - Attaching the Fan Blades

Removing Rubber Packing Mounts

Instructions on removing protective mounts before blade attachment.

Attaching Blades to Arms

Steps for attaching fan blades to their respective arms.

Fastening Blades to Motor

How to attach the assembled blades and arms to the fan motor.

Assembly - Installing the Light Kit

Attaching Light Kit to Switch Housing

Steps for connecting the light kit wiring and mounting it.

Installing Bulbs and Glass Shade

Instructions for installing LED bulbs and securing the glass shade.

Installing Fan Without Light Kit

Steps to complete the fan assembly if the light kit is not installed.

Operation

Pull Chain Operation

Explains how to use the pull chains to control fan speed and light.

Reverse Switch Operation

Care and Cleaning

Care and Cleaning - Do

Recommended actions for fan maintenance, cleaning, and checking connections.

Care and Cleaning - Do Not

Actions to avoid during fan cleaning and maintenance to prevent damage.

Troubleshooting

Fan Will Not Start

Solutions for when the fan fails to power on or operate.

Fan Sounds Noisy

Troubleshooting steps for abnormal fan noises.

Fan Wobbles

Procedures to diagnose and correct fan wobbling issues.

Service Parts

HAMPTON BAY GAZEBO III Specifications

General IconGeneral
Fan Diameter (In.)52
Number of Blades5
Light TypeIntegrated LED
Bulb TypeLED
DimmableYes
Remote ControlYes

Related product manuals