EasyManua.ls Logo

HAMPTON BAY Principle - User Manual

HAMPTON BAY Principle
33 pages
Print Icon
To Next Page IconTo Next Page
Loading...
128 597
128 967
Principle
Principle
s/o

Questions and Answers

  • K
    Kevin BlakeAug 4, 2025
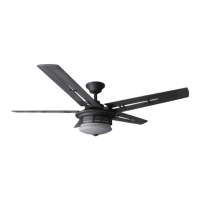
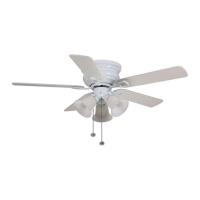
    What to do if my HAMPTON BAY Fan will not start?
    • R
      Ronald RussellAug 4, 2025
      If your HAMPTON BAY Fan isn't starting, try the following: * Check the main and branch circuit fuses or breakers. * Inspect the line wire connections to the fan and the switch wire connections in the switch housing. * Verify the battery in the transmitter. Ensure the LCD is active, the low battery light isn't on, you're within 10-20 feet of the fan, and the dip switch settings match on both the transmitter and receiver.
  • A
    Allen MartinezAug 19, 2025
    Why is my HAMPTON BAY Fan so noisy?
    • A
      Alexander WoodsAug 19, 2025
      A noisy HAMPTON BAY Fan can be caused by several factors. Here's what to check: 1. Ensure all motor housing screws are snug. 2. Verify the screws attaching the fan blade bracket to the motor hub are tight. 3. Confirm wire nut connections aren't rattling against each other or the switch housing's interior. 4. Allow a 24-hour "breaking in" period for new fans, as most noises disappear during this time. 5. If using a light kit, tighten the glassware screws and ensure the bulb is secure. 6. Make sure the canopy isn't touching the ceiling. 7. Confirm the outlet box is secure and rubber isolator pads were used between the mounting bracket and the outlet box.

Summary

READ AND SAVE THESE INSTRUCTIONS

Unpacking Your Fan

Tools Required

Mounting Options

Installing Your Fan

Hanging the Fan

Standard Ceiling Mounting

Steps for mounting the fan using the standard downrod and ball socket method.

Close-to-Ceiling Mounting

Instructions for mounting the fan closer to the ceiling, ideal for rooms with lower ceilings.

Installing Fan to the Outlet Box

Making the Electrical Connections

Finishing the Fan Installation

STANDARD CEILING MOUNTING

Final steps for securing the canopy and ring for standard ceiling mounting.

CLOSE-TO-CEILING MOUNTING

Final steps for securing the canopy and ring for close-to-ceiling mounting.

Attaching the Fan Blades

BLADE BALANCING

Installing the Light Kit and Glass Bowl

Operating Your Fan

Setting the Dip Switches in the Receiver

Transmitter Operation and Remote Control

Fan Auto and Temp Set (Up and Down)

Explains how the fan auto mode adjusts speed based on room temperature.

Wall Mount

Instructions for mounting the remote control holder on a wall.

Care of Your Fan

Troubleshooting

Specifications

Hampton Bay Lifetime Limited Warranty

Lifetime Warranty on Motor

Details the lifetime warranty coverage for the fan motor.

HAMPTON BAY Principle Specifications

General IconGeneral
Glass StyleFrosted
Light Bulb Type IncludedLED
Number of Blades5
Light Kit IncludedYes
Reversible MotorYes
Blade Span52
Mounting TypeDownrod
Blade MaterialWood
WarrantyLifetime

Related product manuals