7
Assembly
1
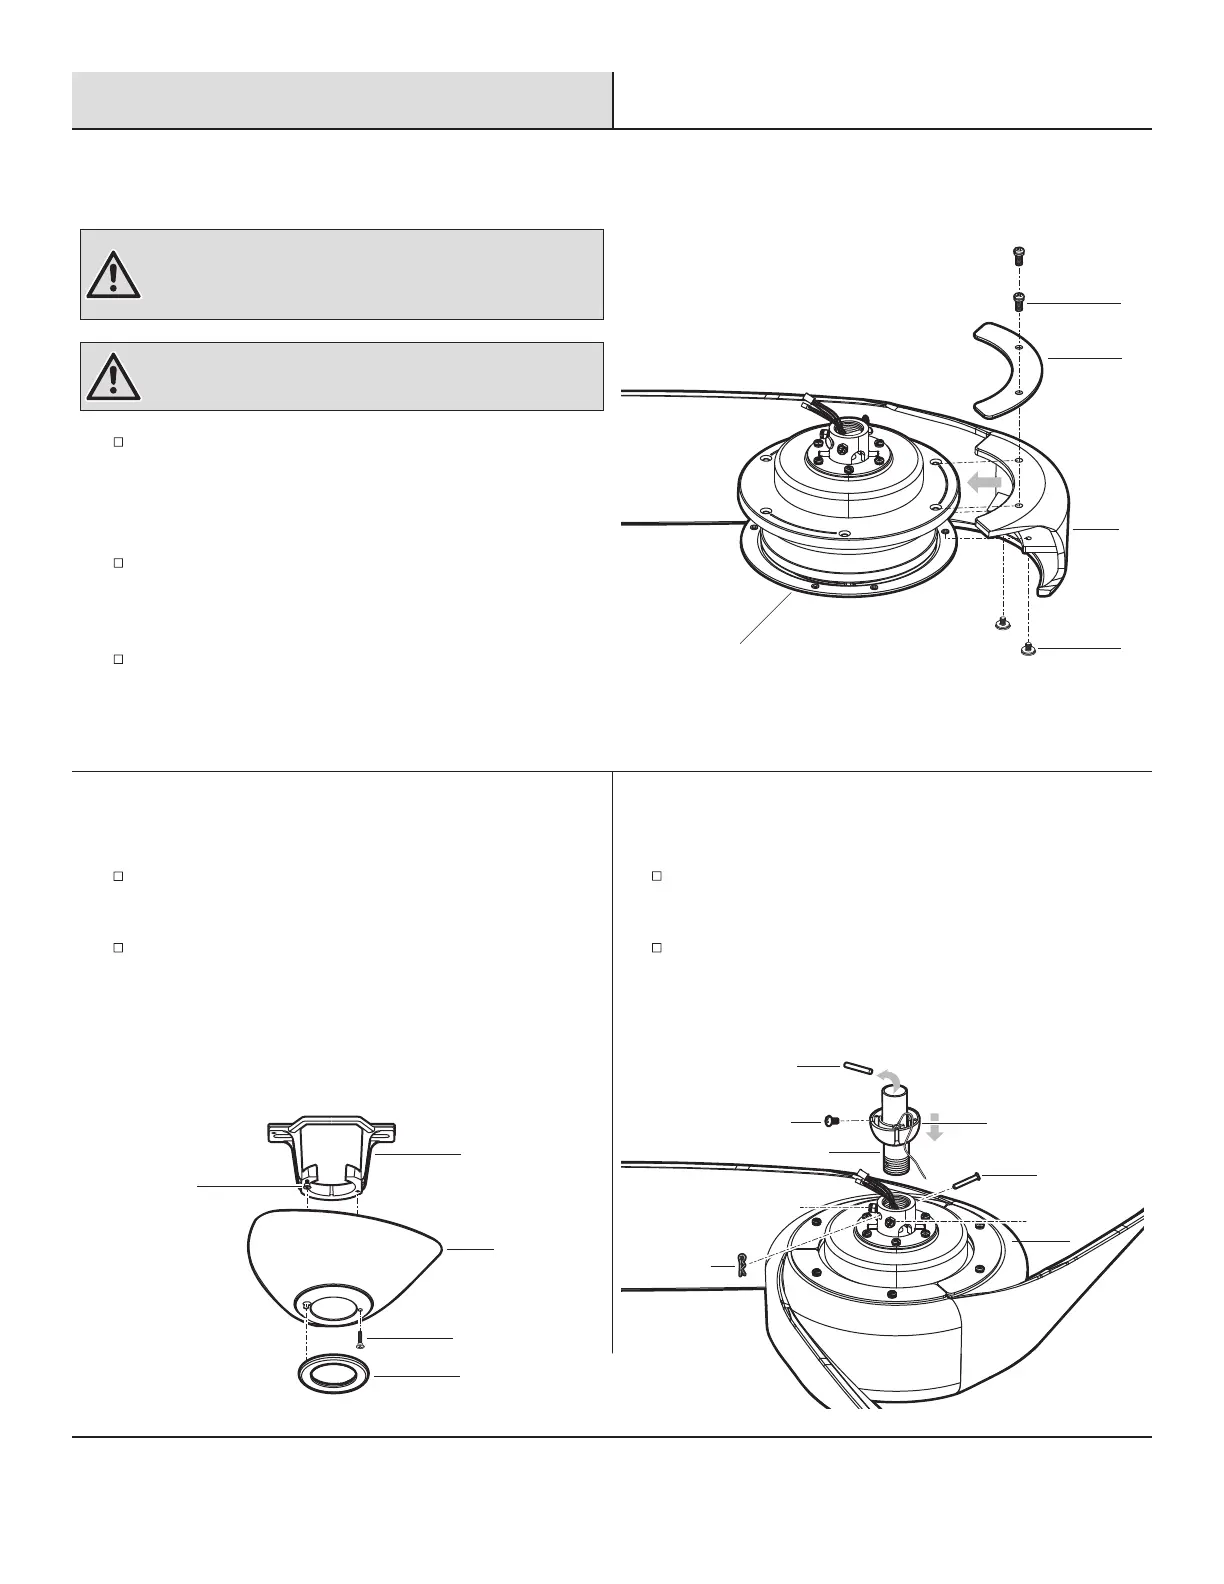
Attaching the fan blades
2
Preparing the canopy
Align the holes from the blade (G) to the holes from the top
housing and secure the blade in place with blade support
plate (F) and blade attachment screws with lock washers
(BB) provided.
Align the bottom holes from the blade (G) to the holes from
the bottom housing and secure the blade in place and blade
attachment screws with ber washers (CC) provided.
Repeat this procedure with the remaining blades (G).
Remove the canopy bottom cover (C) from the canopy (B) by
turning the canopy bottom cover (C) counterclockwise.
Remove the mounting bracket (A) from the canopy (B) by
removing the non-slotted canopy mounting screw (GG) from
the bottom of the canopy (B) and loosening the slotted canopy
mounting screw (GG) a half turn from the screw head. Next,
turn the canopy (B) counterclockwise to remove the mounting
bracket (A) from the canopy (B).
Remove the cotter pin (HH) and clevis pin (II), and loosen the
two collar set screws (JJ) from the motor collar.
Take out the set screw (KK) located in the hanger ball (LL),
lower the hanger ball (LL) and remove the cross pin (MM).
Remove the hanger ball (LL) from the hanger ball/downrod
assembly (D).
WARNING: To reduce the risk of personal injury, do not
bend the blades (G) while installing, balancing the blades (G),
or cleaning the fan.
WARNING: Do not insert foreign objects between rotating
fan blades (G).
Preparing the motor
3
GG
A
B
C
GG
HH
II
JJ
JJ
H
KK
D
MM
LL
BB
CC
F
G
H
HAMPTONBAY.COM
Please contact 1-855-HD-HAMPTON for further assistance.
 Loading...