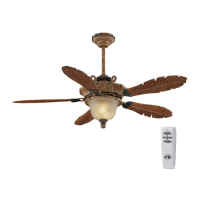
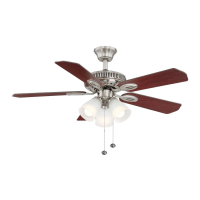
This document is an owner's manual for the Hampton Bay Thorton 52" Ceiling Fan, model number 867-670. It provides instructions for installation, operation, and maintenance, along with important safety rules and warranty information.
Function Description:
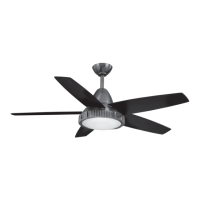
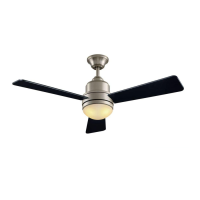
The Hampton Bay Thorton 52" Ceiling Fan is designed to provide comfort and energy savings throughout the year. It features a 52-inch blade span, making it suitable for various room sizes. The fan can be operated at three different speeds (Low, Medium, High) and includes a light kit. It also has a reverse switch, allowing for both warm weather (downward airflow for cooling) and cool weather (upward airflow to circulate warm air) operation. The fan is controlled by a remote transmitter, offering convenience in adjusting speed and light settings.
Important Technical Specifications:
- Model Number: 867-670
- Fan Size: 52 inches
- Voltage: 120 Volts (for all speeds: Low, Medium, High)
- Amps (Approximate): Xxx (Low), Xxx (Medium), Xxx (High) - Note: Specific amp values are not provided in the table, indicated as "Xxx".
- Watts (Approximate): Xx (Low), Xx (Medium), Xx (High) - Note: Specific watt values are not provided in the table, indicated as "Xx".
- RPM (Approximate): Xx (Low), Xx (Medium), Xx (High) - Note: Specific RPM values are not provided in the table, indicated as "Xx".
- CFM (Approximate): Xxxx (Low), Xxxx (Medium), Xxxx (High) - Note: Specific CFM values are not provided in the table, indicated as "Xxxx".
- Net Weight (N.W.): Xx kgs - Note: Specific value is not provided, indicated as "Xx".
- Gross Weight (G.W.): Xx kgs - Note: Specific value is not provided, indicated as "Xx".
- C.F.: 3.04' - Note: The meaning of "C.F." is not explicitly defined in the provided context.
- Light Kit: Includes a 22W fluorescent lamp. The light is NOT dimmable.
- Remote Control: Equipped with 16 code combinations to prevent interference. Requires a 12V MN21/A23 battery (not included).
- Mounting: Requires a UL Listed outlet box marked "FOR FAN SUPPORT" capable of supporting a minimum of 50 pounds. Minimum 7 feet clearance from the trailing edge of the blades to the floor.
- Ceiling Angle: Maximum 24 degrees for angled ceilings.
Usage Features:
- Remote Control Operation: The fan is operated via a remote transmitter with dedicated buttons for:
- HI, MED, LOW: To set the fan speed (High, Medium, Low).
- OFF: To turn the fan off.
- Light ON/OFF: To turn the light on or off.
- Reverse Switch: Located on top of the motor housing, it allows users to change the direction of airflow for seasonal comfort.
- Warm Weather (Forward): Downward airflow creates a cooling effect.
- Cool Weather (Reverse): Upward airflow moves warm air off the ceiling area.
- Note: The fan must be turned off and blades stopped before changing the reverse switch setting.
- Installation Options: The manual illustrates various ways to mount the outlet box, including direct attachment to building structure or using an installation hanger bar for existing fixtures without ceiling joists. A longer downrod may be needed for steep, sloped ceilings to maintain proper blade clearance.
- Blade Balancing Kit: Included to correct any noticeable fan wobble after installation.
Maintenance Features:
- Regular Checks: It is recommended to check support connections, brackets, and blade attachments twice a year to ensure they are secure due to the fan's natural movement.
- Cleaning: The fan should be cleaned periodically to maintain its appearance. Use a soft brush or lint-free cloth to avoid scratching the finish. Water or detergents should not be used for cleaning the fan or blades.
- Blade Care: A light coat of furniture polish can be applied to the wood blades for additional protection and enhanced beauty. Small scratches can be covered with a light application of shoe polish.
- Lubrication: The fan motor has permanently lubricated bearings, so there is no need to oil the fan.
- Battery Replacement: The 12V MN21/A23 battery in the transmitter should be removed if not used for long periods to prevent damage.
- Troubleshooting Guide: The manual includes a section to address common issues such as the fan not starting, noisy operation, or remote control malfunction, providing solutions like checking circuit fuses, wire connections, dip switch settings, and ensuring all screws are snug.
- Warranty: The fan motor is covered by a lifetime limited warranty against defects in workmanship and material. All other fan parts (excluding glass or plexiglass blades) are warranted for one year. The warranty does not cover damage from accident, misuse, improper installation, or changes in brass finish.