49
• Press <Confirm> to accept the calibration point and to continue with second standard.
• Clean out the calibration beaker and refill with 20.0 FNU standard.
• Immerse the sensor in the 20.0 FNU rinse beaker and then shake off excess solution. Place the
sensor into the 20.0 FNU calibration beaker. Observe the precautions noted above for bubbles.
• When the reading is stable the display shows the “Ready”
message.
• Press <Confirm> to accept the second calibration point
and to continue with third standard.
• Clean out the calibration beaker and refill with 200.0 FNU
standard.
• Immerse the sensor in the 200.0 FNU rinse beaker and then shake off excess solution. Place the
sensor into the 200.0 FNU calibration beaker. Observe the precautions noted above for bubbles.
• When the reading is stable the display shows the “Ready” message.
• Press <Confirm> to accept the third point and save the calibration.
• After confirmation, the following messages are displayed:
“Storing” and “Calibration completed”.
• Press <OK> to return to the “Calibration” menu.
• To return to the main menu, press ESC twice.
• Press <Measure> to return to the measurement screen.
• To restore the factory calibration data, select the corresponding option in the “Turbidity calibra‑
tion” menu and then press <Select>.
Note: The calibration procedure can be terminated after 1 or 2 points by pressing <ESC>. A
single point calibration is only recommended to update the offset of a previous 2 or 3 point
calibration. A 2 point calibration is only recommended when the expected turbidity readings
are below 40.0 FNU.
Procedure
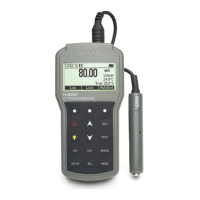
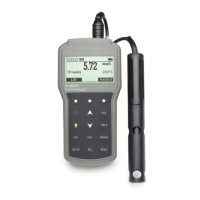
Select “Calibrate turbidity” from the menu.
The measured value is shown on the main part of the display,
while the standard value appears on the secondary level.
• The current turbidity value, the standard value and “Not
ready...” are displayed and a stability timer counts down.
• When the reading becomes stable, the display shows the “Ready” message.
TURBIDITY CALIBRATION
 Loading...