EasyManua.ls Logo

Hannlomax HX-128CR - User Manual

Hannlomax HX-128CR
2 pages
Print Icon
To Next Page IconTo Next Page
Loading...
ALARM CLOCK RADIO WITH USB CHARGING
Model : HX-128CR
Note: Please read and follow these instructions before using your unit.
WARNING
TO PREVENT ELECTRIC SHOCK; DO NOT USE THIS PLUG WITH AN EXTENSION CORD RECEPTACLE OR
OTHER OUTLET UNLESS THE BLADES CAN BE FULLY INSERTED TO PREVENT BLADES EXPLOSURE.
TO PREVENT FIRE OR SHOCK HAZARD; DO NOT EXPOSE THIS APPLIANCE TO RAIN OR MOISTURE.
CAUTION
RISK OF ELECTRIC SHOCK
DO NOT OPEN
The lighting flash with
arrowhead symbol, with an
equilateral triangle is intended to
alert the user to the presence of
un-insulated dangerous voltage
within the products enclosure
that may be of sufficient
magnitude to constitute a risk of
electric shock to persons.
CAUTION: TO REDUCE THE
RISK OF ELECTRIC SHOCK, DO
NOT REMOVE COVER (OR
BACK). NO USER
SERVICEABLE PARTS INSIDE
REFER SERVICING TO
QUALIFIED SERVICE
PERSONNEL.
The exclamation point within an
equilateral triangle is intended to
alert the user to the presence of
important operating and
maintenance (servicing)
instruction in the literature
accompanying the appliance.
1. Keep these instructions.
2. Heed all warnings.
3. Follow all instructions.
4. Do not use this apparatus near water.
5. Clean only with dry cloth.
6. Do not block any ventilation openings. Install in accordance with the manufacturer’s instructions.
7. Do not install near any heat sources such as radiators, heat registers, stoves, or other apparatus (including
amplifiers) that produce heat.
8. Protect the power cord from being walked on or pinched particularly at plugs, convenience receptacles, and the
point where they exit from the apparatus.
9. Only use attachments/accessories specified by the manufacturer.
10. Use only with the cart, stand, tripod, bracket, or table specified by the manufacturer, or sold with
the apparatus. When a cart is used, use caution when moving the cart/apparatus combination
to avoid injury from tip-over.
2) Unplug the apparatus during lightning storms or when unused for long periods of time.
3) Refer all servicing to qualified service personnel. Servicing is required when the apparatus has been damaged
in any way, such as power-supply cord or plug is damaged, liquid has been spilled or objects have fallen into the
apparatus, the apparatus has been exposed to rain or moisture, does not operate normally, or has been
dropped.
FCC NOTICE
This device compiles with Part 15 of the FCC Rules. Operation is subject to the following two conditions : (1) this
device may not cause harmful interference, and (2) this device must accept any interference received, including
interference that may cause undesired operation.
-1-
QUICK REFERENCE
1. SOURCE / AL. OFF
Use this button to turn on the unit.
Use this button to turn the ALARM off after Alarm activates.
2. SNOOZE /SLEEP/DIMMER
Use this button to temporarily suspend the ALARM for a short period.
Use this button to set the sleep time.
HOLD to select the LED display brightness
3. LIGHT
Use this button to select the brightness of NIGHT LIGHT
4. SKIP DOWN/ HOUR
Use this button to adjust the hour in CLOCK or ALARM time
Use this button to search the radio station in backward direction.
5. SKIP UP/ MIN
Use this button to adjust the minute in CLOCK or ALARM time
Use this button to search the radio station in forward direction.
6. CLK / MEM
Use this button to set the clock
Use this button to store radio stations in the memory.
Use this button to select the stored radio stations in the memory.
7. AL1 / VOLUME-
Use this button to set the alarm time in ALARM 1
Use this button to decrease the volume.
8. AL2 / VOLUME+
Use this button to set the alarm time in ALARM 2
Use this button to increase the volume.
9. PM INDICATOR ( FOR 12 HOURS SETIING VERSION ONLY)
10. ALARM 1 BUZZER INDICATOR(This indicator shows that the unit is in ALARM 1 buzzer mode.)
11. ALARM 1 RADIO INDICATOR(This indicator shows that the unit is in ALARM 1 radio mode.)
12. ALARM 2 BUZZER INDICATOR(This indicator shows that the unit is in ALARM 2 buzzer mode.)
13. ALARM 2 RADIO INDICATOR (This indicator shows that the unit is in ALARM 2 radio mode.)
14. LED DISPLAY
15. BATTERY COMPARTMENT (Compartment for the back-up battery.)
16. SPEAKER
17. DC Adaptor (DC cable also acts as FM antenna)
18. USB SLOT FOR 1A CHARGING (Connect a USB cable to charge your device.)
-2-
Question and Answer IconNeed help?

Do you have a question about the Hannlomax HX-128CR and is the answer not in the manual?

Summary

Safety Precautions

General Safety Guidelines

Essential safety guidelines for operating the clock radio to prevent hazards.

Electrical Shock and Fire Prevention

Instructions to prevent electric shock and fire hazards, including warnings about moisture and covers.

FCC Compliance Information

Quick Reference Guide

SOURCE; AL. OFF Button

Controls unit power and alarm activation/deactivation.

SNOOZE; SLEEP; DIMMER Button

Suspends alarm, sets sleep timer, or adjusts display brightness.

LIGHT Button

Adjusts the brightness of the night light.

SKIP DOWN; HOUR Button

Sets hour for clock/alarm and tunes radio backward.

SKIP UP; MIN Button

Sets minute for clock/alarm and tunes radio forward.

CLK; MEM Button

Sets clock and stores/recalls radio stations.

AL1; VOLUME- Button

Sets Alarm 1 time and decreases volume.

AL2; VOLUME+ Button

Sets Alarm 2 time and increases volume.

PM Indicator

Indicates PM time for 12-hour settings.

Alarm Indicators

Shows active alarm (buzzer or radio) mode.

LED Display

Shows time, alarm settings, and other information.

Battery Compartment

Compartment for backup battery.

Speaker

Outputs audio for radio and alarms.

DC Adaptor and USB Slot

Connects power; USB slot for charging devices.

Connecting and Powering

Power Connection

Instructions for connecting the AC power adapter to the wall outlet.

Battery Backup

Details on inserting backup batteries for power failure protection.

USB Charging

Instructions for using the USB port to charge external devices.

Display and Light Control

Dimmer Control

How to adjust the brightness of the LED display.

Night Light

How to turn on and adjust the brightness of the night light.

Setting the Clock

Setting the Alarms

Snooze Function

Turning Off the Alarm

Listening to FM Radio

Tuning Radio Stations

Instructions for auto and manual tuning of FM radio stations.

Radio Station Memory

Saving Radio Stations

How to store desired radio stations into memory.

Recalling Saved Stations

How to listen to previously stored radio stations.

Sleep to Music Function

Specifications

Overview

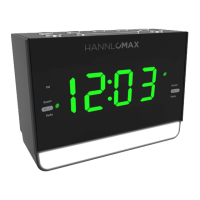
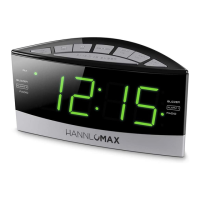
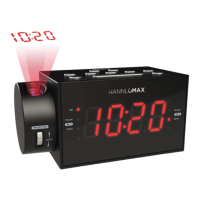
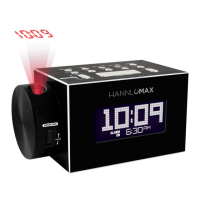
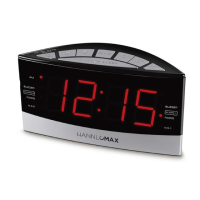
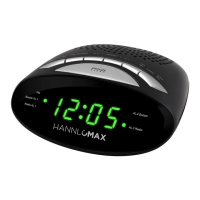
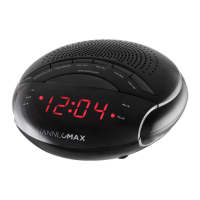
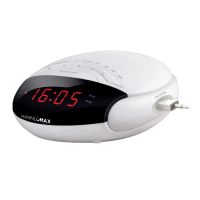
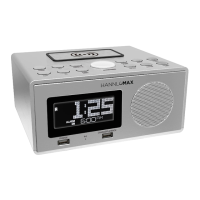
This document describes the HANNLOMAX ALARM CLOCK RADIO WITH USB CHARGING, model HX-128CR. It is a multi-functional device designed to provide timekeeping, alarm, radio, and charging capabilities.

Function Description

The device primarily functions as an alarm clock radio. It features an LED display that shows the current time and various indicators for its operational modes. It includes two independent alarms (ALARM 1 and ALARM 2) that can be set to either a buzzer sound or a selected FM radio station. A snooze function allows for temporary suspension of an active alarm.

Beyond timekeeping and alarms, the device incorporates an FM radio tuner, allowing users to listen to their favorite stations. It supports both auto and manual tuning, as well as the ability to store up to 20 FM radio stations in memory for quick access. A "Sleep to Music" function enables users to fall asleep to the radio, with a customizable timer that automatically turns off the radio after a set period.

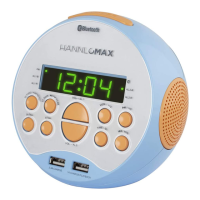
For convenience, the unit includes a USB slot for 1A charging, allowing users to charge their smartphones or tablets. It also features a "Night Light" with adjustable brightness and a "Dimmer Control" to adjust the brightness of the main LED display.

Usage Features

  • Powering On/Off: The "SOURCE / AL. OFF" button is used to turn the unit on and off. It also serves to turn off an active alarm.
  • Setting the Clock: To set the clock, ensure the unit is in CLOCK mode (display shows "OFF"). Press and hold the "CLK / MEM" button until the time flashes. Use the "HOUR" and "MIN" buttons to adjust the time, then press "CLK / MEM" again to confirm.
  • Setting Alarms: To set an alarm, press and hold either the "AL1" or "AL2" button until the alarm time flashes. Adjust the hour and minute using the "HOUR" and "MIN" buttons. Press "AL1" or "AL2" again to confirm the alarm time. Repeatedly pressing "AL1" or "AL2" will cycle through the alarm sound modes: buzzer or the currently set radio station. Indicators on the display will light up to show the selected alarm mode.
  • Snooze Function: When an alarm activates, pressing the "SNOOZE / SLEEP / DIMMER" button will temporarily suspend the alarm for 9 minutes. This can be repeated for up to approximately one hour.
  • Sleep to Music: In radio mode, press the "SNOOZE / SLEEP / DIMMER" button repeatedly to set a sleep timer (from 90 minutes down to 10 minutes, or OFF). The radio will automatically turn off after the selected time.
  • Radio Operation:
    • To select FM radio, press "SOURCE / AL. OFF".
    • Auto Tuning: Press and hold "SKIP DN/SKIP UP" for about 1 second to search for the next strong radio station.
    • Manual Tuning: Press "SKIP DN/SKIP UP" step-by-step to tune to desired stations.
    • Storing Radio Stations: Tune to the desired station, then press and hold "CLK / MEM". The display will show "PXX". Use "SKIP DN/SKIP UP" to select the memory station number, then press "CLK / MEM" to confirm.
    • Listening to Stored Stations: In FM radio mode, press "CLK / MEM" to cycle through stored stations.
    • To turn off the radio, press "SOURCE / AL. OFF".
  • Display Brightness: Press and hold the "SNOOZE / SLEEP / DIMMER" button to adjust the brightness of the LED display.
  • Night Light: Press the "LIGHT" button repeatedly to select the desired brightness of the night light.
  • USB Charging: Connect a USB cable from your device to the USB slot on the clock to charge your device.
  • Battery Backup: The unit uses two UM-4 (AAA size) batteries for backup. In case of power failure, these batteries preserve the current time, alarm settings, and stored radio stations. Ensure correct polarity when inserting batteries.

Maintenance Features

  • Cleaning: The device should only be cleaned with a dry cloth.
  • Ventilation: Do not block any ventilation openings. Install the unit according to the manufacturer's instructions.
  • Heat Sources: Avoid installing the unit near heat sources such as radiators, heat registers, stoves, or other heat-producing apparatus (including amplifiers).
  • Power Cord Protection: Protect the power cord from being walked on or pinched, especially at plugs, convenience receptacles, and where it exits the apparatus.
  • Attachments/Accessories: Only use attachments/accessories specified by the manufacturer.
  • Stability: If using with a cart, stand, tripod, bracket, or table, ensure it is specified by the manufacturer. Exercise caution when moving the cart/apparatus combination to prevent tip-over.
  • Lightning Storms/Extended Unuse: Unplug the apparatus during lightning storms or when it will be unused for long periods.
  • Servicing: Refer all servicing to qualified service personnel. Servicing is required if the apparatus has been damaged (e.g., damaged power cord/plug, liquid spilled, objects fallen into, exposed to rain/moisture, or if it does not operate normally or has been dropped). Do not attempt to remove the cover or back, as there are no user-serviceable parts inside.

The DC adaptor cable also functions as the FM antenna; fully extend it and try different positions for better FM reception.

Hannlomax HX-128CR Specifications

General IconGeneral
Display TypeLED
Snooze FunctionYes
Sleep TimerYes
Tuner TypeAM/FM
Power SourceAC

Related product manuals