EasyManua.ls Logo

Harbor Breeze 42299 - User Manual

Harbor Breeze 42299
17 pages
Print Icon
To Next Page IconTo Next Page
Loading...
1
ATTACH YOUR RECEIPT HERE
Purchase Date _________________________
RR20389
ITEM #3025022
MAC CEILING FAN
MODEL #42299
Español p. 18
Questions, problems, missing parts? Before returning to your retailer, call our customer
service department at 1-888-251-1003, 8 a.m. - 8 p.m., EST, Monday - Sunday. You could also
contact us at partsplus@lowes.com or visit www.lowespartsplus.com.
HARBOR BREEZE and logo design are trademarks or
registered trademarks of LF, LLC. All rights reserved.

Questions and Answers

Summary

Package Contents

Package Contents Details

Lists all included parts with their corresponding labels and quantities for assembly verification.

Hardware Contents

Hardware Components Identification

Details all hardware items included, their labels, and quantities, often shown to actual size.

Safety Information

General Safety Warnings

Provides critical warnings and instructions to prevent injury, electric shock, and fire during installation and use.

Electrical Safety and Compliance

Covers grounding, FCC compliance, and potential interference issues, plus preparation steps.

Preparation

Preparation and Required Tools

Ensures all parts are present and lists required and helpful tools for a smooth assembly process.

Initial Installation

Initial Setup: Power and Clearance

Instructions to turn off power and ensure adequate clearance for safe fan operation.

Mounting Bracket Attachment

Steps for preparing and securing the mounting bracket to the electrical outlet box.

Wiring

Wiring Connections

Guides users through connecting the fan wires to the house supply wires using provided connectors.

Final Installation

Final Assembly: Canopy and Blades

Instructions for attaching the canopy, blades, and blade arms to the fan motor assembly.

Final Assembly: Light Kit and Bowl

Steps for connecting the light kit, setting LED color, and securing the glass bowl.

Final Steps: Remote and Power Up

Instructions for installing the remote battery, wall bracket, and finally turning on power.

Operating Instructions

Operating the Fan with Remote

Explains how to use the remote for fan speed, light control, and delay off mode.

Adjusting Fan Airflow Direction

Details how to adjust the reverse switch for summer (downward) or winter (upward) airflow.

Care and Maintenance

Maintenance and Battery Replacement

Provides guidelines for cleaning the fan and replacing the remote control battery.

Troubleshooting

Troubleshooting: Fan Movement and Wobbling

Solutions for problems like the fan not moving or experiencing excessive wobbling.

Troubleshooting: Lights and Noise

Addresses issues with lights not working and common causes of fan noise.

Troubleshooting: Remote Control

Steps to resolve issues where the remote control is not functioning correctly.

Limited Lifetime Warranty

Warranty Details and Exclusions

Outlines the terms, coverage, exclusions, and duration of the product's warranty.

Replacement Parts List

Replacement Parts Identification

Lists all available replacement parts with their part numbers for ordering.

Overview

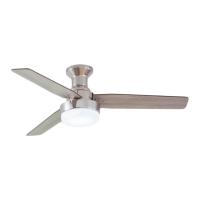
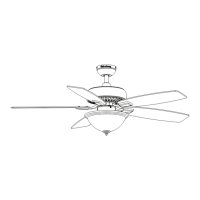
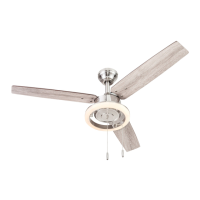
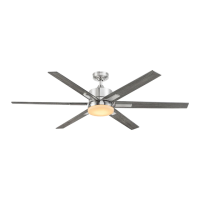
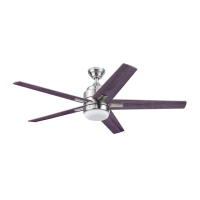
The Harbor Breeze MAC CEILING FAN, Model #42299 (Item #3025022), is a flushmount ceiling fan designed to provide both air circulation and illumination for indoor spaces. This fan is intended for permanent installation and comes with a remote control for convenient operation.

Function Description:

The primary function of the MAC CEILING FAN is to circulate air, offering a cooling effect in warmer weather and helping to distribute warm air in cooler weather. It features three blades that rotate to create airflow. The fan also incorporates an integrated LED light kit, providing ambient lighting. The LED light offers five color temperature settings, ranging from 2700K (soft white) to 6500K (cool white), with a factory default of 2700K. The fan's operation, including speed control and light functions, is managed via a handheld remote control. This remote allows users to select from three fan speeds (high, medium, low), turn the fan on or off, and control the light (on/off and dimming). A unique "Light Delay Off" mode allows the light to remain on for one minute after the button is pressed, providing a convenient exit light. The fan also includes a reverse switch, enabling users to change the direction of blade rotation to optimize airflow for different seasons. In warmer weather, the blades can be set to rotate counter-clockwise for a downward airflow, creating a wind chill effect. In cooler weather, the blades can be set to rotate clockwise for an upward airflow, helping to move hot air off the ceiling area.

Usage Features:

The MAC CEILING FAN is designed for flushmount installation, meaning it mounts directly to the ceiling without a downrod. This makes it suitable for rooms with lower ceilings where a standard or angle mount fan might not be appropriate. The installation process involves securing a mounting bracket to an existing outlet box, connecting electrical wires, attaching the motor assembly and blades, and finally installing the light kit and glass bowl.

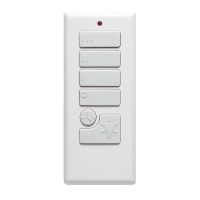
The remote control is a central feature for ease of use. It includes distinct buttons for high, medium, and low fan speeds, as well as a dedicated "Fan Power" button to turn the fan off. The "Light Control" button allows users to toggle the light on/off and to dim or brighten it by pressing and holding the button. The remote also has a D/CFL switch, which should remain in the "D" position as set at the factory. The remote requires an A23, 12-volt battery, which is included in the remote pack. For optimal performance, the remote needs to be synced with the fan's receiver after installation or if its memory is cleared due to a power surge. A wall bracket is provided for storing the remote when not in use.

The fan's reverse switch is a crucial feature for year-round comfort. Users can easily change the direction of the blades by pushing the switch left for warmer weather (downward airflow, indicated by a sun icon on the remote) or right for cooler weather (upward airflow, indicated by a snowflake icon). It is important to ensure the fan has completely stopped before changing the reverse switch setting, and the switch must be fully engaged in either the left or right position for the fan to operate correctly. If the switch is in a middle position, the fan will not function.

Safety is emphasized throughout the manual, with warnings about disconnecting power before installation, ensuring the outlet box is securely attached and capable of supporting the fan's weight (at least 35 lbs.), and using appropriate wire connectors. The fan requires a minimum clearance of 7 feet from the blades to the floor and 30 inches from the end of the blades to any obstruction. The use of a full-range dimmer switch to control fan speed is explicitly warned against, as it can cause a loud humming noise and poses a risk of fire or electric shock.

Maintenance Features:

Maintaining the MAC CEILING FAN is straightforward and primarily involves routine checks and cleaning to ensure longevity and optimal performance. Users are advised to tighten all screws on the fan at least twice a year. This helps to prevent wobbling and ensures all components remain secure. Cleaning the fan is recommended using only a soft brush or a lint-free cloth. This applies to both the motor housing and the blades. It is important to avoid abrasive materials or harsh chemicals that could scratch the finish. Crucially, water or a damp cloth should not be used to clean the ceiling fan, and the main power supply should always be shut off before beginning any maintenance tasks. The LED light kit is designed to be maintenance-free in terms of bulb replacement, as the total fixture wattage is 16 watts, and users are instructed not to attempt to replace the LED. Battery replacement for the remote control is a simple task, requiring an A23, 12-volt battery. Exhausted batteries should be removed promptly, and non-rechargeable batteries should not be recharged. Proper disposal of batteries is also advised, as they can explode or leak if disposed of in fire. In case of operational issues, a troubleshooting guide is provided to help diagnose and resolve common problems such as the fan not moving, excessive wobbling, lights not working, or the remote control not functioning. Solutions range from checking power connections and tightening screws to re-syncing the remote control with the receiver. The fan comes with a limited lifetime warranty, covering defects in workmanship and materials for the fan motor assembly for a lifetime from the date of purchase. Other fan parts, excluding glass or plastic blades, are warranted for one year. This warranty underscores the manufacturer's commitment to quality and provides assurance for the product's durability. However, the warranty does not cover damages due to accident, misuse, improper installation, or the use of unauthorized parts. It also notes that a small amount of "wobble" is normal and not considered a defect.

Harbor Breeze 42299 Specifications

General IconGeneral
TypeCeiling fan
Blade Span52 inches
Number of Blades5
Control TypePull chain
FinishBrushed Nickel
Remote Control IncludedNo
Reversible MotorYes
BrandHarbor Breeze
Model42299
Motor Speed3 speed

Related product manuals