EasyManua.ls Logo

Harbor Breeze LP8072LAZ User Manual

Harbor Breeze LP8072LAZ
42 pages
To Next Page IconTo Next Page
Page #1 background imageLoading...
Page #1 background image
Questions, problems, missing parts? Before returning to your retailer, call our customer
service department at 1-800-643-0067, 8 a.m. - 6 p.m., EST, Monday - Thursday and
8 a.m. - 5 p.m., EST, Friday.
Español p. 22
ITEM #0068717
MODEL #LP8072LAZ
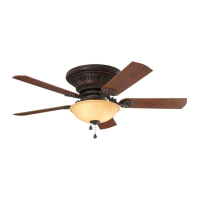
FREEPORT CEILING FAN
Harbor Breeze® is a registered trademark
of LF, LLC. All Rights Reserved.
ATTACH YOUR RECEIPT HERE
Serial Number
Purchase Date

Questions and Answers:

Harbor Breeze LP8072LAZ Specifications

General IconGeneral
BrandHarbor Breeze
ModelLP8072LAZ
TypeCeiling Fan
Blade Span52 inches
Number of Blades5
Light KitYes
Control TypeRemote Control
FinishOil-Rubbed Bronze
Blade ColorDark Walnut
Reversible MotorYes
Indoor/Outdoor UseIndoor
MotorAC
Mounting TypeDownrod

Summary

Product Specifications

Safety Information

Package Contents

Hardware Contents

Preparation

Assembly Instructions

Step 1: Hanger Ball Removal

Remove the hanger ball from the downrod, retaining the pin for later use.

Step 2: Wire Routing Through Downrod

Route the motor wires through the downrod and hanger ball assembly.

Step 3: Attaching Downrod to Motor

Thread and secure the downrod to the motor assembly using the clevis pin.

Assembly Instructions (Continued)

Step 4: Wire Routing to Canopy

Route the fan wires through the motor coupling cover, canopy screw cover, and ceiling canopy.

Step 5: Reinstalling Hanger Ball

Reinstall the hanger ball onto the downrod, ensuring proper alignment and secure set screw.

Step 6: Wire Preparation

Trim excess wire and strip insulation from the lead wires at the top of the downrod.

Hanging Instructions

Step 1: Secure Hanger Bracket

Attach the hanger bracket firmly to the ceiling outlet box using provided screws.

Step 2: Seat Fan on Hanger Bracket

Carefully lift and seat the fan's hanger ball assembly onto the hanger bracket.

Wiring Instructions

Step 1: Connect Grounding and Motor Wires

Connect grounding leads and fan motor wires to supply wires using wire connectors.

Step 2: Route Wires into Outlet Box

Carefully push all connected wires into the outlet box, separating them as instructed.

Canopy Housing Installation

Step 1: Attach Canopy to Hanger Bracket

Assemble the ceiling canopy onto the hanger bracket by aligning key slots and tightening screws.

Step 2: Secure Canopy Screw Cover

Attach the canopy screw cover to conceal the canopy screws using the twistlock feature.

Blade Installation

Step 1: Remove Motor Stops

Remove the screws holding the motor stops from the motor assembly.

Blade Installation (Continued)

Step 2: Attach Blades to Holder Arms

Position blades onto holder arms and secure with screws and fiber washers.

Step 3: Attach Blade Holder Arms to Motor

Attach the blade holder arms to the motor hub using the provided screws.

Light Kit Fitter Assembly Installation

Step 1: Attach Light Kit Fitter Assembly

Assemble the light kit fitter assembly onto the motor support bracket using key slots.

Light Kit Fitter Assembly Installation (Continued)

Step 2: Connect Wire Harness

Connect the 9-pin connector from the motor to the light kit's wire harness socket.

Step 3: Connect Light Connectors

Connect the single-pin down light connectors to the socket plate assembly.

Step 4: Attach Socket Plate Assembly

Assemble the socket plate assembly to the light kit fitter using key slots and screws.

Light Kit Fitter Assembly Installation (Continued)

Step 5: Install Bulb

Install the bulb into the socket, taking care not to touch it with bare hands.

Step 6: Attach Glass

Securely attach the glass shade by twisting it clockwise onto the socket plate assembly.

Pull Chain Operating Instructions

Step 1: Restore Power

Turn on electrical power at the main fuse box to enable fan operation.

Pull Chain Operating Instructions (Continued)

Step 2: Install Couplers

Install the fan chain coupler and the light kit chain coupler onto their respective chains.

Step 3: Test Fan Chain Operation

Check the fan's speed settings by operating the fan chain coupler.

Step 4: Adjust Airflow Direction

Reverse the fan's rotation direction using the switch for summer or winter airflow.

Pull Chain Operating Instructions (Continued)

Step 5: Test Light Chain Operation

Check the light's on/off function by operating the light kit chain coupler.

Blade Balancing Installation Instructions

Step 1: Interchange Blade Positions

Swap adjacent blade positions to redistribute weight and improve balance.

Step 2: Test Balancing Clip Location

Use the clip from the balance kit to find the optimal position on a blade to reduce wobble.

Step 3: Apply Weighted Square

Secure a weighted square from the balance kit to the blade at the determined clip location.

Care and Maintenance

Troubleshooting

Warranty

Replacement Parts List

Related product manuals