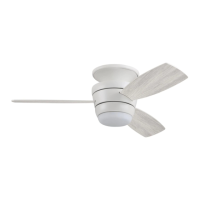
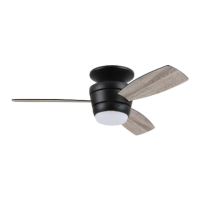
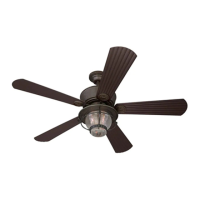
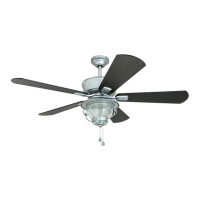
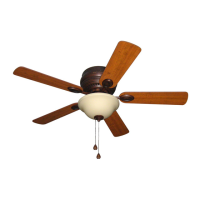
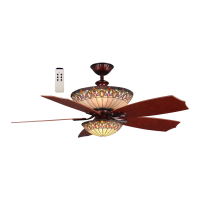
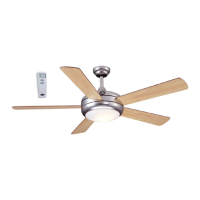
This document describes the installation, operation, and maintenance of the Harbor Breeze Mazon Ceiling Fan, available in models #MZ44BNK3LR, MZ44ORB3LR, and MZ44WW3LR. The fan is designed for residential use and includes a light kit and remote control.
Function Description
The Harbor Breeze Mazon Ceiling Fan is designed to provide air circulation and illumination in a room. It operates with multiple fan speeds (High, Medium, Low) and includes a light kit that can be turned on/off and dimmed. The fan features a reversible motor, allowing for seasonal optimization of airflow. In warmer weather, the fan can be set to create a downward airflow for a wind chill effect, while in cooler weather, it can be set to create an upward airflow to help move stagnant, hot air off the ceiling. The fan is controlled by a remote control transmitter, which allows users to adjust fan speed, turn the fan off, and control the light functions (on/off, dimming).
Usage Features
The fan is designed for flushmount installation on a regular (no-slope) ceiling. It requires a minimum clearance of 7 ft. from the blades to the floor and at least 30 in. from the end of the blades to any obstruction.
Remote Control Operation:
The fan's primary control is through a remote control transmitter.
- Pairing: After restoring electrical power, the remote control needs to be paired with the fan. This involves pressing and holding the "0" button on the remote for 5 seconds until the fan light blinks twice.
- Fan Speed: The remote has dedicated buttons for different fan speeds:
- "3" button for HIGH speed
- "2" button for MEDIUM speed
- "1" button for LOW speed
- "0" button to turn the fan OFF
- Light Control: The "Ω" button controls the light:
- A quick tap turns the lights ON or OFF.
- Holding the button down increases or decreases the light intensity (dimming function). The light varies cyclically over 8 seconds. The light button has an auto-resume function, meaning it will return to the last brightness setting when turned on.
- Battery: The remote control uses a battery, which should be installed with the positive (+) end toward the top of the transmitter. It's important to remove the battery if the remote is not used for long periods to prevent damage. The battery is not rechargeable and should be disposed of properly.
The fan includes a reverse switch located on the fitter plate (D) to optimize airflow for different seasons.
- Warmer Weather (LEFT position): Creates a downward airflow, producing a wind chill effect.
- Cooler Weather (RIGHT position): Creates an upward airflow, helping to move stagnant, hot air off the ceiling area.
- Important Note: The reverse switch must be set completely to either the LEFT or RIGHT position for the fan to function. If it's in the middle position, the fan will not operate. Users should turn the fan off at the wall switch and allow blades to come to a complete stop before manually activating the reverse switch.
Installation Process Overview:
The installation involves several steps, emphasizing safety and proper electrical connections.
- Power Disconnection: Always turn off circuit breakers and wall switches to the fan supply line leads before starting installation to prevent serious injury or death.
- Mounting Plate Installation: Secure the mounting plate to an approved METAL octagonal outlet box that can support at least 35 lbs. The outlet box must be securely attached directly to the building structure.
- Motor Stabilization Pieces: Remove and discard the three preassembled motor stabilization pieces from the motor assembly.
- Wiring: Connect the fan's wires (BLACK, WHITE, GROUND/GREEN) to the corresponding house wires (BLACK, WHITE, BARE/GREEN) using the provided wire connectors. Ensure all connections are secure and no bare wire strands are visible. The fan's black wire is for hot power, white is common for fan and light, and green/bare is ground.
- Motor Assembly Attachment: Hang the motor assembly on the j-hook of the mounting plate for temporary support during wiring. After wiring, secure the motor assembly to the mounting plate using the provided screws and lock washers.
- Canopy Ring Installation: Align the tabs on the canopy ring with the grooves on the motor assembly and raise the canopy until it snaps into place, fitting flush with the ceiling.
- Blade Attachment: Attach the blades to the motor assembly using blade screws and fiber blade washers. Avoid using power tools for this step to prevent overtightening and potential damage to the blades.
- Fitter Plate and Light Kit Installation: Connect the male plug from the motor assembly to the female plug from the fitter plate, matching colors. Secure the fitter plate to the motor assembly. Connect the WHITE wire from the LED light kit to the WHITE wire from the fitter plate, and the BLUE wire from the LED light kit to the BLUE wire from the fitter plate.
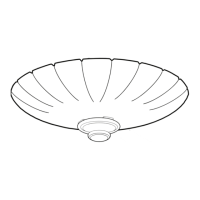
- Shade Installation: Align the slots on the shade with the protrusions on the inside of the fitter plate and turn clockwise until it is secured. Gently pull down on the shade to confirm it is fully secured.
- Remote Control Bracket (Optional): If desired, install the remote control bracket to a suitable location using screws from the remote pack. The remote control transmitter rests inside this bracket.
Maintenance Features
Regular maintenance helps ensure the longevity and optimal performance of the fan.
- Screw Checks: At least twice a year, check and tighten all mounting plate screws and other screws on the fan to ensure they are secure.
- Cleaning:
- Clean the motor assembly with only a soft brush or lint-free cloth to avoid scratching the finish.
- Clean the blades with a lint-free cloth.
- Power Disconnection: Always shut off the main power supply before beginning any maintenance to prevent electrical shock.
- Cleaning Agents: Do not use water or a damp cloth to clean the ceiling fan.
- Light Kit: The light kit has a total wattage of 18 watts. Do not attempt to replace the LEDs, as the light source is designed for this specific application and should not be serviced by untrained personnel. If servicing is required, contact customer service.
Troubleshooting:
The manual provides a troubleshooting guide for common issues such as the fan not moving, noisy operation, excessive wobbling, and light failure, along with possible causes and corrective actions. For example, if the fan does not move, possible causes include the reverse switch not engaged, power being off, faulty wire connections, incorrect wiring in the light kit fitter, or an unsuccessful learning code process for the remote. Corrective actions range from pushing the reverse switch firmly to checking power, inspecting wire connections, and repeating the remote pairing process.
Warranty:
The fan comes with a Limited Lifetime Warranty, covering defects in workmanship and materials from the date of purchase for the original purchaser. The distributor will correct defects or replace the fan at no charge. The warranty does not cover damage from accident, misuse, improper installation, or use of non-provided parts. It also does not cover changes in brass finish, rusting, pitting, tarnishing, corroding, or peeling due to climatic conditions, nor does it cover any glass components. Replacement of defective parts within the first year should be reported to customer service.