L -
~,
I'.,
..
- •
·1
:
~
<
\
~ - --
. '
\
Figure 14
MAINTENANCE
This precision surface grinder
is
equipped
with
an
automatic .
"Flo-clean"
oil
system.
Unlike
other
grinders, this completely separate system circulates,
filters and recirculates the cleaning/lubricating oil.
All
moving mechanical and wear surfaces are auto-
matically and continuously flushed
with
filtered
oil
whenever the spindle
is
running.
CLEANING
This machine requires
only
surface cleaning.
All
internal parts
are
cleaned automatically
by
the
built-in
flow
system mentioned above. When clean-
ing the external surface:
1.
Center table
to
prevent
dirt
and
grit
from
being
brushed
onto
ways.
2. Never
use
an
air
blast
to
clean machine.
Use
a
vacuum
and/or
treated dusting cloth. Remove
dirt--don't
just
move
it.
3. Make certain
that
exhaust
from
vacuum
or
dust
collector
is
not
directed toward grinder and part-
icularly
not
at
underside
of
table.
4.
If
solvents must
be
used
to
clean surface,
use
caution
not
to
drip
on ways. Do
not
use
a lacquer
base
or
other solvent which may damage machine's
baked enamel finish.
8
7
Figure 15
NOTE:
We
recommend centering
the
table when
machine
is
not
in
use
to
provide a dust cover
for
table ways.
LUBRICATION
Since moving mechanical parts
of
this
machine
are
automatically lubricated, and the
motor
and drive
are
permanently lubricated and sealed, the
only
lubrication maintenance required are
the
following
periodic checks:
EVERY
100 HOURS OF OPERATION:
Check the large
oil
cup in rear
of
machine.
If
less
than half
full,
add enough Harig Way
Oil
(No. 612-245, furnished
with
machine)
to
bring
level slightly over half
full.
(Fig. 4, page 3) A
standard 150
to
225
SUS
viscosity way
oil
may
be
used
in
place
of
Harig's 612-245,
but
it
will
have
10%
less
"stick
-
slip"
efficiency.
EVERY
1000 HOURS OF
OPERATION:
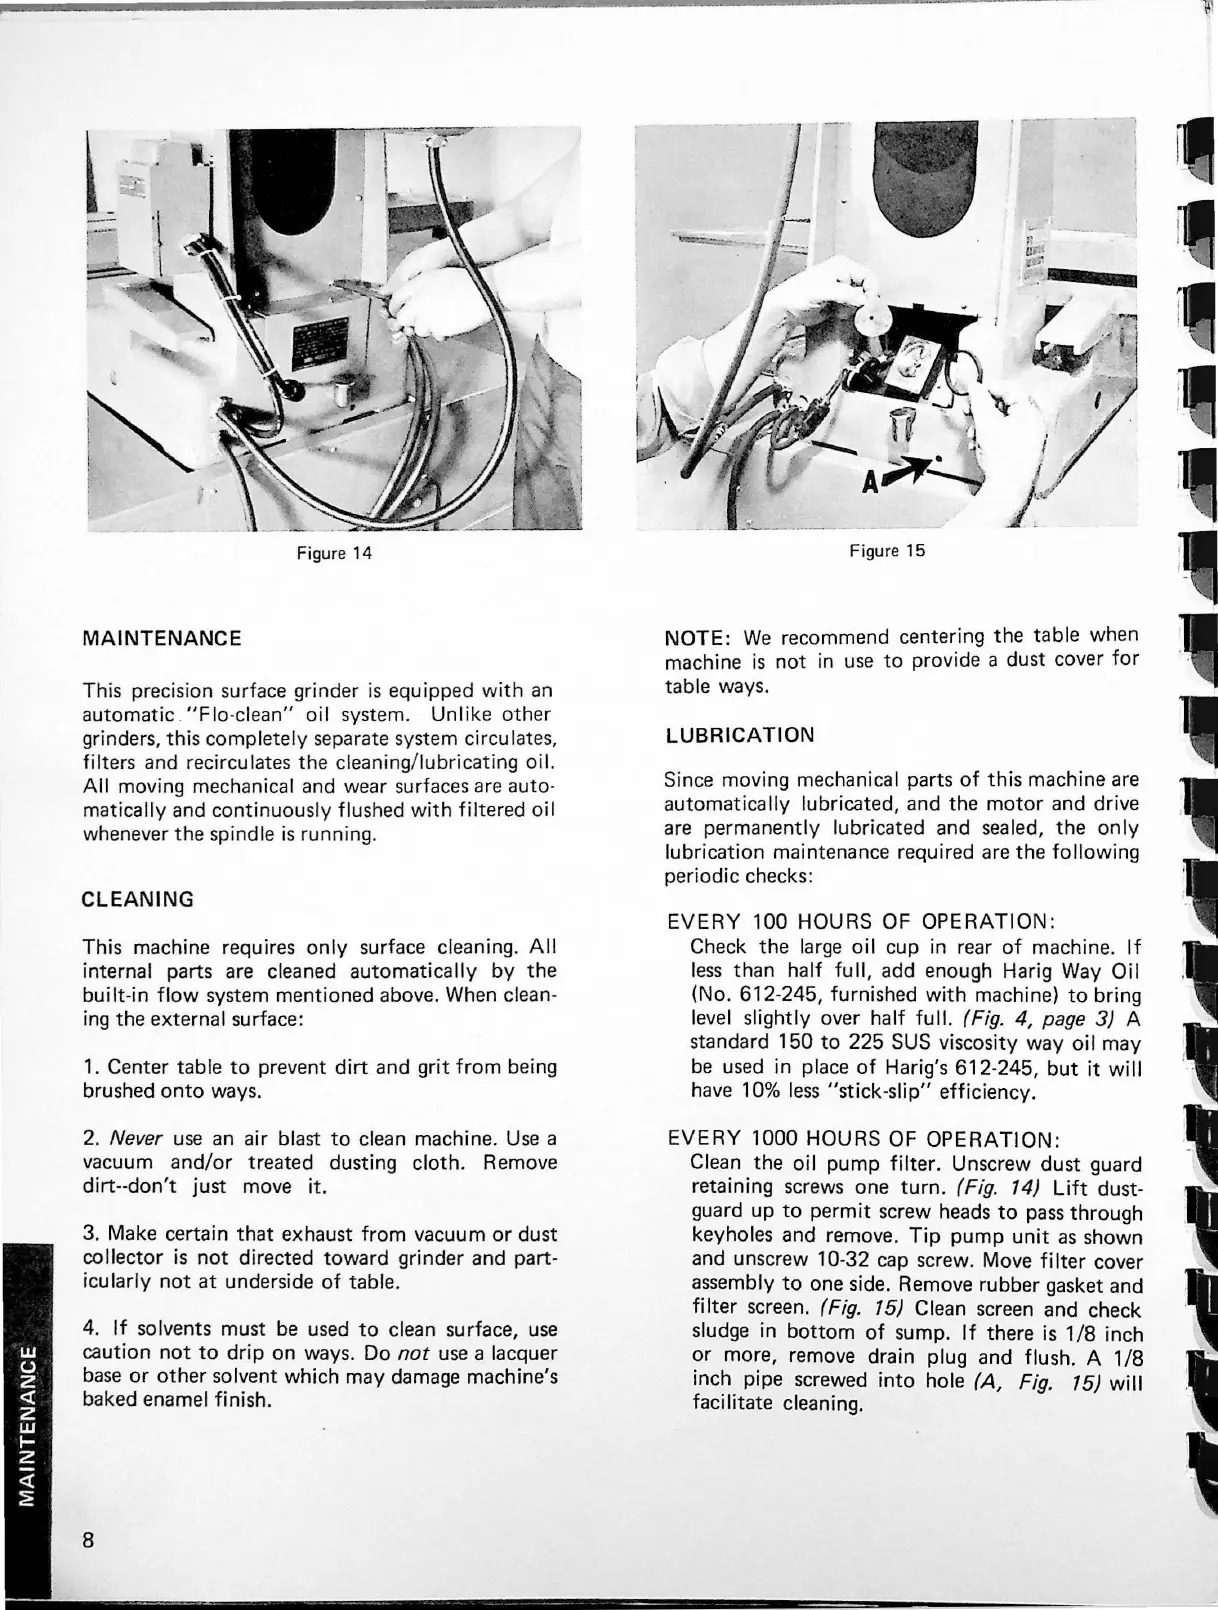
Clean the
oil
pump
filter.
Unscrew dust guard
retaining screws one
turn.
(Fig. 14)
Lift
dust-
guard up
to
permit
screw heads
to
pass
through
keyholes and remove.
Tip
pump
unit
as
shown
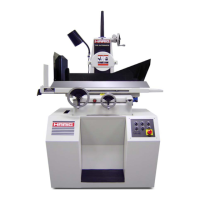
and unscrew 10-32 cap screw. Move
filter
cover
assembly
to
one side. Remove rubber gasket and
filter
screen. (Fig. 15) Clean screen and check
sludge
in
bottom
of
sump.
If
there is
1/8
inch
or
more, remove drain plug and flush. A
1/8
inch pipe screwed
into
hole (A, Fig. 15)
will
facilitate cleaning.