10 INSTALLATION AND CONNECTIONS
INSTALLATION AND CONNECTIONS
Installation and Connections
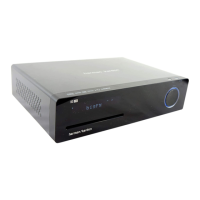
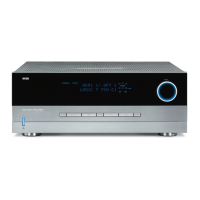
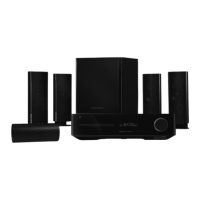
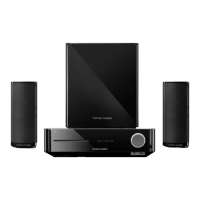
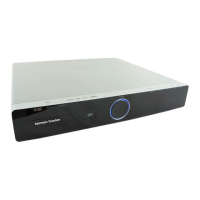
After unpacking the HS 100 controller unit and the
speakers, the first step is to place each speaker and
the HS 100 controller unit in its location in your listen-
ing room. Consult the separate owner’s manual packed
with the speaker system for detailed information on
physical mounting of the speakers.
When making any connections between speakers and
the HS 100, as well as between the HS 100 and other
audio/video components, it is important that both the
HS 100 and external components be turned off,
preferably with the power removed from the AC outlet.
This protects against accidental turn-on that might
cause damage not covered by the products’ warranty.
When placing any speaker or the controller, make cer-
tain that it is on a solid surface capable of supporting
its weight, and make certain that there is a means for
connecting cables or speaker wires to reach through
the back of any cabinets or shelves to the components
they are connected to. As important, please note that
due to the weight of the speaker cabinets, particularly
the subwoofer, and the weight of and heat generated
by the HS 100 controller, there is the remote possibility
that the rubber padding on the bottom of the feet of
the system components may leave marks on certain
soft woods, wood veneers or carpets. Always use cau-
tion when placing any speaker or electronic component
on a material that is soft or porous, or of a significantly
different color than the feet or rubber padding on the
component.
Speaker Placement
It is important that the speakers be placed in positions
that enable them to do the best job of reproducing the
sound as it was meant to be heard, regardless of the
program content. Particularly in a multichannel 5.1 sys-
tem, the placement of speakers can have a noticeable
impact on the accuracy of the surround process.
When placing your speakers in a listening room, pic-
ture an imaginary circle starting at the center of your
video screen that arcs around the room with the prime
listening position, or “sweet spot” at the center of the
circle. Depending on the number of speakers in your
system, there is a recommended placement along the
arc for each speaker, though the specific construction
of your room (taking into account the available walls,
bookcases, or floor space at which the speakers may
be placed) will obviously have some impact on where
the speakers are ultimately located. As a general rule,
try to place all speakers so that they are positioned at
the same height as your ears when you are seated at
the prime listening position.
Use the following suggestions as a guide, and make
the changes needed to fit the speakers to your room.
Don’t be afraid to experiment a bit until you find the
right combination of locations that works for you. There
is no real “right” or “wrong” place to put the speakers;
work to optimize their locations so that audio moves
across the front of the room smoothly, without seeming
to jump from one speaker to another.
Center Channel Speaker
The ideal location for the center channel speaker is at
“0 degrees” in our circle, directly in front of the prime
listening position. Place the center channel speaker as
close to the top (or bottom) of the video screen as
possible so that when you position the front left/right
speakers the tweeters of all three front channel speak-
ers are within 24" of one another.
Front Left/Right Speakers
The recommended placement for front left/right speak-
ers is to place them at the 30-degree position with ref-
erence to the center channel speaker. The distance
between them should be about the same as the dis-
tance from the center channel speaker to the prime
listening position.
Although the natural tendency is to place the speakers
so they are parallel to the wall behind them, and thus in
line with the video screen, the preferred placement is
to angle the speakers slightly (“toe in”) so that they
point to the prime listening position.
Surround Speakers
In a 5.1 surround system, an additional pair of left/right
speakers is added to the front left, right and center
speakers. Although many believe that these speakers
should be placed at the rear of the room, the preferred
position for them is at the sides of the room, with rear
placement a second option when room conditions pre-
vent the use of side-mounted surround speakers.
When side-wall mounting is possible, place the left/right
surround speakers at a point that is 110 degrees along
our circle from the center of the video screen. This
translates to placing them to the side and slightly
behind your preferred listening position. If possible,
angle the speakers in slightly so that they are pointing
toward the listener’s ears.
If it is not possible to place the surround speakers at
the sides of the room, the alternate position is at the
back of the room, about 150 degrees on our circle
from the center of the video screen. Another way to
spot the optimal, alternate rear-wall mounting position is
to place the left surround speaker on the back wall so
that it points directly at the front right speaker, and to
have the right surround speaker point directly at the
front left speaker. If possible aim the surround speakers
so that they point “in” toward the listening area, rather
than perpendicular to the walls.
NOTES ON SPEAKER PLACEMENT:
The limitations of your listening room, including the
placement of walls and furniture, may make it difficult
to follow the speaker placement suggestions shown
above. Depending on the specific layout of the room,
here are some ways to compensate for unusual
conditions:
• Try to follow the suggested placement, but move
the speakers within a few feet from the preferred
locations.
• Regardless of where they are placed, always try to
make certain that the main surround speakers are
the same distance from the front speakers. (For
example, try not to have the right surround speaker
further back into the room than the left surround
speaker.)
• If it is not possible to wall-mount or place speakers
on a shelf, consider the use of optional floor stands.
Main Speaker Connections
Once you have placed your left, center, right and sur-
round speakers in the listening room, use the speaker
wire supplied with the HKTS 7 speaker system to con-
nect the individual speakers to the rear panel of the
HS 100. Follow the instructions in the HKTS 7 owner’s
manual concerning connection of the speaker wire to
the back of each of the main speakers.
To simplify installation, the speaker wire included with
the HKTS 7 has a color marking tab at each end of the
wire to indicate the channel the wire’s speaker is con-
nected to. When connecting the wire to the speakers,
we strongly recommend that you connect the wire in
con
formance with this color code, as it then makes it
easier
to match the color code for the speaker termi-
nals on the HS 100.
The color coding is as shown below:
Speaker Position Cable Color Code
Front Left White
Center Green
Front Right Red
Surround Right Gray
Surround Left Blue
If you wish to shorten the length of the speaker wires,
a set of colored stickers is included with the HKTS 7
owner’s manual. For consistency, apply the tab to the
 Loading...