Chipper/Shredder
R
CS-5400 PTO Powered Model
1. Mount feet onto machine base.
2. Connect PTO shaft to input shaft of
machine, tighten set screws on shaft.
3. Mount 3-point hitch pins onto
Chipper/Shredder.
4. Mount Chipper/Shredder to 3-point hitch
of tractor and secure with lynch pins.
IMPORTANT: Do not connect the PTO
shaft at this time.
5. Raise the unit to the height where the
PTO shaft would be level if installed (PTO
shaft should be at shortest length).
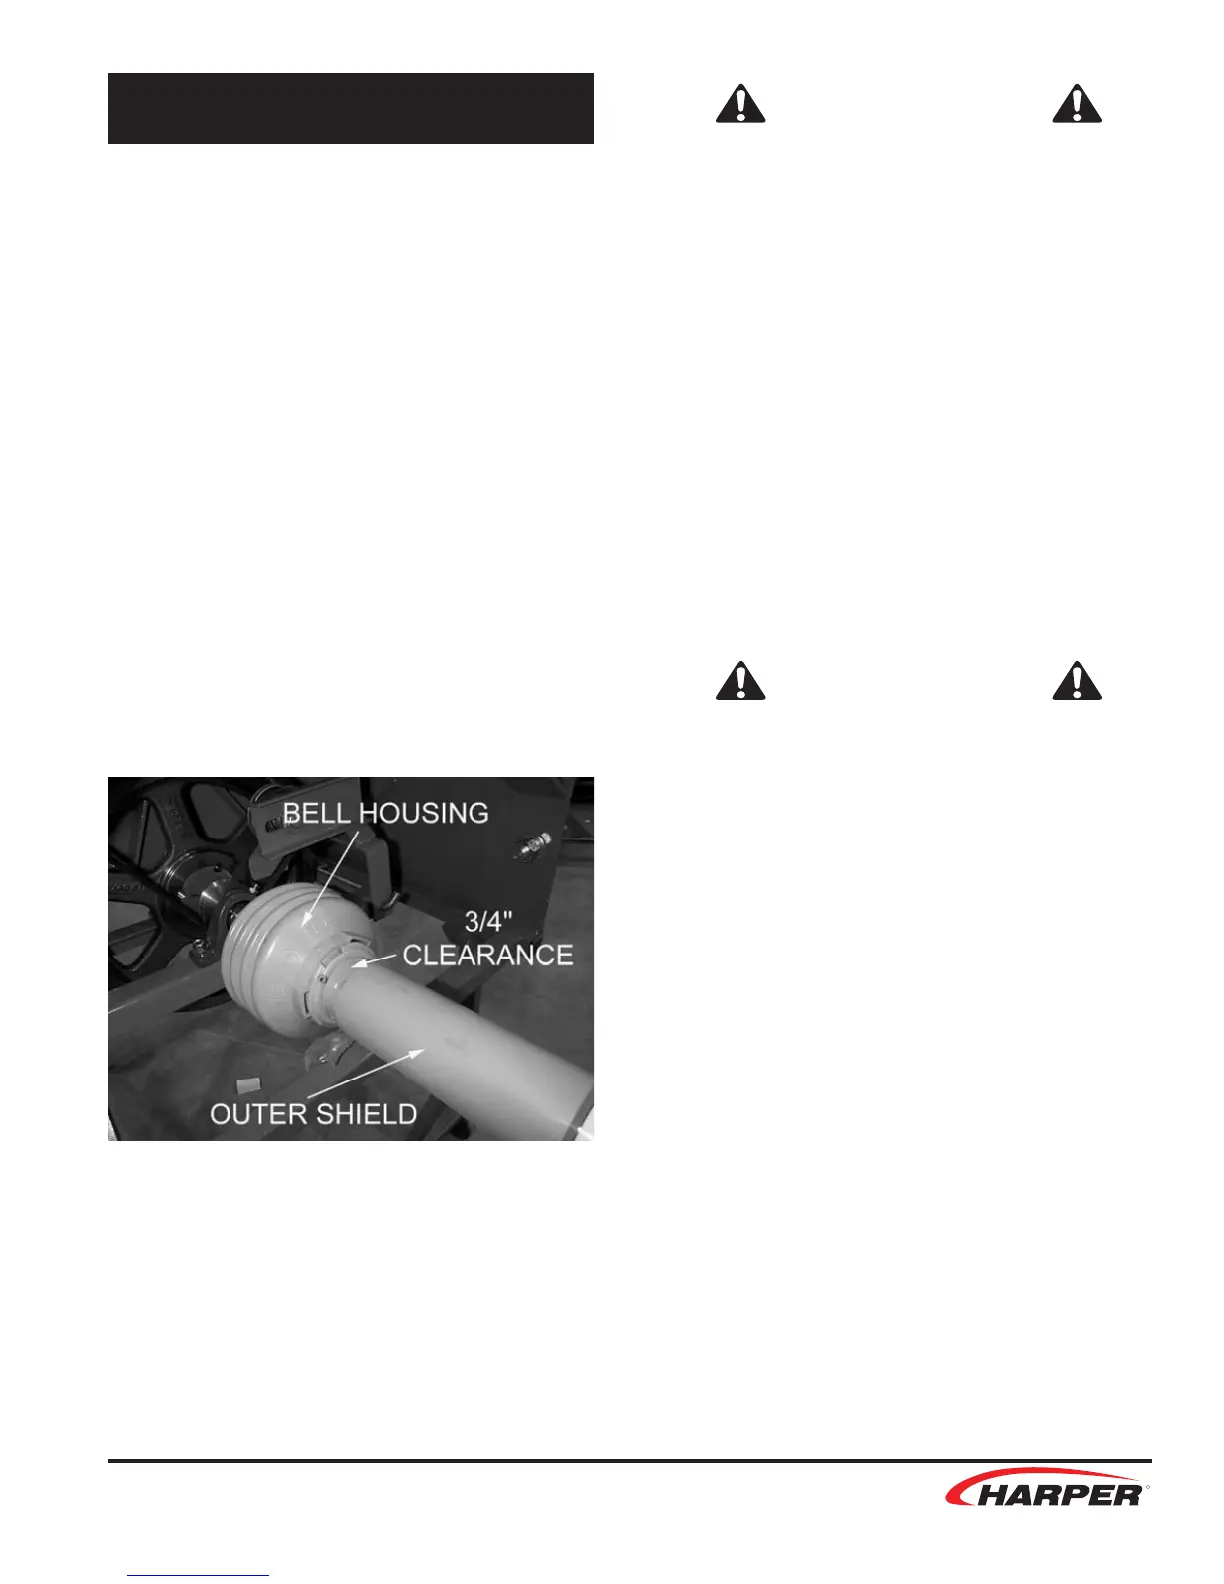
6. Hold the PTO shaft alongside the 540
yoke on the tractor and allow for ¾”
clearance between the outer shield and
the bell housing at the Chipper/Shredder
end of the PTO shaft.
7. If the PTO shaft is too long, separate the
halves and cut the full amount of excess
length from both the male and female half.
Note: If only one end is cut from the PTO
shaft, the other end will bottom out during
operation. Cut the inner and outer shields to
compensate for the length adjustment.
8. Connect the PTO shaft to the 540 yoke on
the tractor to begin operation.
SAFETY WARNING!
• Keep pants and loose clothing away
from PTO shaft and all other shafts, pul-
leys and belts.
• Never operate the Chipper/Shredder be-
yond the suggested 540 PTO speed.
• Do not attempt to service machine while
it is in operation.
CS-1800 18 hp. Gas Powered Model
1. Mount tires and rims onto spindles.
2. Install trailer tongue to trailer using
hardware provided.
3. Mount 12-volt battery onto box on trailer
tongue and connect cables.
Battery
SAFETY WARNING!
The battery is shipped without electrolyte.
Therefore, the battery must be lled with
sulfuric acid electrolyte before the Chip-
per/Shredder can be operated.
Electrolyte:
1. Place the battery on a level surface and
remove the vent caps. If the battery has
thin plastic shields in the cell openings,
remove and discard them.
2. Fill the battery with battery grade sulfuric
acid to just above the separators.
DO NOT OVERFILL
3. Reinstall the vent caps, then charge the
battery as instructed below. AFTER
charging, check the acid level, and ll to
the bottom of the vent well openings.
DO NOT OVERFILL
Charging:
1. Make sure the vent caps included with the
battery are installed.
Assembly
9