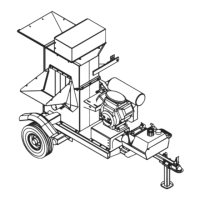
Chipper/Shredder
R
SAFETY WARNING!
• Before servicing or inspecting the
Chipper/Shredder, make sure the
power source is shut off and all
moving parts have stopped.
• Disconnect the spark plug wire
from the spark plug on Gas Pow-
ered units.
On PTO Powered units, disconnect
the PTO shaft from the tractor.
• Always wear safety glasses and
protective gloves when servicing
the Chipper/Shredder.
Break-In Service
• After the rst hour of use:
• Check belts. Re-tension if needed.
• Tighten set screws on bearings.
• Check nuts, bolts and fasteners to see
that they are secure.
Lubrication
• Lubricate grease ttings after every
50 hours of use.
• There are 2 ttings on the rotor shaft
of both the Gas and PTO Powered
models.
• The PTO Powered model also has 2
ttings on the jackshaft and 2 ttings
on the PTO shaft.
SAFETY WARNING!
• Wear protective gloves whenever
handling or working near knives.
• Knives and their retaining hardware
rotate at high speed. It is essential
that they be mounted as described
in the instructions to prevent acci-
dents from ying metal.
Chipper Knives
Depending on the type of wood being fed into
the chipper, the knives eventually become
dulled, slowing chipping time and making it
harder to produce chips. It is recommended
that chipper knives be sharpened every 5 to
10 hours of use.
Removal:
1. Remove the nine 5/16” bolts that fasten
the top and bottom housings together.
2. Remove the bolts that fasten the top of the
grate and open hinged housing to access
drum housing.
3. Rotate drum so that knife is most acces-
sible through chipper chute.
Remove the two 5/16” bolts and the chip-
per knife. Repeat this step for the remain-
ing knives.
Sharpening:
• The chipper blades can be sharpened
with a bench grinder or done by a
Harper dealership.
• Avoid getting blade surface too hot to
where it changes color. This will re
move the heat-treatment and may at-
tribute to premature failure. When
grinding, use short grinding intervals
and cool in between with water.
• Remove equal amounts to keep knives
balanced. Regrind knife-edge to 35
degrees of angle. Failure to do so may
affect chipping performance.
Mounting:
1. Mount chipper knives to rotor plate with
sharpened edge facing chipper chute.
Use Grade 5 5/16” x 1” bolts that have
been treated with Loctite® or equivalent.
2. After knives are mounted, tighten bolts to
specied torque using the Standard Torque
Chart.
3. Re-assemble housing.
Service & Maintenance
16