2.12 Transmitter Check Out
CAUTION
BEFORE PROCEEDINGWITH CHECKOUT,INSPECT THETRANS-
MITTER FOR AC POWER SHORTS, LOOSE HARDWARE, WIRING
ERRORS, UNCONNECTED WIRES, MISSING PARTS, AND DEBRIS.
The following procedures are the sequential steps to safely turn on
the transmitter for the first time, and should be performed in the
order listed. It is recommended that the installation personnel read
the general description in section one, the controls and operation
material in section three, and these procedures before starting.
2.12.1
Control Cabinet Pre-Operational Check Out
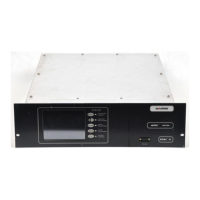
a. (Press,thenreleasetherightside of the paneltoopenthefront
panel.MakesureCB1, on theleft side of the innerpanel,next
to the Control circuit board, is turned off before proceeding.)
The monitor board battery and the controller board batteries
are disconnected before shipping. This prevents total dis-
charge during shipping and storage. Connect the monitor
boardbatterycabletoJ6.Connectthecontrollerboard battery
to J25.
b. See Table 5-6 for Monitor board S3 and S4 DIP configu-
ration switch positions. Check the switch positions against
those listed in the chart.
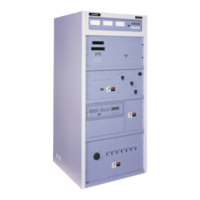
c. Apply 3 phase power to the control cabinet only.
d. Check for correct AC power line voltage. If the voltage
does not correspond to the values for the DC supplies as
wired, then re-tap for the correct voltage.
e. Turn on circuit breaker CB1 (located behind the display
panel left of the control boards) in the control cabinet.
f. Check that the phase monitor red LED is on. If not, first
check that its voltage range is adjusted to the correct
settings. Next, reverse any two phases to cause the LED to
come on. Refer to the AC Distribution Drawing as re-
quired. If the phases are wrong, the PHASE LOSS lamp
on the display panel should light.
NOTE
All cabinets must be phased the same. Correct phasing of each
PA cabinet is a part of the PA cabinet Operational Checkout.
g. The control fault will be on. The failsafe and external
interlocks are active and may be on or off. External site
system wiring must be connected to these interlock termi-
nals or jumpers must be added at the terminals to turn these
indicators off before the transmitter can be turned on. The
exciter should indicate mute.
h. Refer to the Control Cabinet Wiring Diagram. Check the
voltages of the logic power supplies with a VOM or DVM
and on the meterdisplay. (From the Bar Graph screen press
METER, then SUPPLY, then NEXT to access the logic
supply readings. Press EXIT when done.)
i. Check PS-2 for 12V.
j. Check the meter display for the correct AC voltage read-
ings. (From the bar graph press METER, then press LINE.
Press EXIT when done.)
k. Set the time and date on the display. (Press SETUP, then
TIME. Refer to section three for additional information on
date/time entry if needed. Press EXIT once when done.)
l. Press SETPOINT to access the setpoint screen. Enter the
station’s licensed poweroutputsto be usedby the bargraph
page. (Refer to system setpoint entry in section three if
needed.)
m. Check the external interlock by operating whatever is
connected to it, or place jumper at TB1-3 and 4 on I/O
panel.
n. Apply 1 volt p-p video to exciter video input.
o. Press transmitter ON pushbutton.
p. Check for the external blower (diplexer or exhaust blow-
ers) to start if used, and for the failsafe indicator to go out
if tied to diplexer air switch.
q. The failsafe lamp should go out when the diplexer fan gets
uptospeed.The excitershouldun-muteafewseconds after
ON command is given and all interlocks are normal.
r. Open the failsafe circuit. The Failsafe lamp should light
and the exciter should mute. Re-close the failsafe circuit.
The failsafe lamp and exciter mute LED should go out.
s. Open the external interlock. The external interlock lamp
should be on and the transmitter should shut off. Press ON
button. The transmitter should not come on. Re-close the
circuit. The external interlock lamp should go out. If Main
Controller J24 is set 1-2, the transmitter should come back
on. If Main Controller J24 is set 2-3, the transmitter should
not come back on until a manual ON command is given.
t. Check operation of RAISE and LOWER switches, both on
the control cabinet and on the exciter.
u. If the system has a remote control, place transmitter in the
REMOTE mode and check for operation of transmitter
ON/OFF and RAISE/LOWER from the remote.
v. Check that LOCAL mode locks out remote commands.
w. Temporarily remove video input. The exciter should mute,
then return to normal after the video is restored.
x. Return exciter to minimum power when done by depress-
ing and holding LOWER commands for about 15 seconds.
y. Press OFF pushbutton at the control cabinet.
2.12.2
PA Cabinet Pre-Operational Check Out
CAUTION
CHECK 50V BUS BAR CABLES FOR TIGHT CONNECTION AND
INSPECT FOR CABLES WHICH MIGHT SHORT BUS BAR TO
GROUND.
Perform the following for each PA cabinet:
a. TURN OFF BOTH BREAKERS located behind the lower
pop-off panel on the front of the PA cabinet.
b. Unplug the three pin plug at J2 on the slave controller
board. This places the local slave controller in control of
the cabinet.
Section II - Installation
Rev. C: 8-24-2000 888-2365-001 2-7
WARNING: Disconnect primary power prior to servicing.
 Loading...

