10 – English
MAINTENANCE
GENERAL MAINTENANCE
Avoid using solvents when cleaning plastic parts. Most
plasticsaresusceptibletodamagefromvarioustypesof
commercialsolventsandmaybedamagedbytheiruse.Use
cleanclothstoremovedirt,dust,oil,grease,etc.
WARNING:
Do not at any time let brake fluids, gasoline, petro-
leum-based products, penetrating oils, etc., come in
contact with plastic parts. Chemicals can damage,
weaken, or destroy plastic which can result in serious
personalinjury.
NOTICE:
Neveruseahose,water,oranyliquidstocleanthelawn
mower, as water can damage electronic components
andthebatterypack.Removeanybuildupofgrassand
leavesonoraroundthemotorcover.Wipethemower
cleanwithadryclothoccasionally.
LUBRICATION
Allofthebearingsinthisproductarelubricatedwithasuf-
ficient amount of high grade lubricant for the life of the unit
under normal operating conditions. Therefore, no further
bearinglubricationisrequired.
WARNING:
Alwaysprotecthandsbywearingheavyglovesand/or
wrapping the cutting edges of the blade with rags and
othermaterialwhenperformingblademaintenance.Con-
tactwiththebladecouldresultinseriouspersonalinjury.
REPLACING THE CUTTING BLADE
See Figures 15 - 16.
NOTE: Onlyuseauthorizedreplacementblades.
Stopthemotorandremovethestartkey.Allowbladeto
cometoacompletestop.
Removethebatterypackfromthebatteryport.
Turnthemoweronitsside.
Wedgeablockofwoodbetweenthebladeandmower
decktopreventthebladefromturning.
Loosen the blade nut by turning it counterclockwise (as
viewedfrombottomofmower)usinga15mmwrench
orsocket(notprovided).
Removethebladenut,spacer,bladeinsulator,andblade.
Placethenewbladeontheshaftagainstthebladeposts.
Ensure blade is properly seated with shaft going through
center blade hole and the two blade posts inserted
intotheirrespectiveholesontheblade.Makesureitis
installedwith thecurvedends pointinguptoward the
mowerdeckandnotdowntowardtheground. When
seatedproperly,thebladeshouldbeflat.
Replacethebladeinsulatorandspacer,thenthreadthe
bladenutontheshaftandfingertighten.
NOTE: Make certain all parts are replaced in the exact
orderinwhichtheywereremoved.
Torque the blade nut down clockwise using a torque
wrench (notprovided) to ensure the bolt is properly
tightened.Therecommendedtorqueforthebladenut
is310–360in.lbs.
WARNING:
Ensure blade is properly seated and the blade nut is
tightenedtothetorquespecificationsabove.Failureto
properly attach the blade could cause it to come loose
andresultinpossibleseriouspersonalinjury.
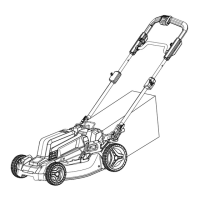
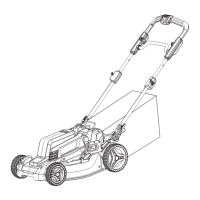
STORING THE MOWER
See Figures 17 - 18.
WARNING:
Remove all battery packs from the battery port and
battery storage compartment and start key and store in
asecurelocationoutofthereachofchildrentoprevent
unauthorizeduseofthelawnmowerandpossibleserious
personalinjury.
Before storage, wipe any dirt or debris from the battery
area.
Turn mower on its side and clean grass clippings that
haveaccumulatedontheundersideofthemowerdeck.
Wipethemowercleanwithadrycloth.
Checkallnuts,bolts,knobs,screws,fasteners,etc.,for
tightness.
Inspectmovingpartsfordamage,breakage,andwear.
Haverepairsmadeonanydamagedormissingparts.
Checkbladefordamage,uneven,orexcessivewearand
replacebladeiftheseconditionsexist.
Store mower indoors in a clean, dry place out of the reach
ofchildren.
•Tostorethemowerinahorizontalposition,lowerthe
handleassembly.Avoidpinchingortrappinganycables.
•Tostorethemowerinaverticalposition,removethe
grass bag, then lower the handle assembly. Avoid
pinchingortrappinganycables.
NOTE: Make sure the pins on the handle adjustment
knobs are fully locked before attempting to raise the
mowertothestandingposition.
NOTICE:
Do not allow the starter cable to become pinched or
trappedwhenloweringthehandle.
Donotstorenearcorrosivematerialssuchasfertilizeror
rocksalt.
 Loading...