22 – English
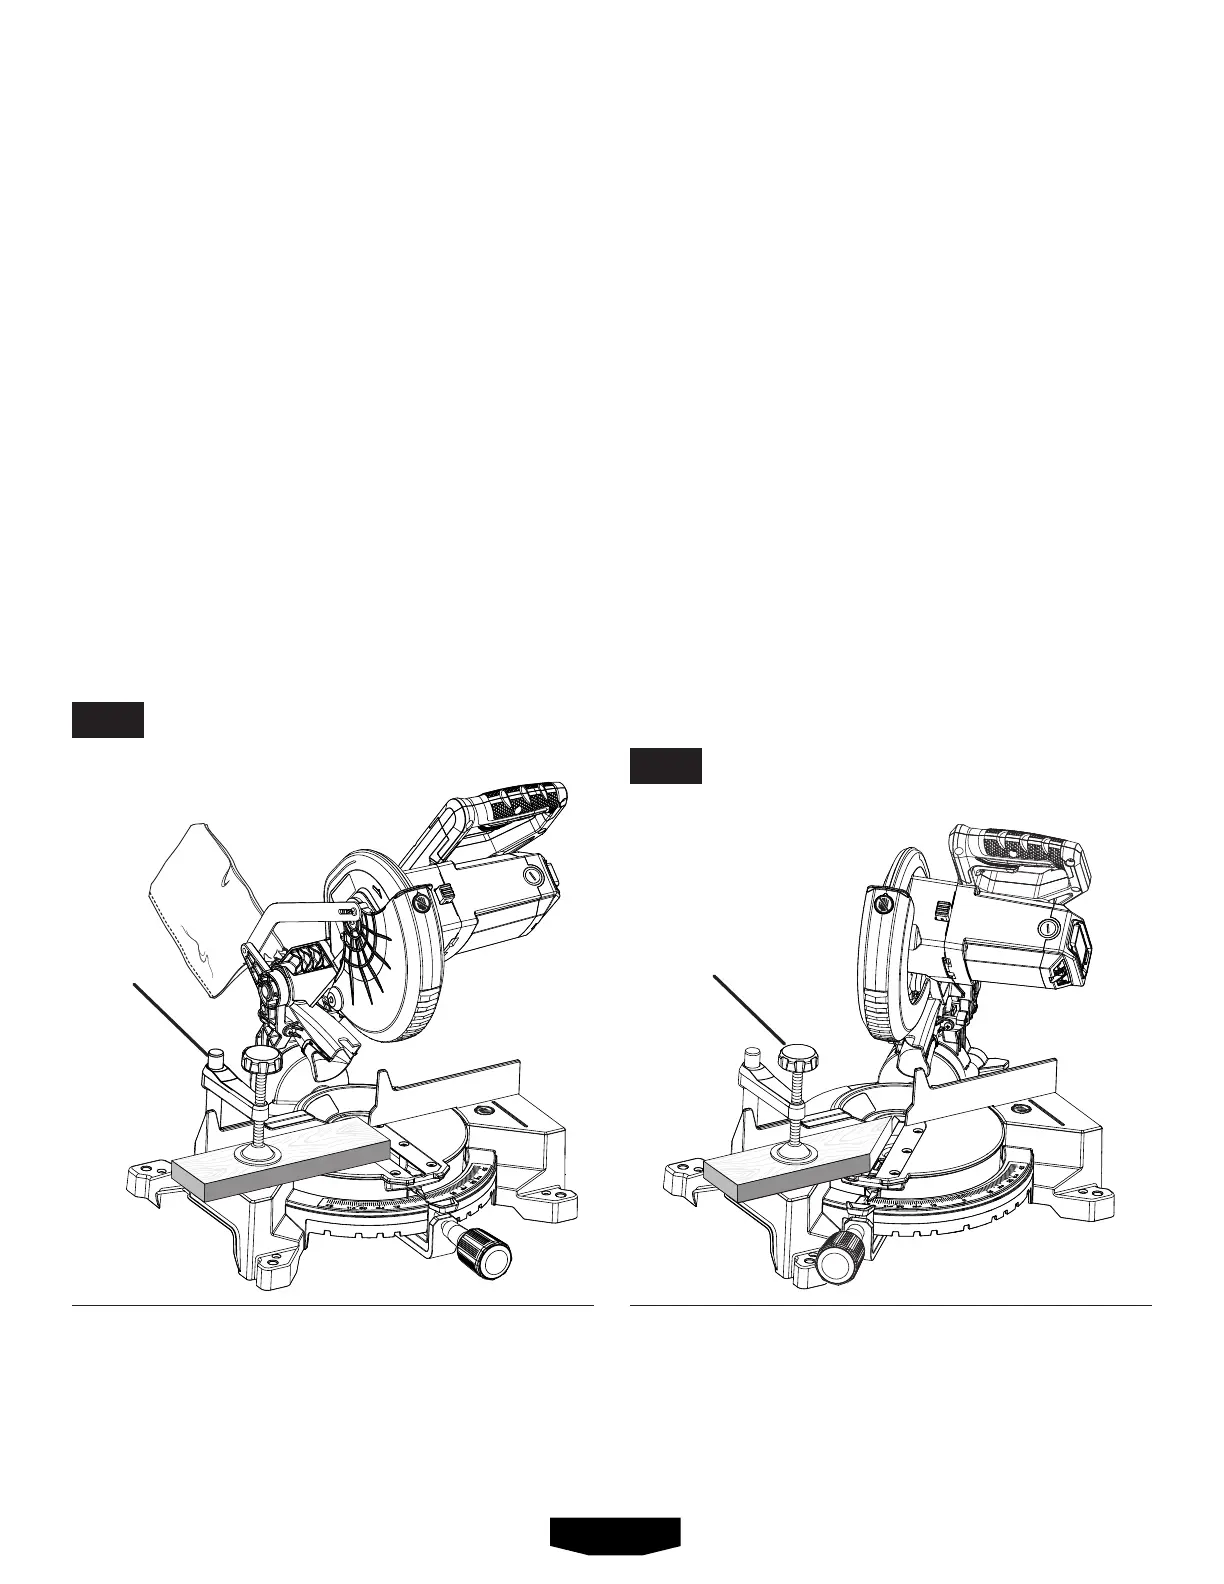
TO MITER CUT/CROSS CUT
See Figures 25 - 26.
Acrosscut is made bycuttingacross the grain ofthe
workpiece.Astraightcrosscutismadewiththemitertable
setatthe0°position.Mitercrosscutsaremadewiththe
mitertablesetatsomeangleotherthanzero.
NOTE:Itmaybenecessarytoadjustthepartialslidingmiter
fencetoensureproperclearancepriortomakingthecut.
Pulloutthelockpinandliftsawarmtoitsfullheight.
Loosenthemiterlockknobapproximatelyone-halfturn
andpressthedetentreleasebutton.
Rotatethecontrolarmuntilthepointeralignswiththe
desiredangleonthemiterscale.
Releasethedetentreleasebutton,thentightenthemiter
lockknobtosecurethemitertable.
NOTE: Youcanquicklylocate0°,15°,22.5°,31.6°,and
45°leftorrightbyreleasingthedetentreleasebuttonas
yourotatethecontrolarm.Thecontrolarmwillseatitself
inoneofthepositivestopnotches,locatedinthemiter
tablebase.
CROSS CUT
MITER CUT
WORK
CLAMP
WORK
CLAMP
Placetheworkpieceflatonthemitertablewithoneedge
securelyagainstthefence.Iftheboardiswarped,place
theconvexsideagainstthefence.Iftheconcaveedge
ofaboardisplacedagainstthefence,theboardcould
collapseonthebladeattheendofthecut,jammingthe
blade.See figures 32 - 33.
Whencuttinglongpiecesoflumberormolding,support
theoppositeendofthestockwitharollerstandorwith
aworksurfacelevelwiththesawtable.See figure 30.
Grasptheworkpiecefirmlywithonehandandsecureit
againstthefence.Usetheworkclamp,C-clamp,orother
suitableclamptosecuretheworkpiecewhenpossible.
Beforeturningonthesaw,performadryrunofthecutting
operationjusttomakesurethatnoproblemswilloccur
whenthecutismade.
Graspthesawhandlefirmly.Depressthetriggerlockout
leverandsqueezetheswitchtrigger.Allowseveralsec-
ondsforthebladetoreachmaximumspeed.
Slowlylowerthebladeintoandthroughtheworkpiece.
Releasetheswitchtriggerandallowthebladetostop
rotatingbeforeraisingthebladeoutoftheworkpiece.
Waituntilthebladestopsturningbeforeremovingthe
workpiecefromthemitertable.
OPERATION
FIG. 25
FIG. 26