29 – English
WARNING:
Beforeperforminganyadjustment,makesurethetool
isunpluggedfromthepowersupply.Failuretoheed
thiswarningcouldresultinseriouspersonalinjury.
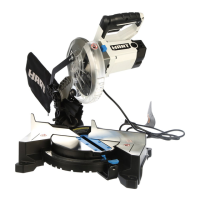
Thecompoundmitersawhasbeenadjustedatthefactory
formakingaccuratecuts.However,someofthecomponents
mighthavebeenjarredoutofalignmentduringshipping.
Also,overaperiod of time,readjustment will probably
becomenecessaryduetowear.Afterunpackingthesaw,
check thefollowingadjustmentsbefore you begin using
thesaw.Makeanyreadjustmentsthatarenecessaryand
periodicallycheckthepartsalignmenttomakesurethatthe
sawiscuttingaccurately.
PIVOT ADJUSTMENTS
NOTE:Theseadjustmentsweremadeatthefactoryand
normallydonotrequirereadjustment.
TRAVEL PIVOT ADJUSTMENT
Thesawarmshouldrisecompletelytotheupposition
byitself.
Ifthesawarmdoesnotraisebyitselforifthereisplay
inthepivotjoints, have saw repaired at yournearest
authorizedservicecenter.
BEVEL PIVOT ADJUSTMENT
Thecompoundmitersawshouldbeveleasilybyloosening
thebevellockknobandtiltingthesawarmtotheleft.
Ifmovementistightorifthereisplayinthepivot,have
sawrepairedbyatyournearestauthorizedservicecenter.
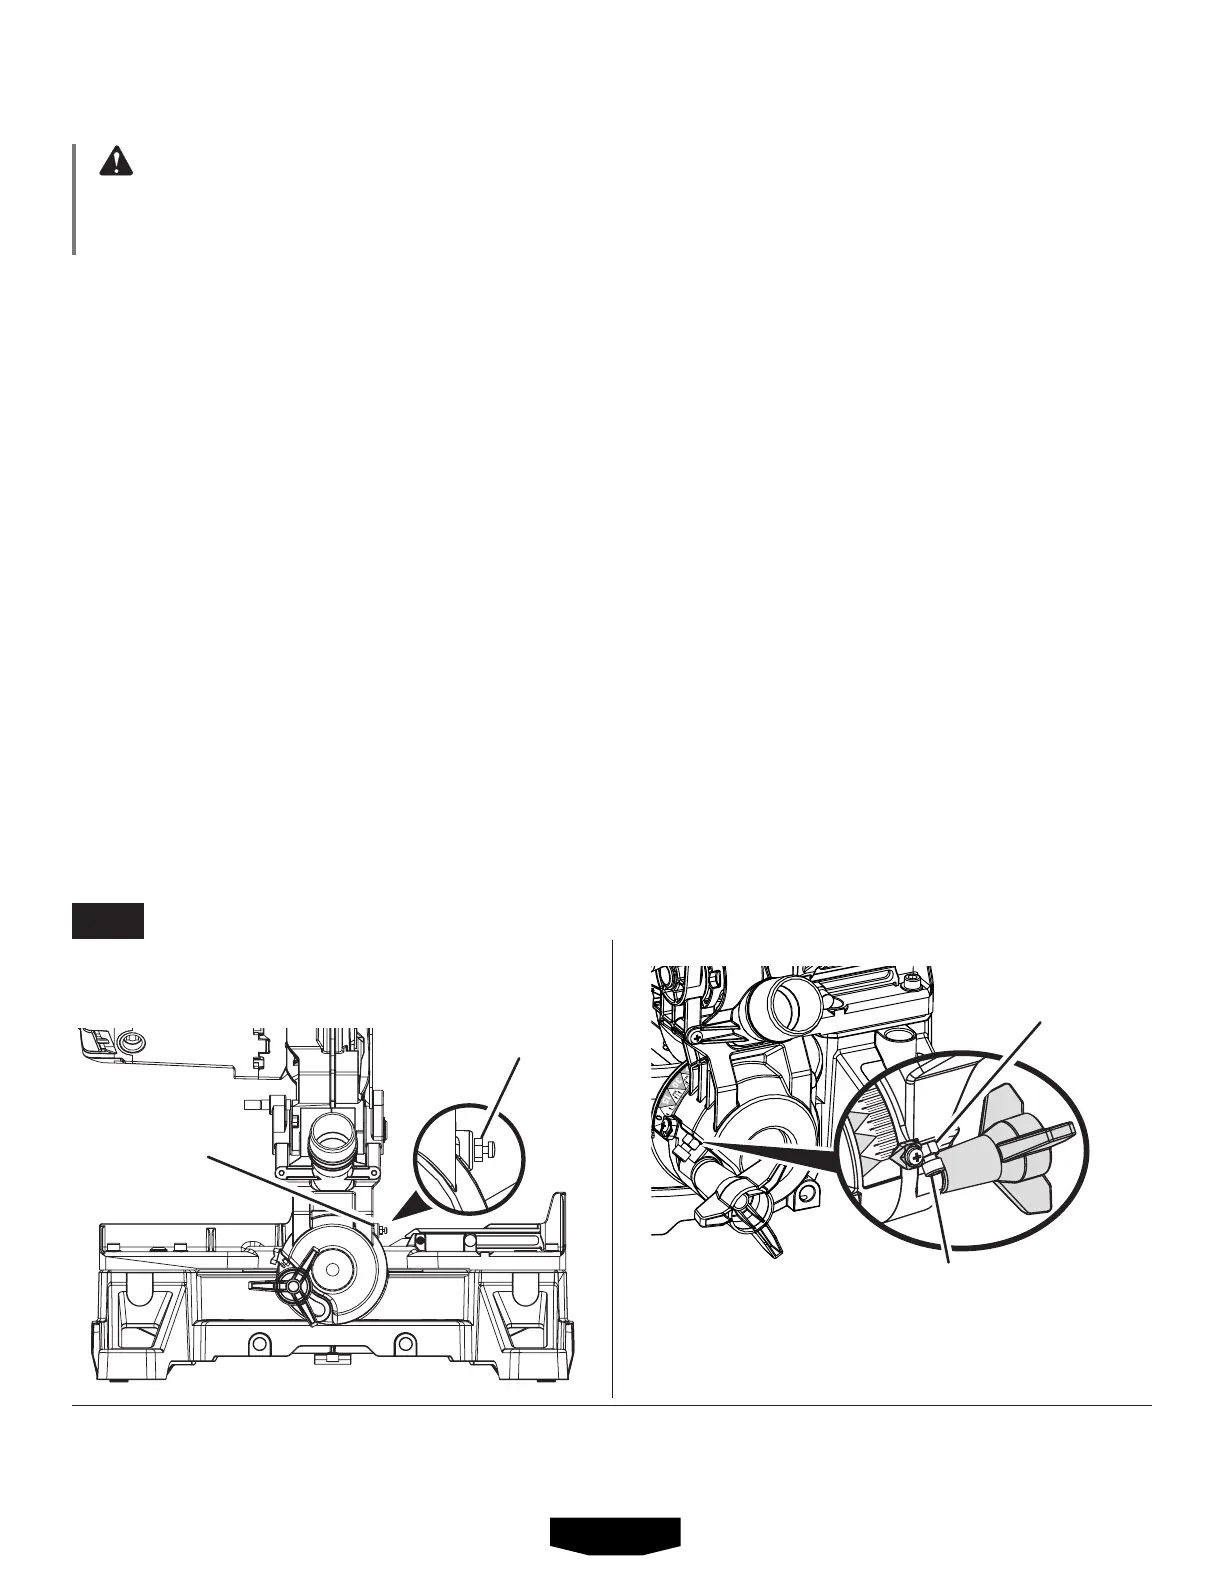
POSITIVE STOP ADJUSTMENTS
See Figure 34.
NOTE:Theseadjustmentsweremadeatthefactoryand
normallydonotrequirereadjustment.
To adjust:
Unplugthesaw.
Loosenthebevellockknobbyturningtheknobcounter-
clockwise.
Squarethebladetothemitertableasdescribedinthe
Assembly sectionofthismanual.
Ifthebladeisoutofsquare,securethelocknutinplace
andloosenortightenthepositivestopadjustmentscrew
usingthebladewrenchprovided.
Retighten bevel lock knob.Recheckblade-to-table
alignment.
NOTE: Theaboveprocedurecanbeusedtocheckblade
squarenessofthesawbladetothemitertableatboth0°
and45°angles.
Thesawhastwoscaleindicators,oneonthebevelscaleand
oneonthemiterscale.Aftersquaringadjustmentshavebeen
made,itmaybenecessarytoloosentheindicatorscrews
andresetthemtozero.See figures 20 - 21.
LOCK NUT
POSITIVE STOP
ADJUSTMENT
SCREW FOR
0
°
ANGLES
LOCK NUT
POSITIVE STOP
ADJUSTMENT
SCREW FOR
45
°
ANGLES
ADJUSTMENTS
FIG. 34