INHALT
1. STEUERGERÄT C260.................................................3
1.1. Technische Daten C260VKK..........................................3
2. BEDIENUNGSANLEITUNG ........................................... 4
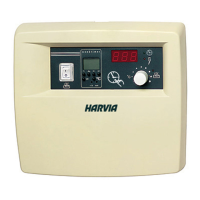
2.1. Hauptschalter (1) ..........................................................4
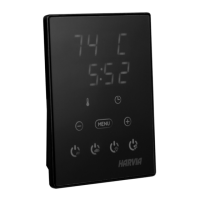
2.2. Wochen-Zeitschaltuhr (Weektimer) (2) .......................5
2.2.1. Display und Tasten der Wochen-
Zeitschaltuhr (Abb. 2) ..................................................5
2.2.2. Uhrzeit und Wochentag (Abb. 3) .......................5
2.2.3. Neues Zeitschalt-Programmpaar (Abb. 4)........6
2.2.4. Ändern eines Zeitschaltprogramms (Abb. 5) ...6
2.2.5. Löschen von Zeitschalt-Programmpaaren
(Abb. 6) .........................................................................7
2.2.6. Sommerzeit ........................................................7
2.2.7. Manuell ein/aus ..................................................7
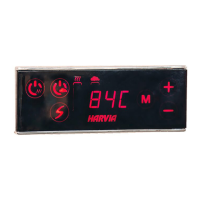
2.3. Manueller Schalter (3) .................................................7
2.3.1. Ofen sofort einschalten ......................................7
2.3.2. Ofen ausgeschaltet ............................................8
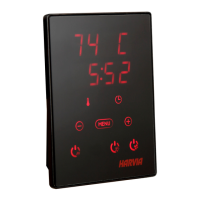
2.4. Anzeige (4) ...................................................................8
2.5. Temperaturregler (5) ....................................................8
2.6. Kontrolllampe, rot (6) ..................................................8
2.7. Kontrolllampe, grün (7) ...............................................8
2.8. Kontrolllampe, rot (8) ..................................................8
3. INSTALLATIONSANLEITUNG ......................................9
3.1. Installation der Steuereinheit C260VKK .....................9
3.1.1. Lösen des Deckels .............................................9
3.1.2. Wandbefestigung ...............................................9
3.1.3. Elektrische Anschlüsse .....................................10
3.1.4. Änderung der Voreinstellungen der
Steuereinheit ..............................................................10
3.1.5. Fernsteuerung der Steuerungseinheit ............11
3.1.6. Kontrolllampe ...................................................12
3.2. Installation des Fühlergehäuses für den
Thermostaten ...................................................................12
3.3. Installation der Leistungseinheit C260K ..................13
3.3.1. Lösen des Deckels ............................................13
3.3.2. Wandbefestigung .............................................13
3.3.3. Elektrische Schaltungen .................................14
CONTENTS
1. CONTROL UNIT C260 ................................................3
1.1. Technical Data ...............................................................3
2. INSTRUCTIONS FOR USE ........................................... 4
2.1. Main Switch (1) ............................................................4
2.2. Weekly Timer (Weektimer) (2) .....................................5
2.2.1. Weekly Timer’s Display and Buttons (g. 2) .....5
2.2.2. Clock Time and Weekday (g. 3)........................5
2.2.3. New Timing Program Pair (g. 4) ......................6
2.2.4. Changing a Timing Program (g. 5) .................6
2.2.5. Clearing a Timing Program Pair (g. 6) ............7
2.2.6. Summer Time .....................................................7
2.2.7. Manual On/Off .....................................................7
2.3. Manual Switch (3) ........................................................7
2.3.1. Heater On Instantly ............................................7
2.3.2. Heater Off............................................................8
2.4. Display Screen (4) .......................................................8
2.5. Temperature Regulator (5) ..........................................8
2.6. Indicator Light, Red (6) ................................................8
2.7. Indicator Light, Green (7) ............................................8
2.8. Indicator Light, Red (8) ................................................8
3. INSTRUCTIONS FOR INSTALLATION ...........................9
3.1. Installation of the Control Unit C260VKK ...................9
3.1.1. Removing the Top Plate ......................................9
3.1.2. Fastening the Device to the Wall .......................9
3.1.3. Electrical Connections ......................................10
3.1.4. Altering the Basic Settings of the Control
Unit .............................................................................. 10
3.1.5. Use of the Control Unit by Remote
Control ........................................................................11
3.1.6. Indicator Lamp ..................................................12
3.2. Installing the Thermostat’s Sensor Box ...................12
3.3. Installing the Power Unit C260K...............................13
3.3.1. Removing the Top Plate ....................................13
3.3.2. Fastening the Device to the Wall .....................13
3.3.3. Electrical Connections .....................................14
 Loading...