EN DE
18
Anschluss des Ofens an einen gemauerten Rauchfang
über die obere Anschlussöffnung (Abbildung 12/13)
Für den oberen Anschluss wird ein Winkelrauchrohr
(45° oder 90°) benötigt ( 3.4.).
1. Öffnen Sie den Deckel der hinteren Anschluss-
öffnung (nur M2/M3). Verbiegen Sie die Halte-
rung mit einem Schraubendreher.
2. Versetzen Sie den Stopfen von der oberen
Anschlussöffnung auf die hintere Anschlussöff-
nung.
3. Verbiegen Sie die Halterung mit einem Schrau-
bendreher. Klappen Sie den Deckel zurück nach
oben und befestigen Sie ihn mit einer Schrau-
be (nur M2/M3).
4. Bringen Sie das Abzugsanschlussrohr an die
obere Anschlussöffnung an. Das Rohr muss
fest an seinem Platz sitzen.
5. Schieben Sie den Ofen an seine Position.
Schieben Sie das Abzugsanschlussrohr nicht zu
weit in den Rauchfang hinein. Kürzen Sie das
Rohr, falls notwendig.
6. Dichten Sie das Abzugsanschlussrohr in der
Öffnung der feuerfesten Wand ab, z.B. mit
feuerfester Mineralwolle. Der Abzugsanschluss
muss absolut dicht sein. Fügen Sie gegebenen-
falls mehr Mineralwolle hinzu.
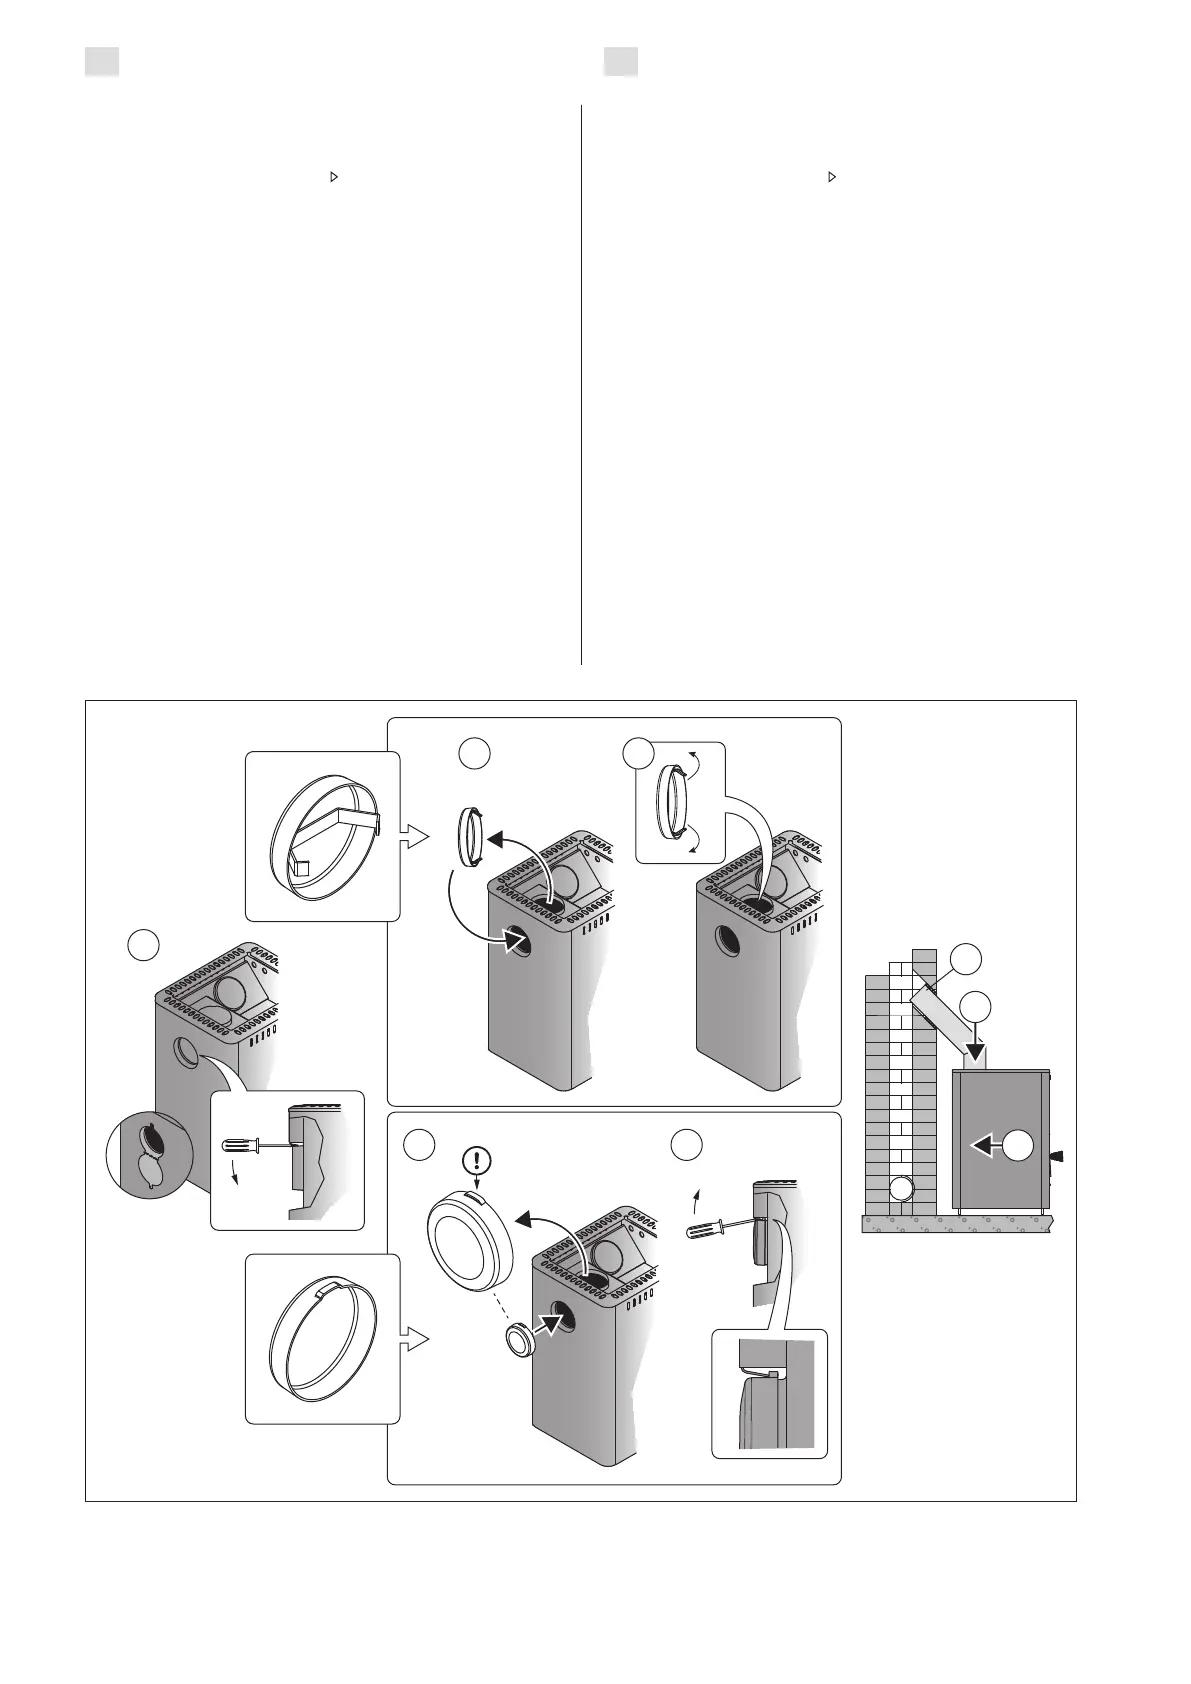
Figure 12. Connecting the stove to a masonry flue via the upper connection opening (all dimensions in millimeters)
Abbildung 12. Anschluss des Ofens an einen gemauerten Rauchfang über die obere Anschlussöffnung (alle
Abmessungen in Millimetern)
Connecting the stove to a masonry flue via the
upper connection opening (figure 12/13)
You will need an angled smoke pipe (45° or 90°)
for the upper connection ( 3.4.).
1. Open the cover hatch of the rear connection
opening (M2/M3 only). Bend the holder with a
screwdriver.
2. Move the blocking plug from the upper
connection opening on the rear connection
opening.
3. Bend the holder with a screwdriver. Turn the
cover hatch back up and lock it in its position
with a screw (M2/M3 only).
4. Attach the ue connection pipe to the upper
connection opening. Ensure that the pipe ts
tightly in place.
5. Push the stove in place. Do not block the ue
by pushing the ue connection pipe too far
into the ue. If necessary, shorten the pipe.
6. Seal the ue connection pipe to the opening
in the reproof wall, for example, by using
reproof mineral wool. Make sure that the
ue connection is tightly sealed. Add more
reproof mineral wool if necessary.
3
4
6
5
2
1
2
3
 Loading...