EasyManua.ls Logo

Haskris R Series - User Manual

Default Icon
11 pages
Print Icon
To Next Page IconTo Next Page
Loading...
Copyright © 2020 Haskris REV102920
1
www.haskris.com
776 North Oaklawn Avenue, Elmhurst, Illinois 60126 USA ph: +1-847-956-6420 | fx: +1-847-956-6595 | email: service@haskris.com
Operation and Maintenance
Haskris LX-Series, R-Series, WW-Series, OPC-Series
Section 1: Temperature Control
Your Haskris will have one of three different types of controller. Use table 1-1 to identify the relevant controller.
The controller may appear different than examples. Contact Haskris if you are not sure what type you have.
Adjust supply temperature while under heat load.
Allow 15-30 minutes for the supply temperature to stabilize after an adjustment.
Consult a dew point chart to select a supply uid temperature that will minimize condensation.
If no heat load is applied, the unit may “over-cool”.
Electronic Temperature Controllers
ON/OFF
Cycling Control
Section 1.1
Parametric
Control
Section 1.2
Programmable
Logic Control
Section 1.3
Table 1-1
Question and Answer IconNeed help?

Do you have a question about the Haskris R Series and is the answer not in the manual?

Summary

Section 1: Temperature Control

ON;OFF Cycling Control

Explains the ON/OFF cycling control for temperature regulation.

Parametric Control

Explains parametric control for temperature regulation.

Programmable Logic Control

Explains programmable logic control for temperature regulation.

Section 2: Indicator Lights

ON;OFF or Power Indicator

Describes the green light indicating unit ON/OFF status.

Liquid Level Indicator

Details indicators for sufficient liquid level or low liquid level.

Liquid Temperature Fault Indicator

Indicates liquid temperature above or below alarm set points.

Refrigerant Pressure High or Building Water Fault

Covers high pressure safety switch and building water fault indicators.

Refrigerant Pressure Low

Explains low refrigerant pressure switch and troubleshooting.

Section 3: Strainers

Suction Strainer Maintenance

Details cleaning and replacement of nylon suction strainers.

Wye Strainer Maintenance

Describes brass wye strainers with removable screens.

Section 4: Filters

Supply Line Particle Filter

Explains the function and replacement of supply line particle filters.

Section 5: Drain Line

Drain Hose and Valve

Describes drain hose connection and plastic valve.

Section 6: Water Quality and Treatment - Indoor Units

Maintaining Water Quality

Guidance on inspecting and maintaining water quality in the tank.

Flushing the System

Procedure for flushing the system with hydrogen peroxide.

Additives for Water Quality

Recommendations for using sodium bicarbonate and propylene glycol.

Section 7: Water Quality and Treatment - Outdoor Units

Additives for Outdoor Units

Details on using glycol mixtures for outdoor operation to prevent freezing.

Maintaining Glycol Solution Quality

Guidance on changing and testing glycol solution quality.

Wye Strainer on Return Fluid Connection

Instructions for cleaning wye strainers on the return fluid connection.

Section 8: Bypass Pressure Relief Valve

Bypass Pressure Relief Valve Types

Describes types of relief valves and their factory preset function.

Valve Setting Procedure

Step-by-step guide for adjusting the bypass pressure setting.

Section 9: Refrigerant Sight Glass and Moisture Indicator

Sight Glass and Moisture Indicator Function

Explains how sight glass indicates refrigerant status and contamination.

Section 10: Cleaning an Air-Cooled Condenser

Air-Cooled Condenser Cleaning

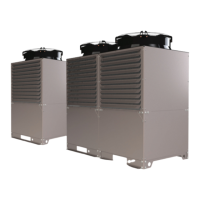
Instructions for cleaning dust and debris from air-cooled condensers.

Section 11: Maintenance Checks

General Maintenance Checks

Overview of checks for water, strainers, filters, and condenser coils.

Maintenance Check Schedule

Recommended schedule for performing maintenance checks after installation.

Section 12: Support

Haskris Support Contact Information

Provides phone, email, and web contact details for technical support.

Product Serial Number Location

Guidance on locating the product serial number for support calls.

Overview

This document outlines the operation and maintenance procedures for Haskris LX-Series, R-Series, WW-Series, and OPC-Series units, focusing on temperature control, indicator lights, strainers, filters, drain lines, water quality, bypass pressure relief valves, refrigerant sight glass, and condenser cleaning.

Function Description

Haskris units are designed to maintain precise fluid temperatures for various applications. They achieve this through different control mechanisms: ON/OFF Cycling Control, Parametric Control, and Programmable Logic Control (PLC). The units can be refrigerated or non-refrigerated, with non-refrigerated units utilizing facility water regulating valves for temperature maintenance.

Important Technical Specifications

The document details three types of electronic temperature controllers:

  • ON/OFF Cycling Control: This controller maintains temperature by cycling refrigeration ON/OFF based on a set point and a differential. The supply fluid temperature will oscillate between the set point and +4°F (+2.2°C) above it.
  • Parametric Control: Refrigeration runs continuously to maintain a steady supply fluid temperature under stable heat load and ambient conditions. Non-refrigerated units use a facility water regulating valve. The PV (Present Value) LEDs display the current fluid temperature, while SV (Set Value) LEDs display the set point. Alarm set points are application-specific and factory-set.
  • Programmable Logic Control (PLC): Refrigeration runs continuously to maintain a steady supply fluid temperature under stable heat load and ambient conditions. Non-refrigerated units use a facility water regulating valve. The main screen displays the present fluid temperature, set point, and other operating conditions. Alarm conditions, including date and time, are reported and logged.

Usage Features

Temperature Control:

  • General: Allow 15-30 minutes for supply temperature to stabilize after adjustment. Select a supply fluid temperature that minimizes condensation using a dew point chart. The unit may "over-cool" if no heat load is applied.
  • ON/OFF Cycling Control Set Point Adjustment:
    1. Press MENU (display shows "OFF").
    2. Press MENU again (display shows current set point).
    3. Adjust set point using UP/DOWN arrows.
    4. Press MENU to save (display shows "OFF").
    5. Press UP/DOWN arrows simultaneously to return to current temperature reading.
    • (Alternative controller) Press and hold SET for 1 second (display shows current set point). Adjust with UP/DOWN arrows. Press SET again to save and return to current temperature.
  • Parametric Control Set Point Adjustment: Adjust set point using UP/DOWN arrows.
  • Parametric Control High/Low Temperature Alarm Adjustment:
    1. Press the alarm button once (PV displays A1.SP, SV displays alarm set point).
    2. Record original setting. Adjust alarm set point using UP/DOWN arrows.
    3. Press the alarm button again (PV may display A2.SP if used). Adjust if necessary.
    4. Press the alarm button to return to normal temperature display.
  • PLC Control Set Point Adjustment:
    1. Press the right arrow to move the blinking cursor after SV.
    2. Press UP/DOWN arrows to adjust the set point value.
  • PLC Control Alarm Condition:
    • If an alarm occurs, the alarm button flashes red.
    • Press the alarm button to view the most recent current alarm.
    • Press UP/DOWN arrows to scroll through current alarms.
    • To view past alarms: Press the circle button until "Alarm Log" is highlighted. Press the right arrow. Press UP/DOWN arrows to scroll through past alarms.

Indicator Lights:

  • ON/OFF or Power: Green light indicates ON/OFF status, or the temperature controller lights up.
  • Liquid Level: A light indicates sufficient liquid level in the tank. "FULL" light must be lit for operation. "Liquid Level Low" indicator must not be lit.
  • Liquid Temperature Fault: Indicates fluid temperature is above or below alarm set points.
  • Refrigerant Pressure High or Building Water Fault: Indicates insufficient air or cooling water flow through the condenser, leading to high refrigerant pressure. A safety switch stops the unit and lights this indicator. The high-pressure switch can be manually reset after pressure decreases.
  • Refrigerant Pressure Low: Indicates low compressor suction line pressure, potentially due to a refrigerant leak. This may appear on startup and is normal. If persistent, it may require a refrigeration technician. To address on startup, turn the system power ON, wait for the compressor to start, and cycle the system OFF/ON 3-4 times before permanently switching ON.

Bypass Pressure Relief Valve:

  • Units with positive displacement or turbine pumps include one of four types of modulating bypass pressure relief valves.
  • The valve is factory-preset to limit supply pressure to the application.
  • It diverts flow when system running pressure approaches the bypass pressure setting.
  • The bypass pressure setting must be above the pressure drop of the application and closed-loop piping.
  • Running pressure increases if a restriction develops (e.g., closed valve, particle accumulation).
  • Valve Setting Procedure:
    1. Restrict the supply line (close hand valve or kink hose) to find current pressure setting.
    2. Remove brass cap, loosen locknut.
    3. Adjust screw: inward (clockwise) to increase pressure, outward (counterclockwise) to decrease. Do not remove the screw completely.
    4. Tighten locknut, replace cap.

Refrigerant Sight Glass and Moisture Indicator:

  • Some refrigerated units include a liquid line sight glass and moisture indicator.
  • Helps identify low refrigerant or contamination.
  • Should be clear and indicate "DRY" when the compressor is running.
  • Constant bubbles indicate low refrigerant.
  • "WET" indicates contaminated refrigerant.
  • Turbulence and bubbles are normal immediately after compressor ON/OFF.

Maintenance Features

Strainers:

  • Some units have a nylon suction strainer in the tank to prevent pump damage. In LX-Series, it's threaded into a fitting at the bottom of the tank.
  • Regularly check for debris or biological growth. "Slippery" or "slimy" mesh indicates biological growth; flush the system.
  • Replace strainer with significant debris or biological growth.
  • Dirty strainers can cause pump cavitation (rapid pressure fluctuations), which is not covered under warranty.
  • Replacement strainers are available at shop.haskris.com or by phone (+1-847-956-6420).
  • Some systems have brass wye strainers in piping with removable screens for cleaning.

Filters:

  • Some units include a supply line particle filter.
  • Record running fluid pressure at startup with a clean filter.
  • Running pressure can be read from the gauge near the pump or the controller display.
  • Replace the filter when pressure increases 5-6 psi (0.3-0.4 bar) above the startup running fluid pressure.
  • Replacement filters are available at shop.haskris.com or by phone (+1-847-956-6420).

Drain Line:

  • Units include a drain hose connected to the bottom of the tank.
  • Some units also include a plastic valve and hose barb connection.

Water Quality and Treatment (Indoor Units):

  • Maintaining Water Quality:
    • Periodically inspect the tank for clear water and no debris.
    • Drain and replace water regularly (minimum once or twice per year).
  • Flushing the System:
    • Flush if biological growth, significant pH change, or debris accumulation is apparent.
    • To flush the entire system while connected to the application, confirm hydrogen peroxide is approved by the OEM. If not, disconnect the application and flush only the unit.
    • To flush only the unit, connect a short hose from the Supply Connection to the Return Connection.
    • Flushing Procedure:
      1. Add 1 pint (0.5 L) of 3% hydrogen peroxide per 15 gallons (57 L) of water to the tank.
      2. Circulate for 20-30 minutes.
      3. Use the drain hose to drain the system.
      4. Refill with clean, potable, distilled water.
      5. Repeat as necessary.
  • Additives:
    • Water absorbs CO2, reducing pH. Add sodium bicarbonate to raise pH if needed.
    • If biological growth persists, use laboratory/food grade (99% pure) propylene glycol to create a 10% solution.
    • Haskris recommends additives only as a last resort.

Water Quality and Treatment (Outdoor Units):

  • Additives:
    • For outdoor operation, a mixture of potable distilled water and laboratory/food grade propylene or ethylene glycol is required to resist freezing.
  • Maintaining Water Quality:
    • Glycol solution should be changed periodically based on environmental conditions.
    • Periodically use a pH test strip; change solution if pH is outside 7-10. If pH is below 7, perform a line flush.
    • Periodically use a refractometer to check glycol percentage.
    • Increase glycol percentage by adding pure glycol of the same kind used previously.
    • Decrease glycol percentage by adding potable distilled water.
  • Wye Strainer:
    • Some units have a wye strainer on the return fluid connection.
    • Clean the wye strainer every time the glycol solution is changed or return pressure increases 10 psi or more.

Cleaning an Air-Cooled Condenser:

  • Air-cooled units collect dust and debris, restricting airflow and reducing heat transfer.
  • Turn the unit OFF. Use a vacuum to collect debris.
  • Use a brush to loosen compacted debris.

Maintenance Checks Schedule:

  • After new installation: Every 2 weeks for 3 months.
  • Beyond 3 months: 1-2 times per year.
  • Checks include:
    • Inspect water in the tank (clean, proper level).
    • Perform system or line flush if debris or biological growth is observed.
    • Inspect and clean or replace strainers and filters.
    • Clean air-cooled condenser coils and fins.

Support:

  • For questions, problems, or technical support, contact Haskris support:
    • Phone: +1-847-956-6420
    • Email: service@haskris.com
    • Web: www.haskris.com
  • Have the product serial number available (found on a panel near supply/return connections or on the main electrical enclosure).

Haskris R Series Specifications

General IconGeneral
BrandHaskris
ModelR Series
CategoryChiller
LanguageEnglish

Related product manuals