"'( (#"
10
Form No. DHLM-1010
<AB/::7<5B63(@/1
(C@<>=E3@#/B;=C<B7<5:=1/B7=<034=@37<AB/::/B7=<=4
C<7B
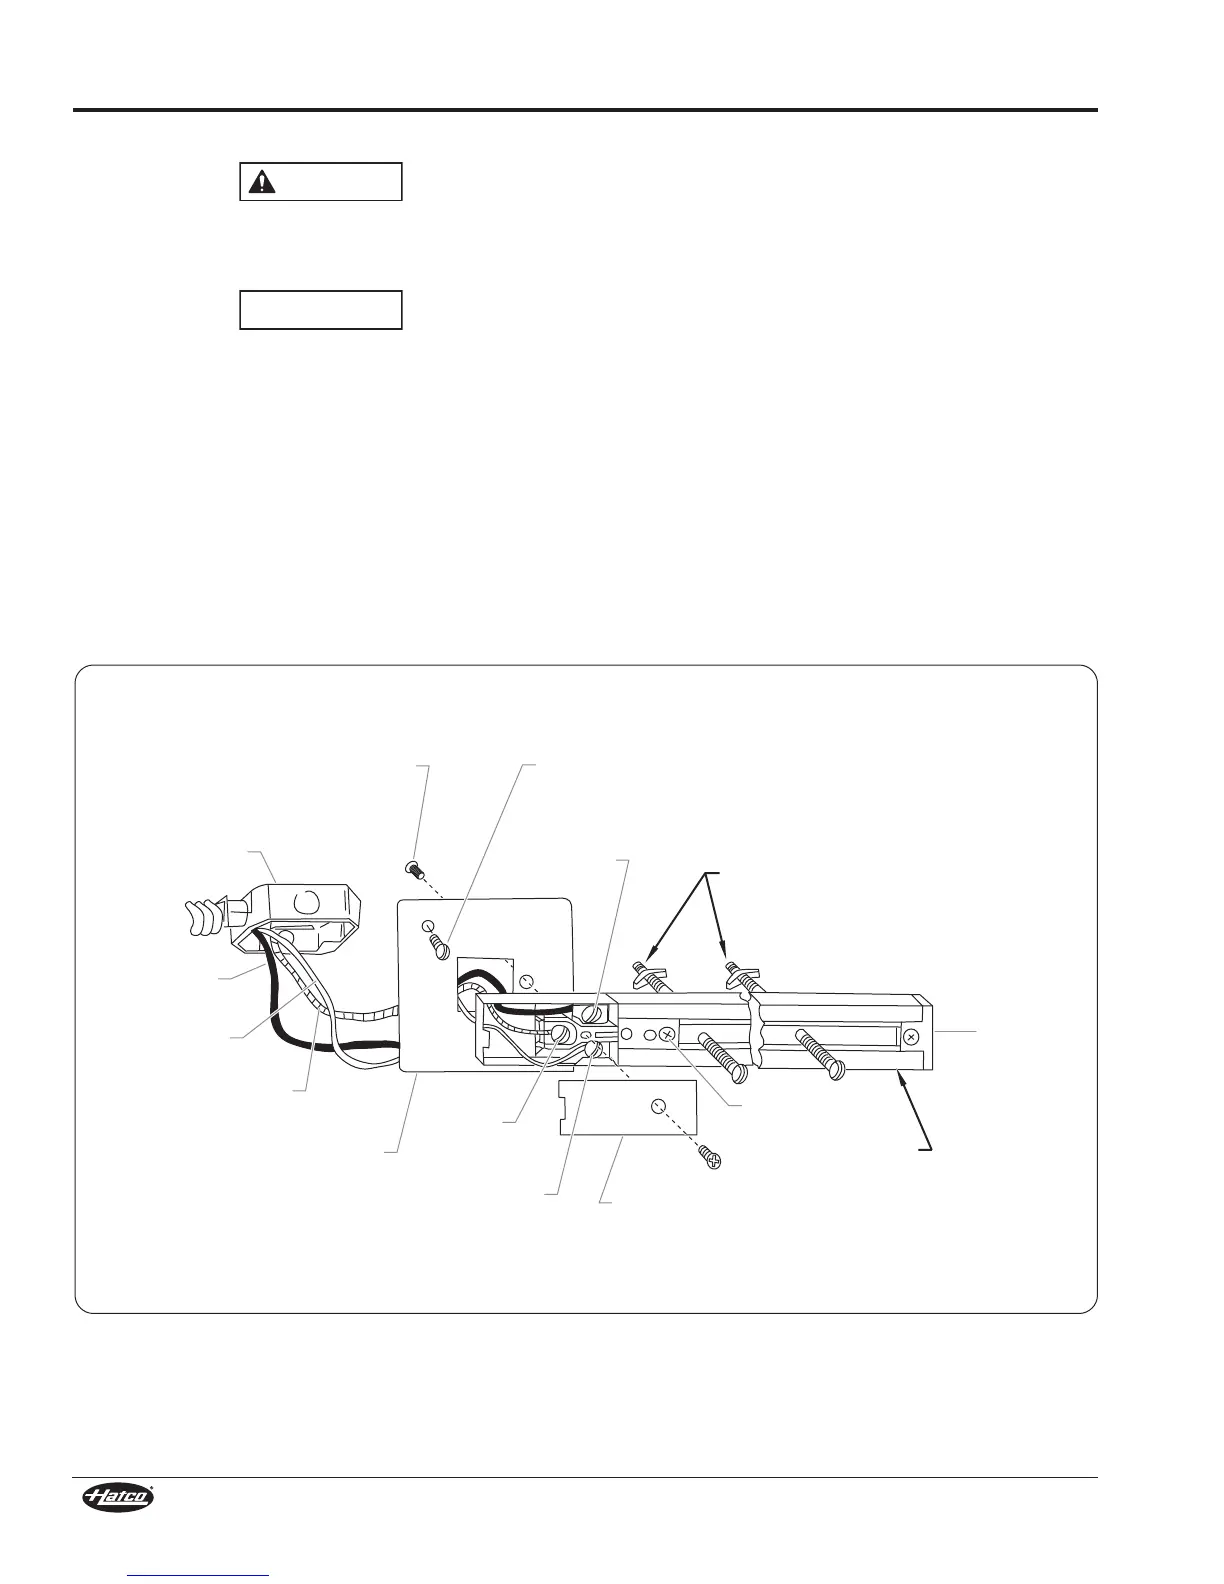
1. Punch out the proper knockout holes in the ceiling plate.
=<=B2/;/53B63A>317/:A;==B6>:/AB7147<7A6>7313=<
;3B/:137:7<5>:/B3E63<23B3@;7<7<5:=1/B7=<=4>@=>3@
9<=19=CB6=:3A
2. Remove the flat head screw(s) from the back of the live
end fitting and use them to fasten the ceiling plate to the
live end fitting.
3. Remove the cover from the live end fitting. Place Trac with
the ceiling plate attached over the junction box and mark
the position of the Trac mounting holes on the ceiling or
wall.
4. Drill the mounting holes in the ceiling or wall large enough
for the supplied toggle bolts and install the Trac using the
toggle bolts. If Trac is to be mounted on a solid surface,
use #8 screws (not supplied) instead of toggle bolts.
5. Fasten the ceiling plate to the junction box with two screws.
Pull the wires from the junction box through the open hole
in the live end.
6. Cut and strip the wire leads (3/8” strip) and fasten to the
screw terminals in the live end fitting. Push the excess
wires back into the junction box and fasten the ground wire
to the green ground screw.
7. Replace the cover on the live end and tighten the screw.
8. Install the lamp(s) in the desired location(s) along the Trac.
To install the lamp(s):
a. Pull back the locking tab on the track pendant and insert
the pendant into the Trac.
b. Rotate the pendant approximately 90° until the pendant
locks into position.
Live End Cover
Setscrew
Ground Contactor
Slide
Black Wire L1
(Hot)
White Wire
(Neutral)
Green Wire
(Ground)
Ceiling Plate
Dead End
Fitting
Nickel Plated
Terminal
Green
Ground
Screw
Junction Box
Mounting
Screw
Flat Head Screw
(Ceiling Plate to Live End Cover)
Junction Box
Brass
Terminal
To mount Trac: Drill holes in ceiling or wall.
Attach Trac with toggle bolts (or screws if
surface is solid material).
Figure 9. Installing the Trac
 Loading...