"'( (#"
Form No. DHLM-1010
7
AA3;0:G
Models with Mounting Styles C, CT, R, and RT are cord hung
fixtures and are shipped fully assembled and ready for
installation.
All other models will require some assembly before mounting.
Refer to the appropriate assembly procedure below for each
Mounting Style.
NOTE: If the shade comes equipped with plastic nut and nipple
in stem mounting hole, both nut and nipple must be
removed before installing stem to shade.
(C@<>=E3@#/B;=C<B7<5:=1/B7=<034=@37<AB/::/B7=<=4
C<7B
AA3;0:7<5/<'(!=C<B)<7B
1. Feed the wires from the lamp through the stem. Screw the
stem into the coupling on the lamp. Tighten securely.
2. Open the track pendant side access panel and feed the
wires up into the pendant enclosure.
3. Screw the stem into the track pendant and tighten securely.
The stem should not rotate after it is tightened.
4. Following the instructions supplied with the pendant,
connect together the white wire leads, connect together
the black wire leads, and connect together the green
ground wires using the provided wire nuts.
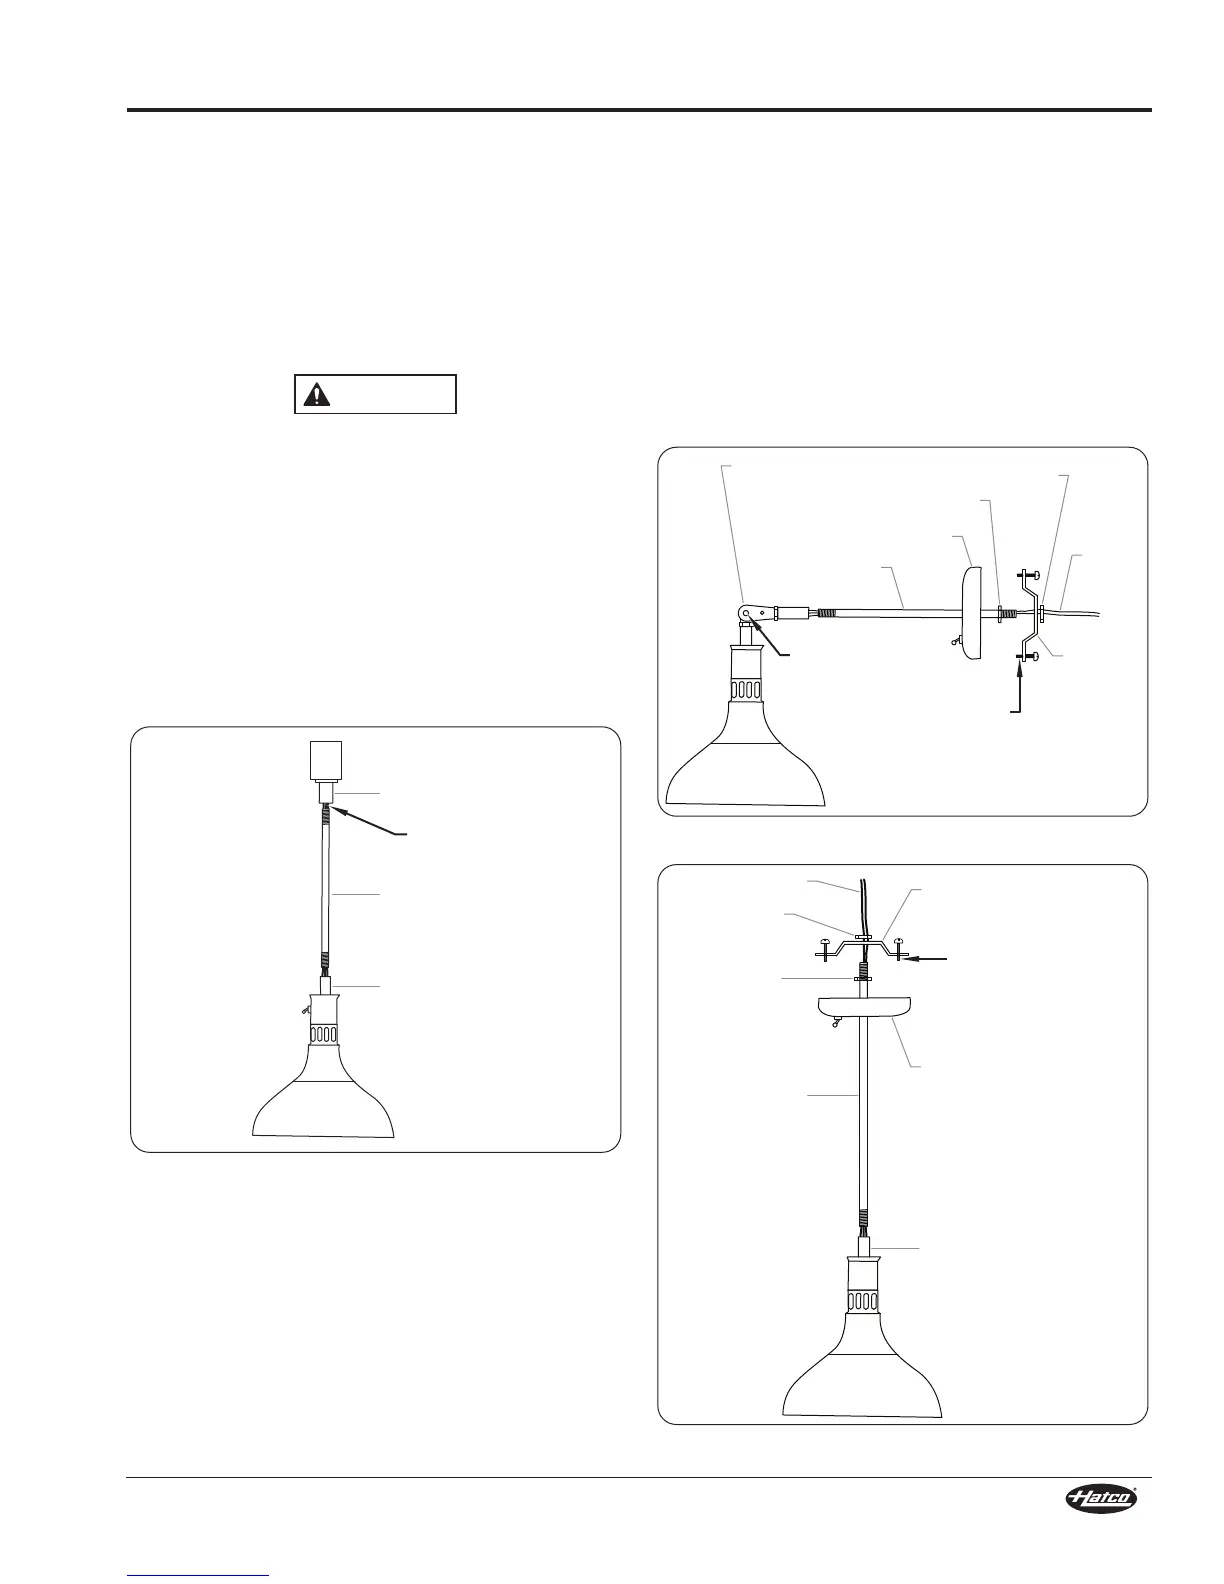
Figure 4. Assembling an ST Mount Unit
Track Pendant
Wires
Stem
Coupling
AA3;0:7<5/<$=@'!=C<B)<7B
1. Feed the wires from the lamp through the stem. Screw the
stem into the coupling on the lamp and tighten securely. If
the unit is equipped with a pivot mount, straighten the pivot
to help ease feeding the wires.
2. Place the canopy on the stem.
3. Thread one jam nut onto the stem and tighten until it
bottoms out on the threads. Place the mounting bracket on
the stem until it rests on the jam nut. Thread the second
jam nut onto the stem and tighten it against the mounting
bracket.
4. If the unit is equipped with an upper switch, connect the
black wire from the lamp to one of the black wires on the
switch. Use the included wire nut.
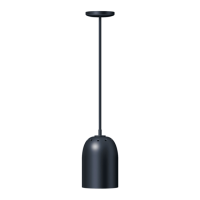
Figure 5. Assembling A and P Mount Units
Figure 6. Assembling an S Mount Unit
Mounting
Bracket
Canopy
Leave 1/4″
exposed for
canopy mounting.
Jamnut
Wire Leads
Jamnut
Stem
Coupling
Stem
Pivot (”A” mount
shown, “P” mount
pivot is at canopy.)
Mounting
Bracket
Wire
Leads
Loosen screw
to adjust pivot.
Leave 1/4″ exposed
for canopy mounting.
Canopy
Jamnut
Jamnut