HDWCEM1-0822
7
SPECIFICATIONS
Food Holding Capacity
A standard drawer has the following capacity:
Dinner Rolls: 6–8 dozen
Ribs: 11–14 kg (25–30 lbs.)
Potatoes: 3–3-1/2 dozen
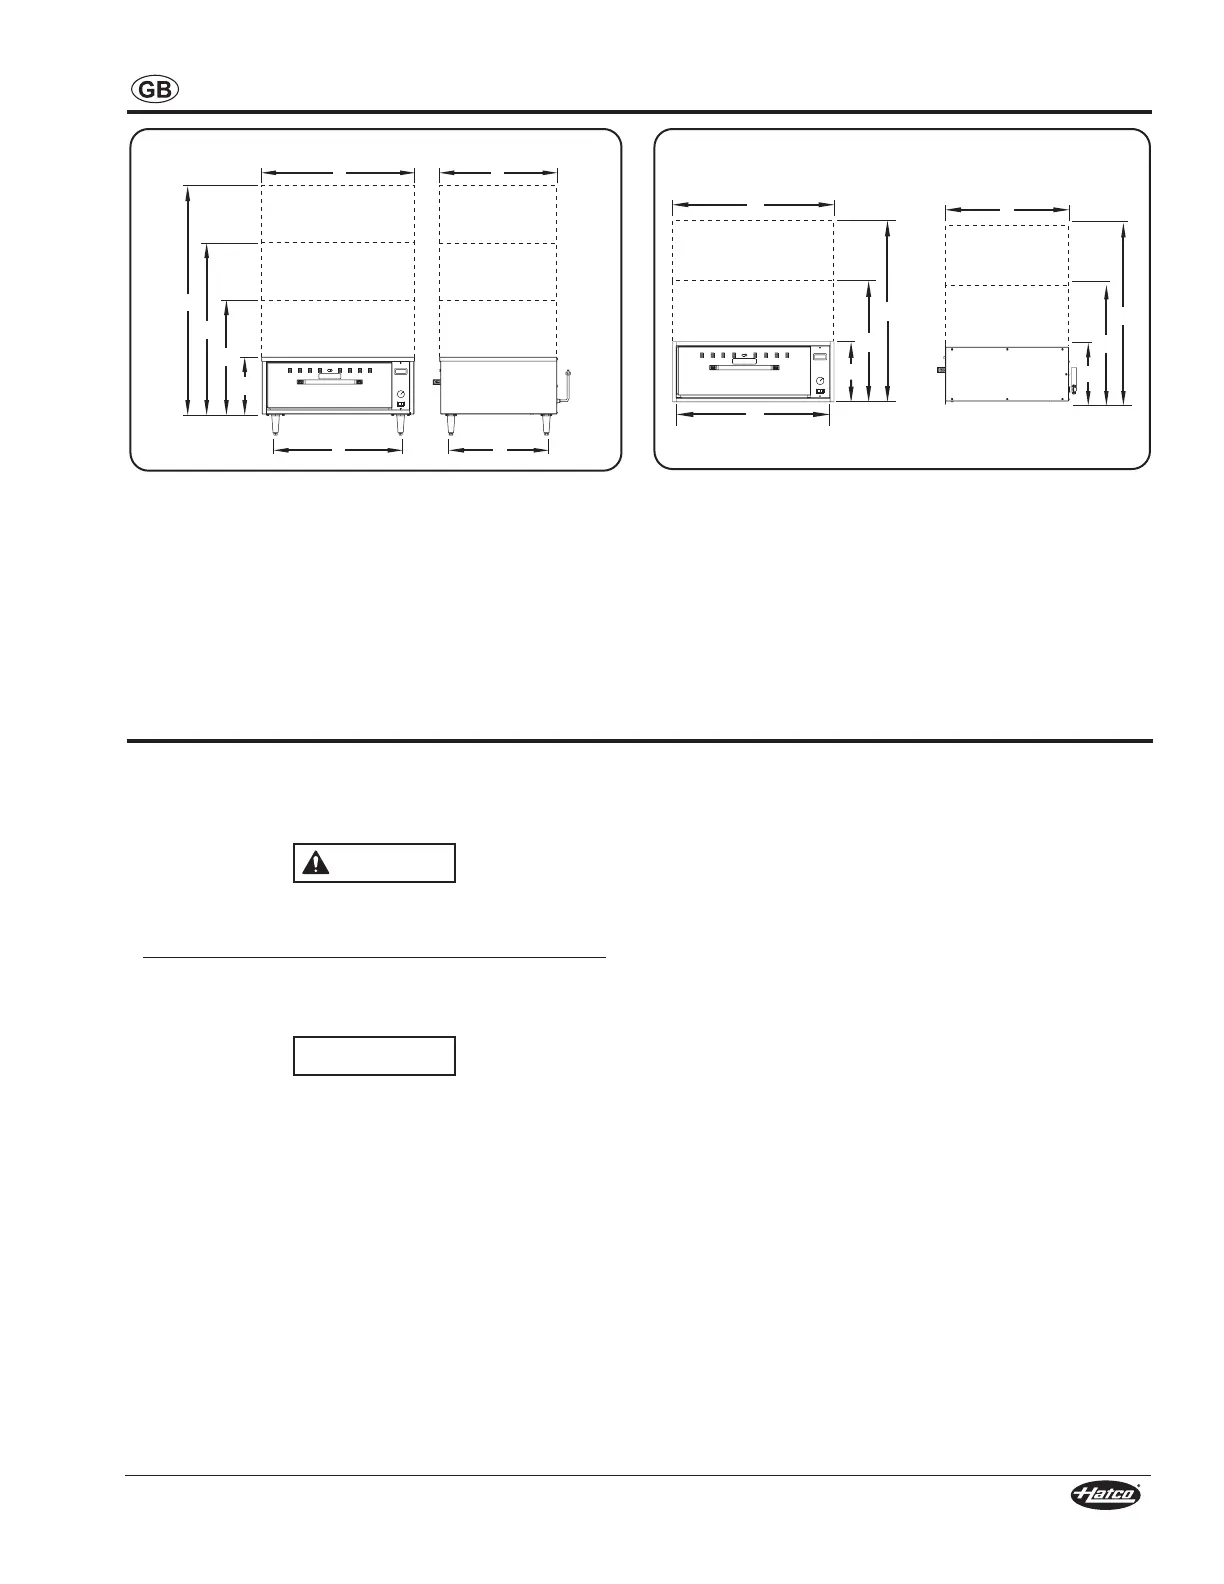
A
B
D E
C
C
C
C
Front View Side View
HDW-x and HDW-xN Dimensions
A
B
C
C
C
D
E
E
E
Front View
Side View
HDW-xB, HDW-xBN, and HDW-xBR Dimensions
INSTALLATION
General
Hatco Drawer Warmers are shipped with most components pre-
assembled. Care should be taken when unpacking the shipping
carton to avoid damage to the unit and components enclosed.
ELECTRIC SHOCK HAZARD: Unit is not weatherproof.
Locate unit indoors where ambient air temperature is a
minimumof21°C(70°F).
FIREHAZARD:Locateunitaminimumof25mm(1″)from
combustible walls and materials. If safe distances are not
maintained, combustion or discoloration could occur.
NOTICE
Do not lay unit on the front or back side. Damage to the
unit could occur.
1. Remove the unit from the carton.
NOTE: To prevent delay in obtaining warranty coverage,
complete online warranty registration. See the
IMPORTANT OWNER INFORMATION section for
details.
2. Remove tape and protective packaging from all surfaces of
unit.
3. Make sure the desired installation location is appropriate.
• Locate the unit in an area where the ambient air
temperature is constant and a minimum of 21°C
(70°F). Avoid areas that may be subject to active air
movements or currents (i.e., near exhaust fans/hoods,
air conditioning ducts, and exterior doors).
• Make sure the unit is located on solid, level flooring or in
sturdy cabinetry.
• Make sure the unit is at the proper height in an area
convenient for use.
4. Install the unit. Refer to the appropriate installation
procedure in this section.
Installing HDW-x and HDW-xN Models
HDW-x and HDW-xN models are freestanding units that require
the installation of legs or casters as well as anti-tip protection
before operation.
1. Remove the plastic bag containing the four legs or casters
from the drawer of the unit.
2. Carefully lay the unit on its side (requires two people).
3. Install each leg or caster. Refer to the appropriate procedure
in this section.
4. Return the unit to its upright position (requires two people).
For units on legs — If the unit is not level or rocks, turn the
adjustable tip/flange of the appropriate leg to level the unit.
5. Install the appropriate anti-tip protection. Refer to the
procedure in this section.
• Make sure the unit is level before fastening leg flanges
to the floor in the anti-tip protection procedure.
continued...
 Loading...