HDWCEM1-0822
13
OPTIONS AND ACCESSORIES
Digital Temperature Control
The Digital Temperature Control is factory installed and takes
the place of the standard drawer warmer control panel. Use the
following procedure to operate the Digital Temperature Control.
Startup
1. Move the Power ON/OFF (I/O) switch(es) to the ON
position.
• The corresponding digital TEMPERATURE Controller
will energize and the current temperature of the drawer
or “LO” will appear on the display. “LO” indicates the
drawer temperature is below 21°C(70°F).
2. Press the key on the digital TEMPERATURE
Controller two times to verify the setpoint temperature.
See the RECOMMENDED SETTINGS chart on the control
panel or the FOOD HOLDING GUIDE in this manual.
• The setpoint temperature will be shown for 10
seconds. After 10 seconds, the display will revert to
the current temperature of the unit. To change the
setpoint temperature, refer to “Changing the Setpoint
Temperature” in this section.
NOTE: The digital TEMPERATURE controller is pre-set to a
setpoint temperature of85°C (185°F)at thefactory.
Once the setpoint temperature is changed, the new
setpoint temperature will remain in memory until it is
changed again. The minimum to maximum setpoint
temperaturerangeis21°C(70°F)to93°C(200°F).
BURN HAZARD:
• Some exterior surfaces on the unit will get hot. Use
caution when touching these areas.
• Use caution when opening drawer. Hot air escapes
when drawer is open.
3. Allow unit 15–20 minutes to reach operating temperature.
Shutdown
1. Move the Power ON/OFF (I/O) switch to the OFF (O)
position. The digital temperature control and heated
drawer will shut off.
Changing the Setpoint Temperature
Use the following procedure to change the setpoint temperature.
1. Press the key three times. The current setpoint
temperature will be shown on the TEMPERATURE
display (“SP” will be displayed after the second press).
2. Press the key or key within 10 seconds to change
the setpoint temperature.
3. Press the key to lock in the new setpoint temperature.
The TEMPERATURE display will go blank for two
seconds to show that the new setting has been accepted.
NOTE: After 10 seconds of inactivity during the programming
process, the controller will exit programming mode
automatically without saving any changes.
Changing Fahrenheit and Celsius Setting
Use the following procedure to change between Fahrenheit and
Celsius on the display.
1. Press the key once. Either an “F” for Fahrenheit or “C”
for Celsius will be displayed.
2. Press the key or key within 10 seconds to change
from “F” (Fahrenheit) and “C” (Celsius).
3. Press the key three times to lock in the new setting.
The TEMPERATURE display will go blank for two seconds
to show that the new setting has been accepted.
NOTE: After 10 seconds of inactivity during the programming
process, the controller will exit programming mode
automatically without saving any changes.
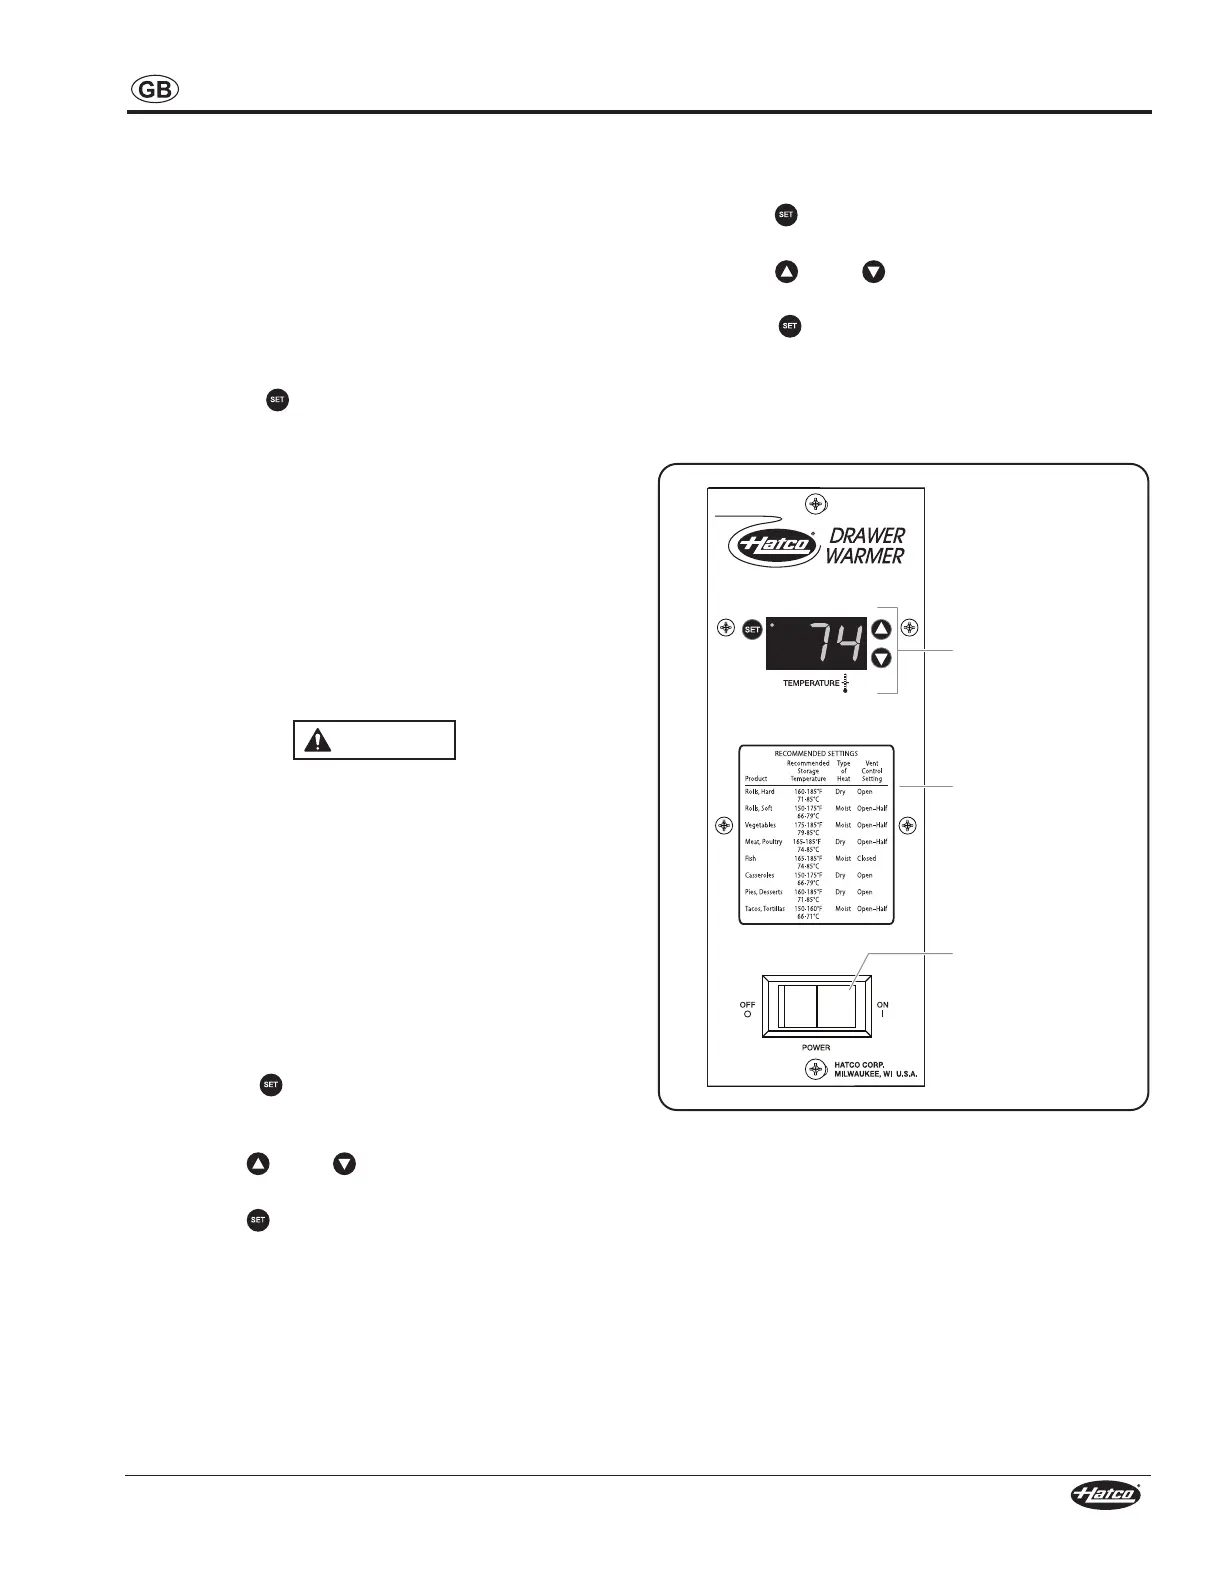
Digital
Temperature
Controller
RECOMMENDED
SETTINGS Chart
POWER ON/OFF
(I/O) Switch
Control Panel with Digital Temperature Controler
 Loading...