HDWCEM1-0822
15
Changing Between Celsius and Fahrenheit
Use the following procedure to change the air temperature unit
of measure between Celsius and Fahrenheit.
1. Move the Power I/O (on/off) switch to the I (on) position.
• The unit will turn on and the touchscreen controller will
energize and show the Home Screen.
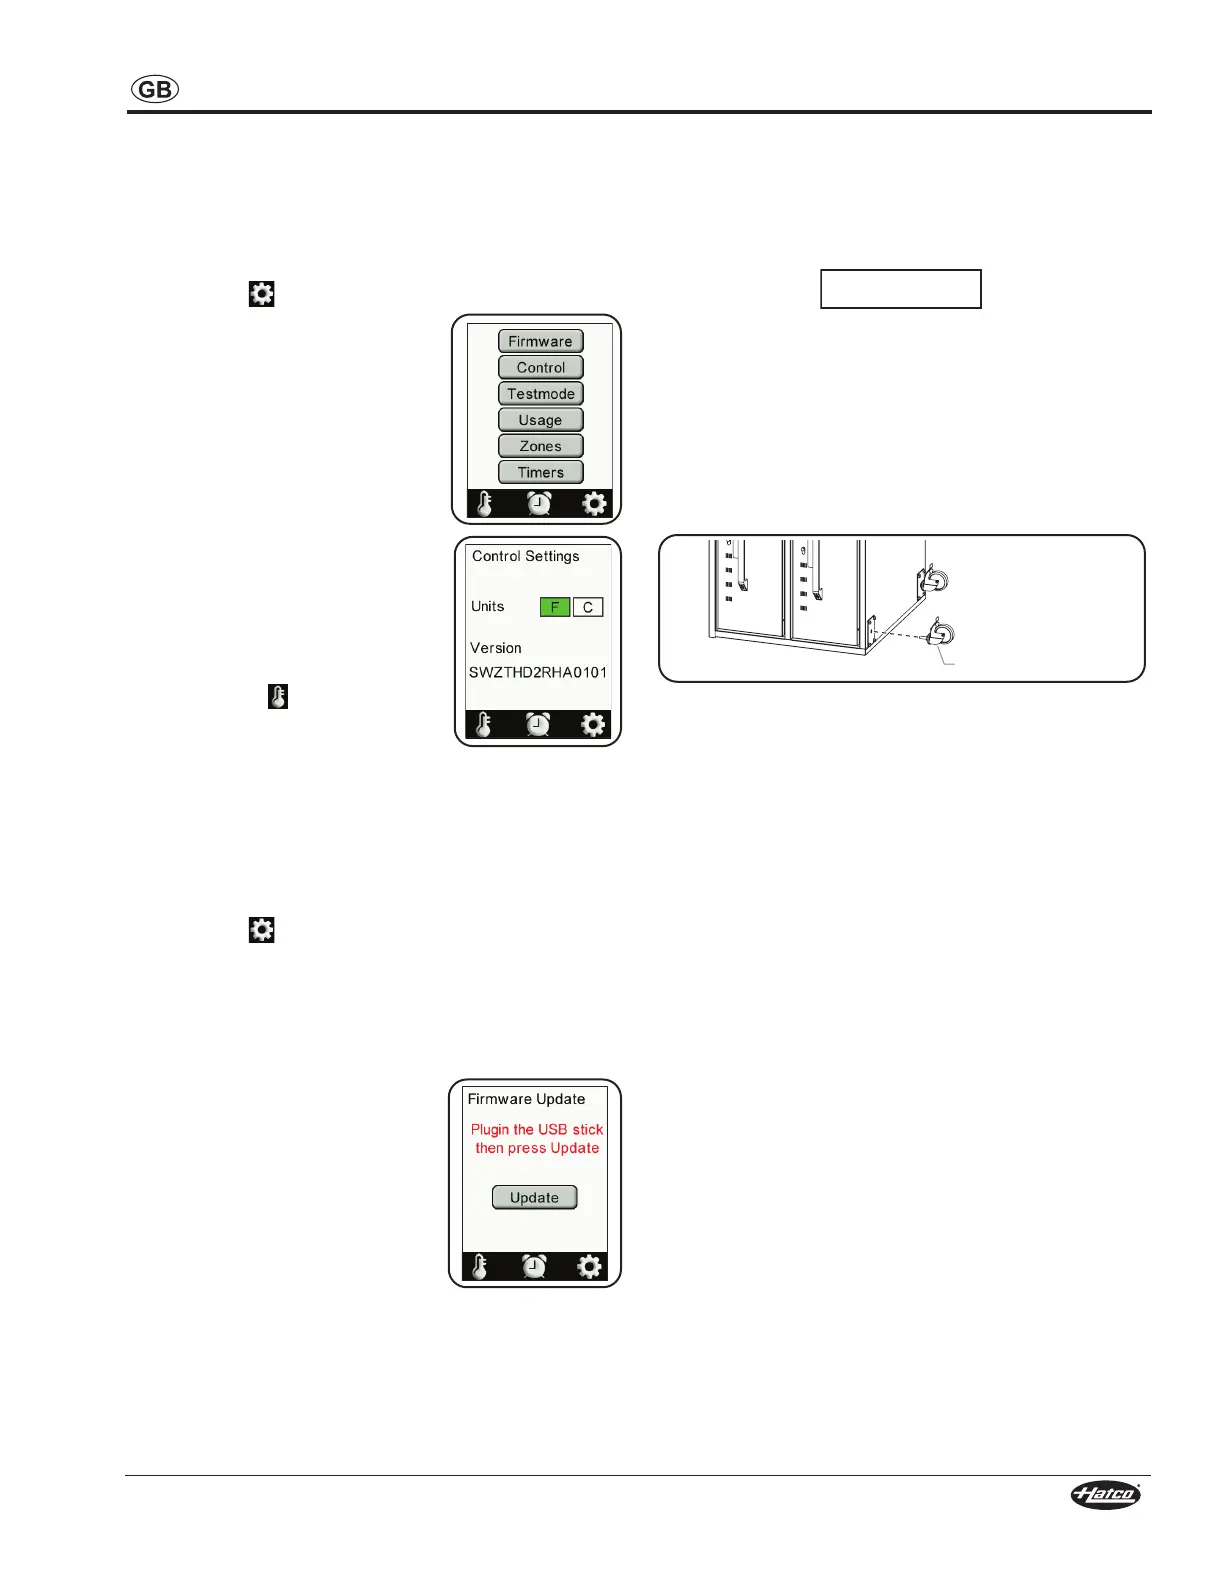
2. Touch the key.
• Enter the password [2 4 8] using
the number keys that appear.
• The Service screen will appear
on the display.
3. Touch the CONTROL key on the
Service screen to access the
Control Settings screen.
4. Choose the desired unit of measure
on the “Units” line:
• Touch the ”F” box to select
Fahrenheit.
• Touch the ”C” box to select
Celsius.
NOTE: The box for the active unit of
measure is highlighted in green.
5. Touch the key to save the
settings and return to the Home
Screen.
Updating the Firmware
Use the following procedure to perform a firmware update on
the touchscreen controller.
1. Move the Power I/O (on/off) switch to the I (on) position.
• The unit will turn on and the touchscreen controller will
energize and show the Home Screen.
2. Touch the key.
• Enter the password [2 4 8] using the number keys that
appear.
• The Service screen will appear on the display.
3. Touch the FIRMWARE key on the Service screen to
access the Firmware Update screen.
4. Insert the USB drive into the USB
port next to the controller, and touch
the UPDATE key on the Firmware
Update screen.
• The update will begin. When
complete, the touchscreen
controller will restart and show
the Home Screen.
76mm(3″)LockingCasters
Use the following procedure to install casters onto the bottom
of the unit.
NOTICE
Do not lay unit on the front or back side or damage to the
unit could occur.
1. Remove any pans from the drawers of the unit.
2. Carefully lay the unit on its left or right side (requires two
people).
3. Remove the legs, if installed.
4. Install the caster into a hole where a leg was removed.
Tighten securely.
5. Repeat steps 3 and 4 for the remaining three casters.
6. Return the unit to the upright position (requires two
people).
51mm(2″)SwivelCasters
102mm(4″)LockingCasters
127mm(5″)LockingCasters
152mm(6″)AdjustableLegs
one, two, three, and four drawer freestanding units. 152 mm
Oversized Drawer
An oversized drawer and pan is available as a factory installed
option for HDW-x and HDW-xB models. The pan measures
Biscuit Drawer
A biscuit drawer is available as a factory installed option for
HDW-x and HDW-xB models. Biscuit drawers accommodate
not included).
OPTIONS AND ACCESSORIES
 Loading...