To assemble the Cab to the LT322 and LT324 you will require Cab Code 917P and Fitting Kit Code 919R.
Check that all parts have been correctly supplied. Check against the Delivery Check List on page 1.10-1.11.
Note: Some parts of the fitting kit are pre-assembled.
WARNING: PREVENT ACCIDENTS - It is essential to have a suitable lifting device with a safe capacity of 350kg.
- Always wear eye protection when drilling.
The cab must be fitted by an authorised Hayter dealer.
Read and understand the assembly instructions before proceeding. Refer to the Spare Parts List and the LT322 or LT324
Operators Manual and proceed as follows:
1. Lower all cutterheads to the ground.
2. Apply the parking brake, switch off the engine and
remove the ignition key.
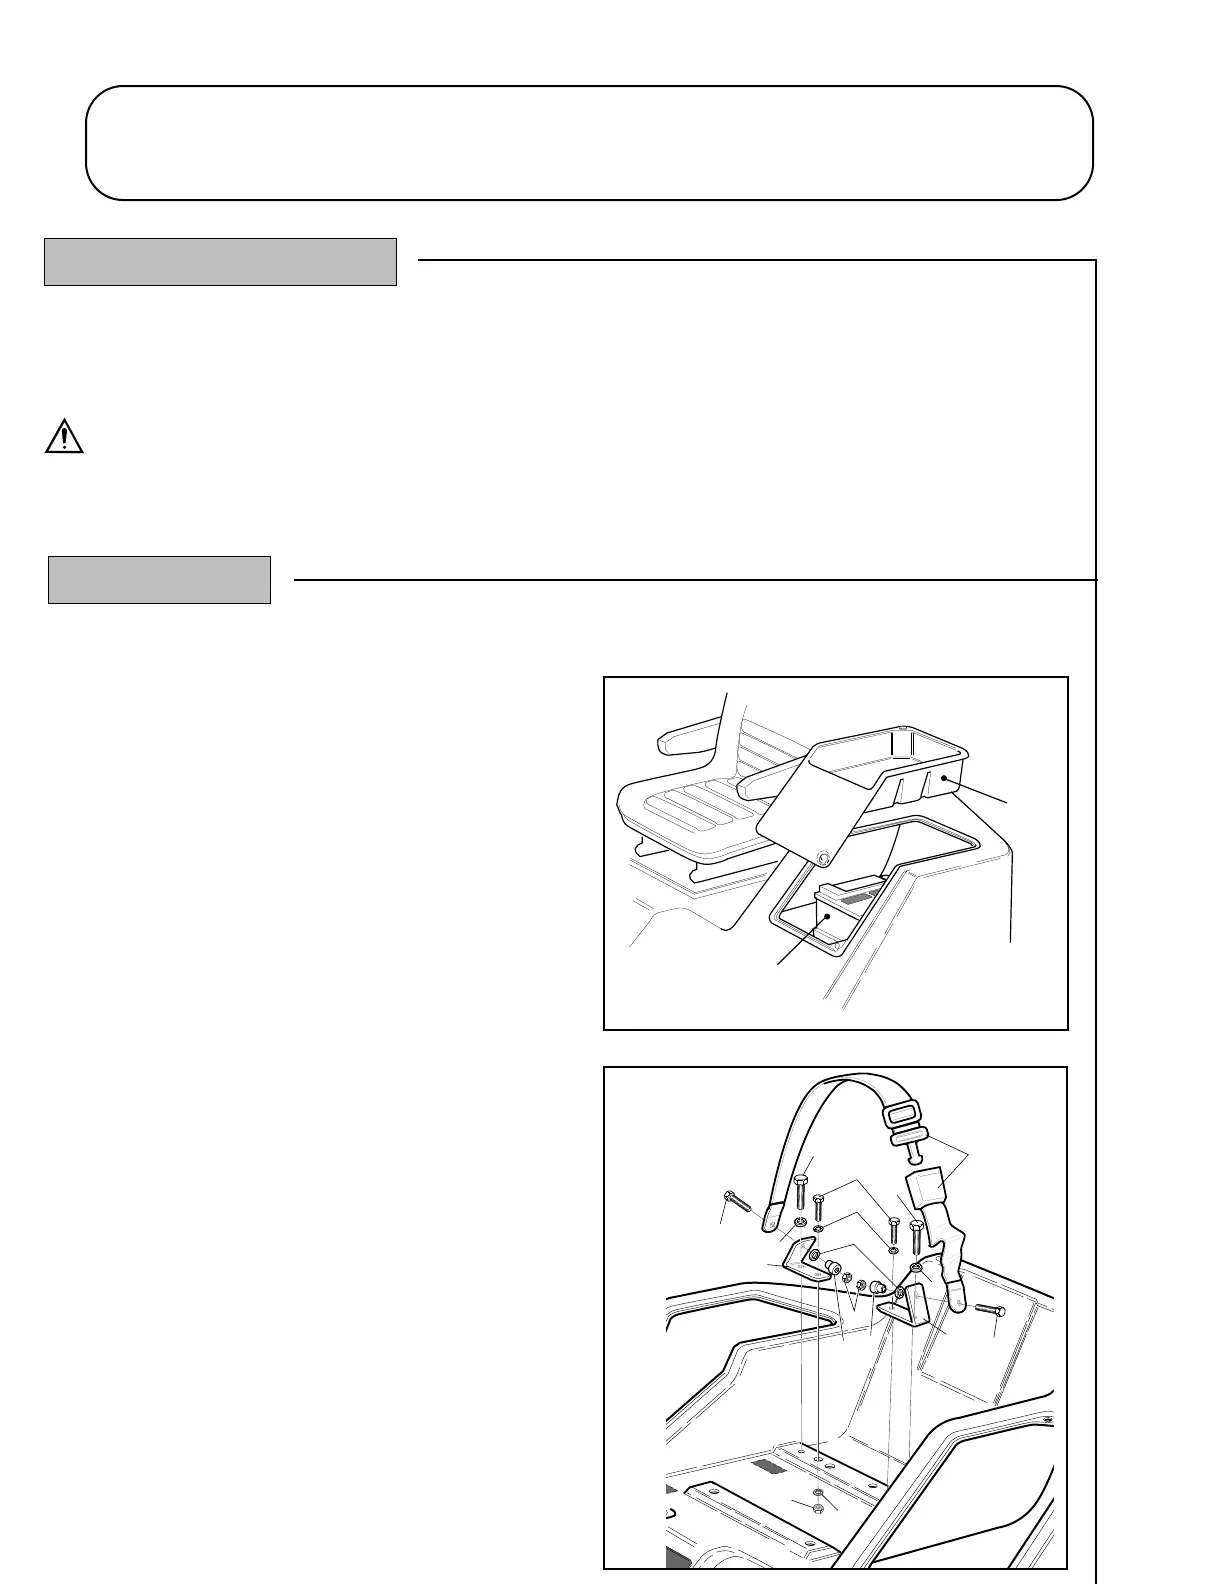
3. Remove the plastic tool tray from the L.H. side of the
platform. Refer - fig. 1.
4. Disconnect the battery terminals, first the negative (-ve)
and then the positive (+ve).
5. Remove the M16 securing bolts and washers (items A,
B) and raise the operator platform. Refer - fig 2.
6. Carefully align each seat belt bracket (items 21) with
the holes in the platform and secure with M10 fasteners
(items 27,13,14) and torque to 43Nm. Ensure that the
M16 bolts will fit through the holes in the brackets and
the platform.
Attach the seat belts to the seat belt brackets with the
7/16” fasteners (items 22, 23, 24, 25, 26) and torque to
60Nm. Ensure that long spacer (item 23) and the short
spacer (item 24) are assembled to the correct sides.
Refer - fig. 2.
1.14 1.14
CAB GENERAL ASSEMBLY
INTRODUCTION
ASSEMBLY
 Loading...