15
en
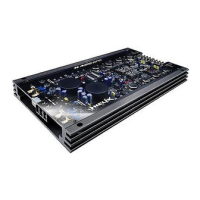
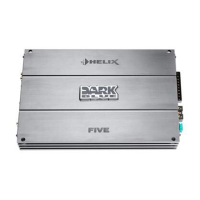
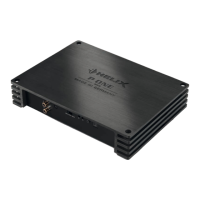
Hardware conguration
Congure the HELIX P ONE MK2 as follows
Caution: Carrying out the following steps will re-
quire special tools and technical knowledge. In or-
der to avoid connection mistakes and / or damage,
ask your dealer for assistance if you have any
questions and follow all instructions in this manual
(see page 13). It is recommended that this unit will
be installed by an authorized HELIX dealer.
1. Connecting the lowlevel line inputs
These two lowlevel line inputs can be connect-
ed to signal sources such as head units / radi-
os / DSPs / DSP ampliers using appropriate
cables. The input sensitivity for all channels
can be optimally adapted to the signal source
using the gain control (see page 16, point 6).
It is not mandatory to use both lowlevel line in-
puts. If only one channel will be connected the
input mode switch must be set to the appropri-
ate input channel used (see page 15, point 3).
Note: It is possible to use the optical input and
the lowlevel line input at the same time if the
SPDIF Direct In function is deactivated (see
page 15, point 4).
2. Connecting a digital signal source in
SPDIF format
If you have a signal source with an optical digi-
tal output you can connect it to the amplier
using the appropriate input. The sampling rate
must be between 28 and 96 kHz. The input
signal is automatically adapted to the internal
sample rate.
It is not mandatory to use both input signals.
If only one signal should be used, the input
mode switch must be set to the appropriate
input channel (see page 15, point 3).
Important: The signal of a digital audio
source normally does not contain any informa-
tion about the volume level. Keep in mind that
this will lead to full level on the outputs of the
HELIX P ONE MK2. This may cause severe
damage to your speakers. We strongly rec-
ommend to only use volume controlled audio
sources! For example DSP devices with opti-
cal signal output like P SIX DSP ULITMATE,
BRAX DSP etc.
Note: The HELIX P ONE MK2 can only handle
uncompressed digital stereo signals in PCM
format with a sample rate between 28 kHz and
96 kHz and no MP3- or Dolby-coded digital
audio stream!
Note: It is possible to use the optical input and
the lowlevel line input at the same time if the
SPDIF Direct In function is deactivated (see
page 15, point 4).
3. Conguration of the ampliers input mode
After connecting the desired signal inputs, the
amplier must be adapted to the number of
used inputs.
Mono A: Select this switch setting if only the
signal of channel A should be used as input
signal. For example, if only a mono signal is
provided for subwoofer applications.
Mono B: Select this switch setting if only the
signal of channel B should be used as input
signal. For example, if only a mono signal is
provided for subwoofer applications.
Stereo: Select this switch setting if both input
channels (A and B) are used. In this mode an
optimized sum signal is generated by the input
signals of the channels A and B.
Note: The setting of the switch aects both
the lowlevel line inputs as well as the optical
digital input.
4. Conguration of the digital signal input
For best possible sound performance, the
SPDIF Direct In switch (page 14, point 5) can
be used to bypass the input stages of the
P ONE MK2 and to route the audio signal from
the digital input (Optical Input A/B) directly and
without any detours to the output stages of the
amplier.
On: Activates direct signal routing for best
sound performance.
O: Select this switch position if you need the
gain control for adjusting the input sensi-
tivity (by default).
Note: The switch only aects the signal rout-
ing of the optical input. If the switch is set to
“On”, the lowlevel line inputs as well as the
gain control are without function!
 Loading...