5
new baby unit, follow the procedure below:
Note : Camera icon with " "means it is well registered. You should select and pair with the
camera icon without " " sign.
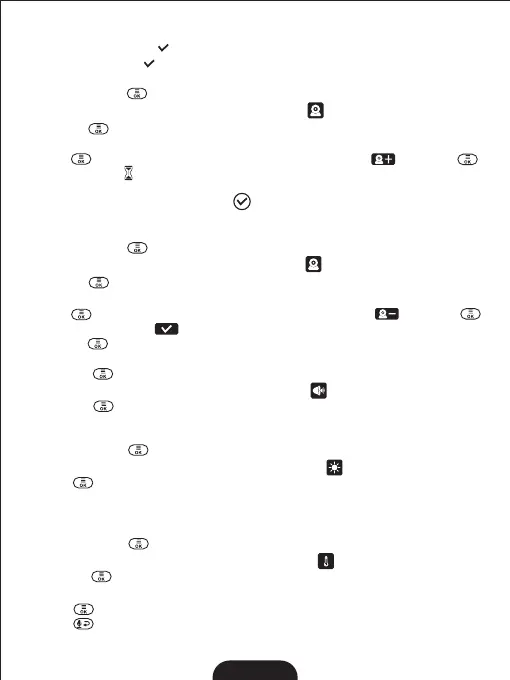
8.1 .1 ADD CAMERA
1. Press the MENU key then the menu will pop up;
2. Press the◀/▶/▲/▼keyuntilthecameraicon isselectedbyredbox;
3. Press OK key to enter into sub-menu, then press ▲/▼ key to select your desired
camera;
4. Press key enter into sub-menu; Press ▲ / ▼ key to select then press key;
5. When the icon … displayed on the LCD screen, press the PAIR button on the back of
camera;
6. Once paired, Successful pairing icon shows on the LCD screen;
7. If fails, repeat the above steps.
8.1.2 DELETE CAMERA
1. Press the MENU key and the menu will pop up;
2. Press the◀/▶/▲/▼keyuntilthecameraicon isselectedbyredbox;
3. Press OK keytoenterintosub-menu,thenpress▲/▼ key to select the camera you
want to delete;
4. Press key enter into sub-menu; Press ▲ / ▼ key to select then press key;
5. Press ▼ key to select icon to delete the camera;
6. Press OK key to confirm the option.
8.2 VOLUME
1. Press the key then the menu will pop up;
2. Press the◀/▶/▲/▼key until the Volume icon is selected by orange box;
3. Press the key enter into sub-menu;
4. Press the◀/▶key to select the desired volume level from level 1 ~ 5.
8.3 DISPLAY BRIGHTNESS
1. Press the MENU key then the menu will pop up;
2. Press the ◀/▶/▲/▼key until the brightness icon is selected by orange box;
3. Press key enter into sub-menu;
4. Press ◀/▶ keys to select the desired brightness level from level 1 ~ 5.
(The default brightness level setting is level 3.)
8.4 TEMPERATURE UNIT SETTING
1. Press the MENU key then the menu will pop up;
2. Press the◀/▶/▲/▼ until the temperature icon is selected by orange box;
3. Press the key enter into sub-menu;
4. Press the◀/▶keytoselectthe℉ or ℃ for setting temperature unit.
5. Press key to confirm;
6. Press key to Exit.
The detected temperature range is 0~40 ℃ .Note: