Do you have a question about the Henny Penny LVE 30 Series and is the answer not in the manual?
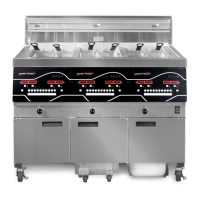
| Model | LVE 30 Series |
|---|---|
| Capacity | 30 lb (15 L) |
| Heating Method | Electric |
| Voltage | 208V, 240V, 480V (Electric Models) |
| Oil Capacity | 30 lb (15 L) |
| Weight | Varies by model |
| Gas Input Rating | Varies by model |
| Electrical Supply | Varies by model |
| Dimensions | 15 5/8 in (397 mm) W x 30 1/8 in (765 mm) D x 45 1/2 in (1156 mm) H |
Wear protective gear and ensure the filter pan is correctly installed before starting.
Access the Oil & Filter menu and then the Daily Filter procedure.
Begin the daily filter process and skim floating crumbs from the vat.
Raise elements and clean the vat interior with pad and brush.
Perform washing, rinsing, and polishing cycles for the vat.
Refill the vat, remove old filter pad, and clean drain pan.
Reassemble filter components and activate screen lock for cleaning.
Wipe down the control panel with a clean, sanitizer-soaked towel.
Clean the exterior surfaces of the fryer with appropriate solutions.
Open door and pull out the filter drain pan assembly.
Inspect O-rings for damage and replace as needed with approved parts.
Execute a filter cycle before deep cleaning and cover adjacent vats.
Access Deep Clean mode via Settings and enter the passcode.
Confirm oil presence in vats and follow prompts to dispose of oil.
Begin the deep clean process and prepare the filter pan.
Mix degreaser solution and fill the vat for a 60-minute soak.
Clean vat walls, corners, and elements using brushes and pads.
Rinse the vat thoroughly, dry components, and assemble with a new filter pad.
Purge oil lines and fill the vat with oil from the selected source.
Switch off power, remove grease trap, and release casters.
Carefully roll the fryer away from the hood to access the rear.
Disconnect power cords and clean the hood area.
Clean the area behind the fryer, including casters and the floor area.
Reverse steps to return the fryer to its position and replace grease filters.
Inspect cabinet for buildup, heating elements, and tilt mechanisms.
Verify fryer recovery time and inspect the heat system power supply.
Measure the heating element amp-draw against specifications.
Verify contactors, probes, electrical components, and wiring connections.
Check safety devices, frypot condition, and insulation.
Inspect filter drain pan, o-rings, and test filter system components.