Page 6 For technical questions, please call 1-888-866-5797. Item 59313
OPERATION
Read the ENTIRE IMPORTANT SAFETY INFORMATION section at the beginning of this manual
including all text under
subheadings therein before set up or use of
this product.
Tool Set Up
TO PREVENT SERIOUS INJURY FROM
ACCIDENTAL OPERATION:
Turn the Power Switch of the tool off and unplug the
tool from its electrical outlet before performing any
procedure in this section.
Note: For additional information regarding the
parts listed in the following pages, refer to the
Assembly Diagram near the end of this manual.
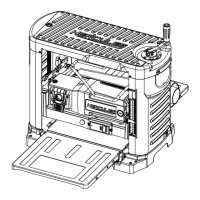
Assembly/Mounting
CAUTION! Attach Planer securely to solid and level
surface that can support weight of Planer and workpiece,
with enough clearance for movement of workpiece.
Note: Verify that mounting surface has no hidden
components before drilling or driving bolts.
1. Use base to mark mounting holes
on mounting surface.
2. Mount base to mounting surface using
appropriate hardware (sold separately).
Installing Dust Chute
1. Loosen the screws on the Blade Guard sides.
2. Attach Dust Chute to Blade Guard,
lining up the screw holes.
3. Place Washer on ends of each Knob
Screw and finger tighten to secure.
4. Tighten Blade Guard Screws.
Knob Screw
and Washer
Dust Chute
Blade
Guard