Page 12 For technical questions, please call 1-888-866-5797. Item 64855
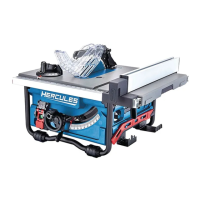
Height/bevel
Adjustment Handwheel
Bevel Lock Handle
5. Make sure blade is at desired angle.
Tighten Bevel Lock Handle clockwise.
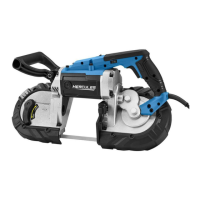
Rip Fence Operation
Note: The width of a cut is achieved by
moving the Rip Fence to right or left.
1. To adjust the position of the fence, raise the
fence Lock Lever and slide the fence along
the table. Once the position is adjusted,
lower the lever to lock the fence in place.
Rip Fence
Lock
Lever
Scale
2. To adjust the fence position using the
workpiece and the scale, place the workpiece
against the fence on the table saw.
3. Raise the lock lever to unlock the fence and
slide the workpiece and fence together to the
right or left until the left side of the guide aligns
with the desired measurement on the scale.
4. Lock the fence in place by lowering
the Rip Fence lock lever.
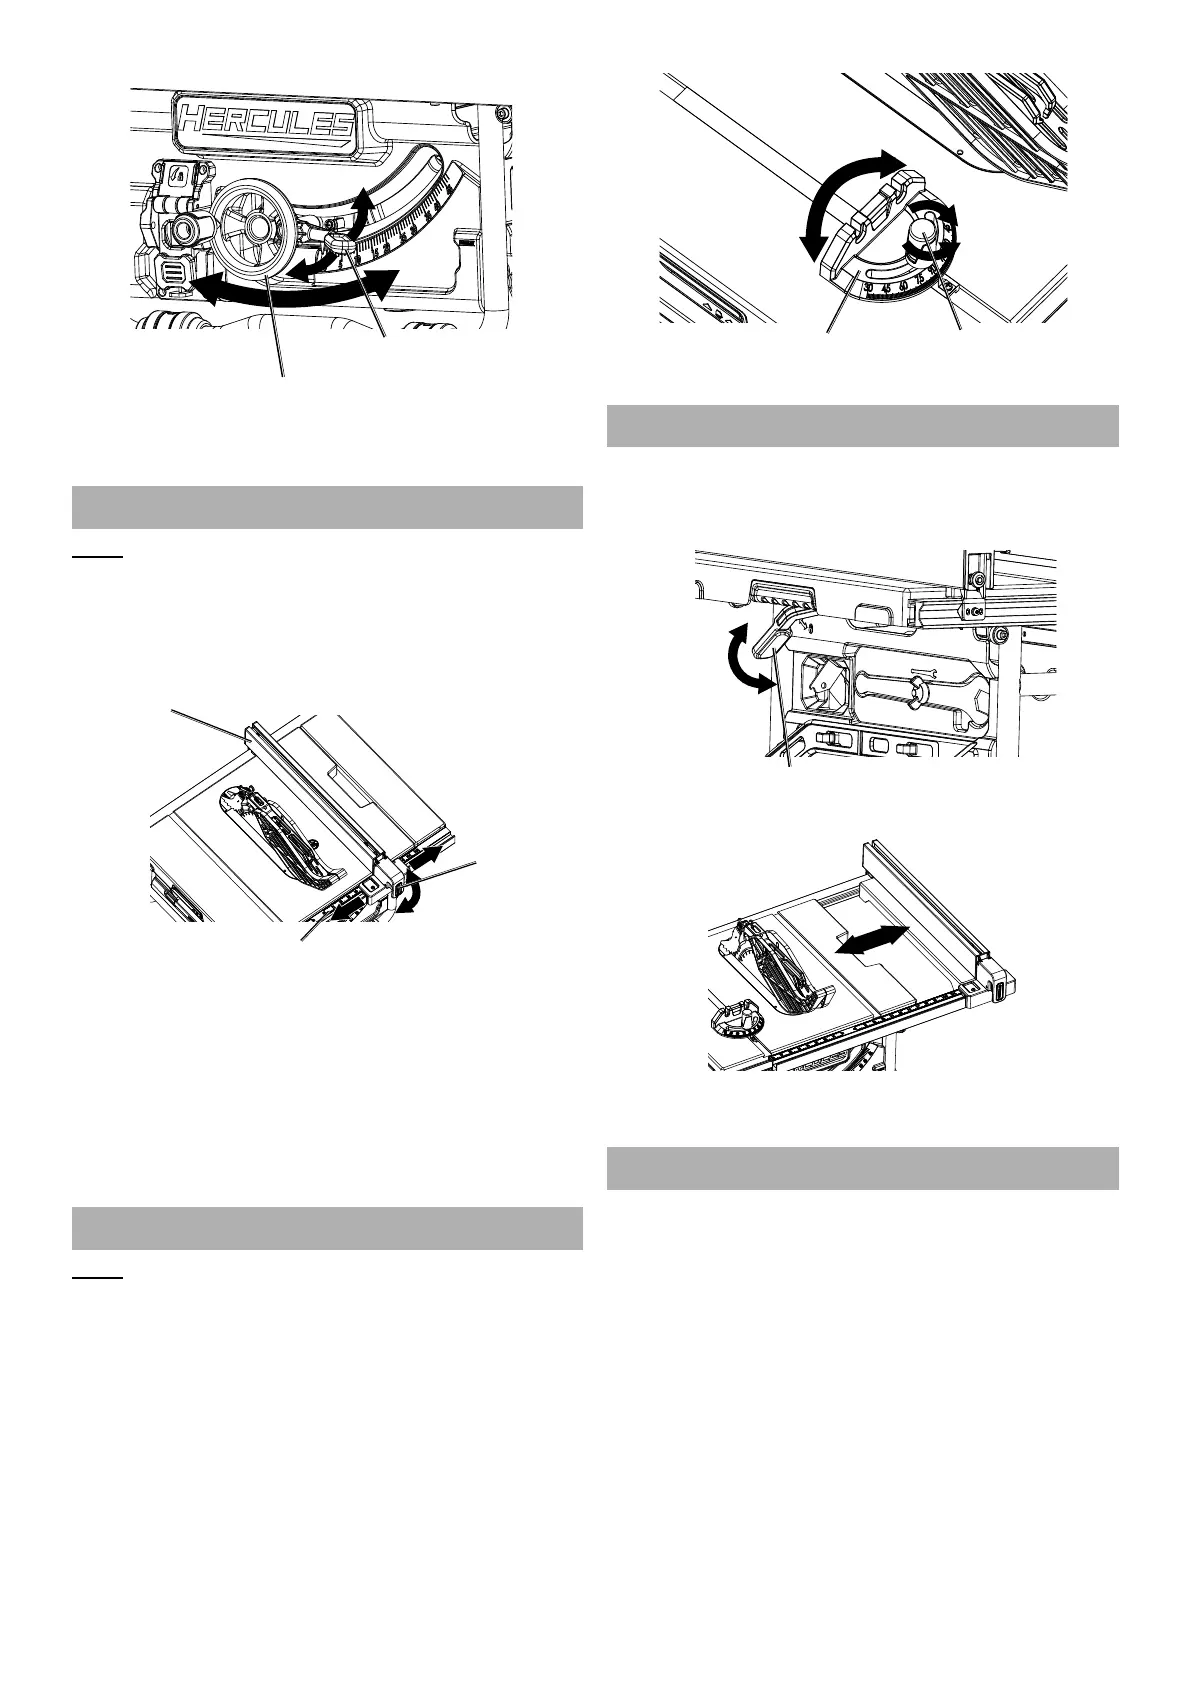
Change Miter Angle
Note: The miter gauge provides accuracy in angle cuts.
For very close tolerances, test cuts are recommended.
When making a 90° cross cut, use either miter
gauge groove. When making a beveled cross cut
(blade tilted in relation to working table) miter gauge
should be located in groove on right so that blade
is tilted away from the miter gauge and hands.
1. Loosen Lock Knob by turning counterclockwise.
2. With Miter Gauge in the miter gauge groove, rotate
gauge until desired angle on scale is reached.
Lock Knob
Miter Gauge
3. Tighten Lock Knob by turning it clockwise.
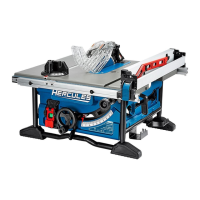
Using the Extension Table
1. Set the Rip Fence on the Extension Table.
2. Unlock the Extension Table Lock Lever by
pushing it toward the front of the saw.
Extension Table Lock Lever
3. Slide the extension table to the desired width.
4. Relock the extension table lock lever by
pushing it toward the back of the saw.
Workpiece and Work Area Set Up
1. Designate a work area that is clean and well lit.
The work area must not allow access by children
or pets to prevent distraction and injury.
2. Route the power cord along a safe route to reach
the work area without creating a tripping hazard or
exposing the power cord to possible damage. The
power cord must reach the work area with enough
extra length to allow free movement while working.
3. Secure loose workpieces using a vise or clamps
(not included) to prevent movement while working.
4. There must not be objects, such as utility lines,
nearby that will present a hazard while working.
5. Cut only the following materials:
dimensional lumber, plywood, particle board.