Page 11For technical questions, please call 1-888-866-5797.Item 64855
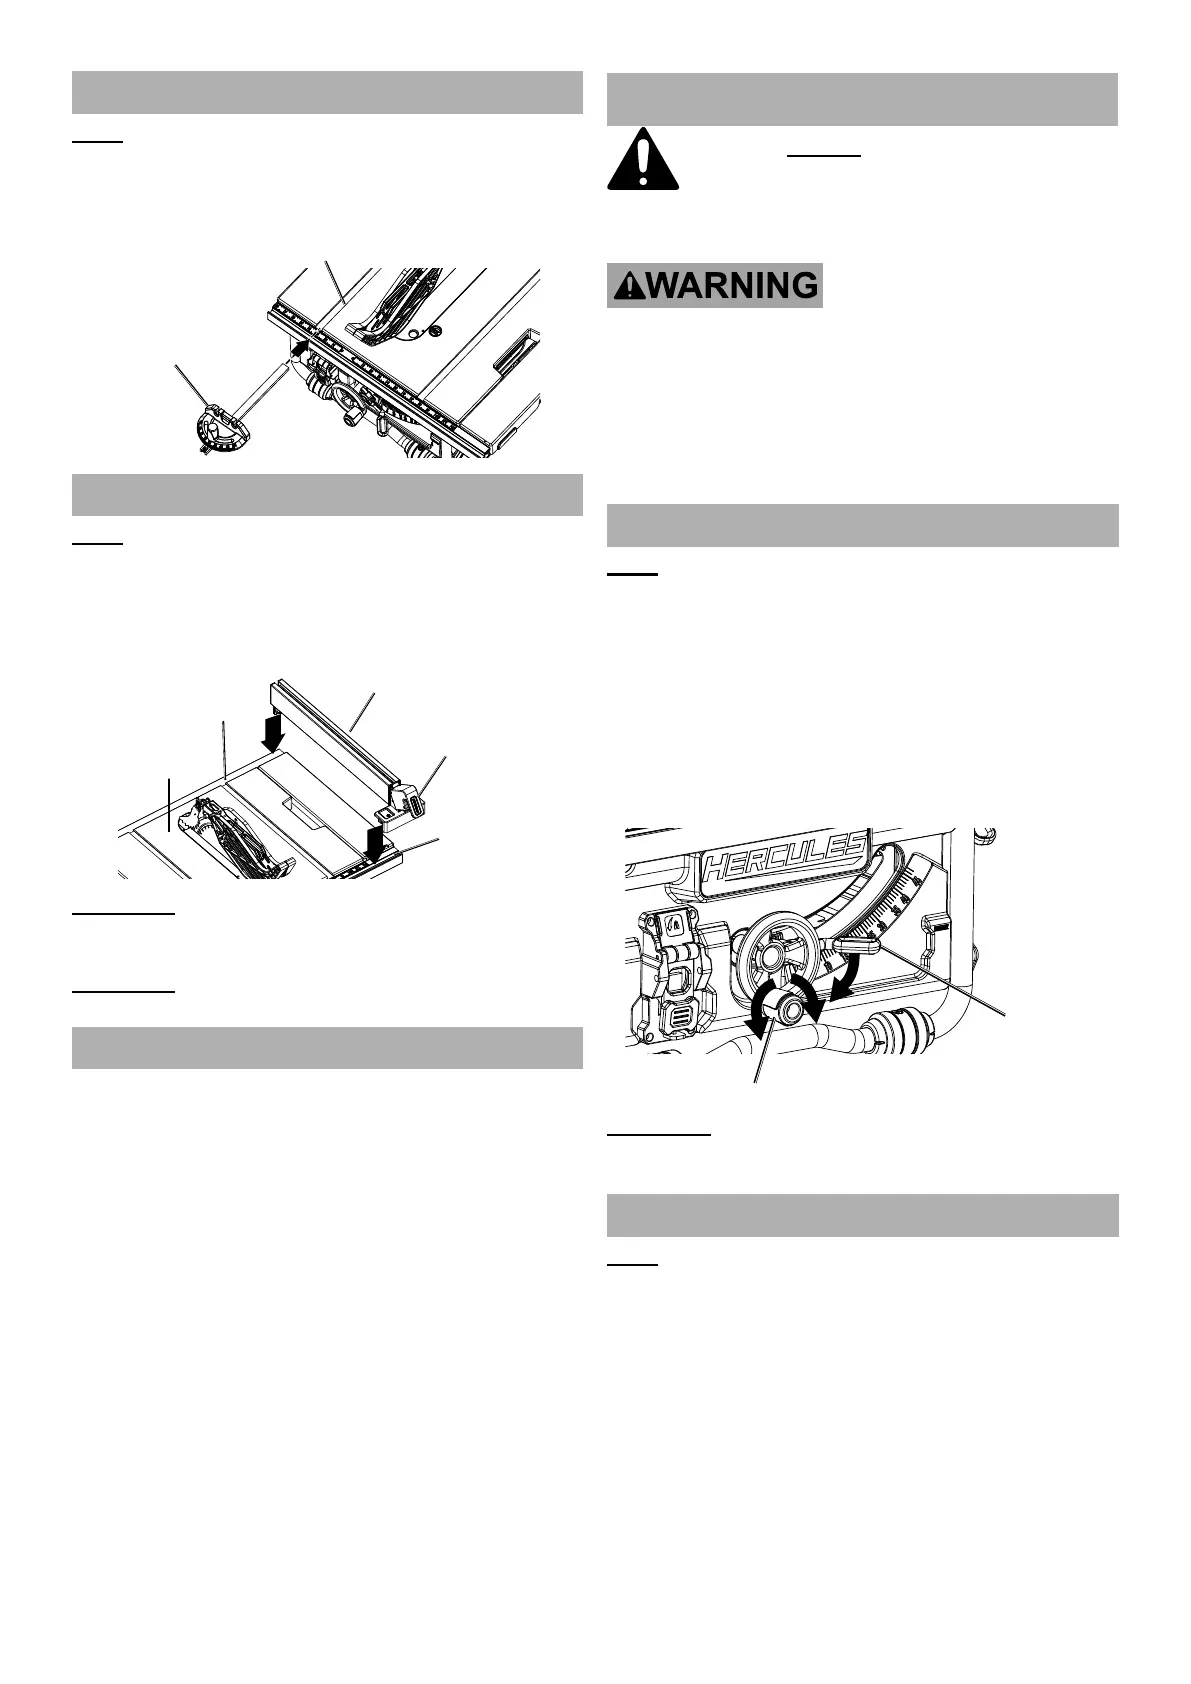
Installing the Miter Gauge
Note: The Miter Gauge can be installed in either
miter gauge groove on either side of blade.
Slide the Miter Gauge into one of the guide grooves.
Miter Gauge
Miter Gauge
Groove
Installing the Rip Fence
Note: The Rip Fence can be installed
on either side of blade.
1. Raise the Rip Fence Lock Lever.
2. Place Rip Fence on the extension table and
secure fence by pushing lever down.
Rip Fence
Fence Lock
Lever
Table
Rear rail
Front rail
WARNING! Make sure Rip Fence is
perfectly parallel to the blade and completely
locked in place to prevent kickback.
WARNING! Do not use Rip Fence when
cutting across wood grain (crosscutting).
Dust Collection System
The dust extraction port is located on the back of
the table saw. This port can be connected directly to
a dust collection system by connecting the pick up
end of the dust collection hose to the dust port.
OPERATION
Read the ENTIRE IMPORTANT
SAFETY INFORMATION section at the
beginning of this manual including
all text under subheadings therein
before set up or use of this product.
TO PREVENT SERIOUS INJURY: Read the
miter saw manufacturer’s instruction manual
before use. Ensure that the miter saw is firmly
secured to the stand. Use as a miter saw stand
only – do not use with any other type of power
tool. Do not exceed listed weight capacity. Do
not use on uneven or slippery surfaces.
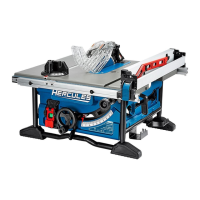
Changing Blade Depth
Note: Blade depth should be set so that outer
points of blade are higher than workpiece by
approximately 1/8″ to 1/4″ and bottom of gullets
are below top surface of workpiece.
1. Turn Bevel Lock Handle clockwise
to tighten it securely.
2. Raise blade by turning Height Adjustment Knob on
the height/bevel adjusting handwheel clockwise.
Lower blade by turning height knob counterclockwise.
Make sure blade is at proper height.
Height Adjustment Knob
Bevel Lock
Handle
WARNING! Make sure the blade guard is in place
after adjusting the blade depth. Failure to heed this
instruction could result in serious personal injury.
Changing Blade Angle
Note: A 90° cut has a 0° bevel and
a 45° cut has a 45° bevel.
1. Loosen the bevel lock handle counter-clockwise.
2. Adjust bevel angle by first pushing Height/
bevel Handwheel all the way to the left.
3. Hold handwheel and slide bevel indicator to
the right to increase angle of blade (bringing
blade closer to 45° from the tabletop).
4. Hold handwheel and slide bevel indicator
to the left to decreases the angle (bringing
blade closer to 90° from the tabletop).