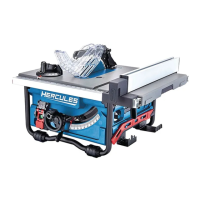
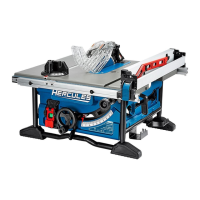
Page 5For technical questions, please call 1-888-866-5797.Item 64855
h. Use extra caution when cutting a workpiece
that is twisted, knotted, warped or does
not have a straight edge to guide it with a
miter gauge or along the fence. A warped,
knotted, or twisted workpiece is unstable
and causes misalignment of the kerf with
the saw blade, binding and kickback.
i. Never cut more than one workpiece, stacked
vertically or horizontally. The saw blade could
pick up one or more pieces and cause kickback.
j. When restarting the saw with the saw
blade in the workpiece, center the saw
blade In the kerf so that the saw teeth are
not engaged in the material. If the saw
blade binds, it may lift up the workpiece and
cause kickback when the saw is restarted.
k. Keep saw blades clean, sharp, and with
sufficient set. Never use warped saw
blades or saw blades with cracked or broken
teeth. Sharp and properly set saw blades
minimize binding, stalling and kickback.
9. Table saw operating procedure warnings
a. Turn off the table saw and disconnect
the power cord when removing the table
insert, changing the saw blade or making
adjustments to the Riving Knife, anti-
kickback device or saw blade guard, and
when the machine Is left unattended.
Precautionary measures will avoid accidents.
b. Never leave the table saw running unattended.
Turn it off and don’t leave the tool until it
comes to a complete stop. An unattended
running saw is an uncontrolled hazard.
c. Locate the table saw in a well-lit and level
area where you can maintain good footing
and balance. It should be installed in an area
that provides enough room to easily handle the
size of your workpiece. Cramped, dark areas,
and uneven slippery floors invite accidents.
d. Frequently clean and remove sawdust
from under the saw table and/or the dust
collection device. Accumulated sawdust
is combustible and may self-ignite.
e. The table saw must be secured. A table saw
that is not properly secured may move or tip over.
f. Remove tools, wood scraps, etc. from the
table before the table saw is turned on.
Distraction or a potential jam can be dangerous.
g. Always use saw blades with correct size
and shape (diamond versus round) of
arbor holes. Saw blades that do not match
the mounting hardware of the saw will run
off-center, causing loss of control.
h. Never use damaged or incorrect saw blade
mounting means such as flanges, saw blade
washers, bolts or nuts. These mounting
means were specially designed for your saw,
for safe operation and optimum performance.
i. Never stand on the table saw, do not
use it as a stepping stool. Serious injury
could occur if the tool is tipped or if the
cutting tool is accidentally contacted.
j. Make sure that the saw blade is installed
to rotate in the proper direction. Do not use
grinding wheels, wire brushes, or abrasive
wheels on a table saw. Improper saw
blade installation or use of accessories not
recommended may cause serious injury.
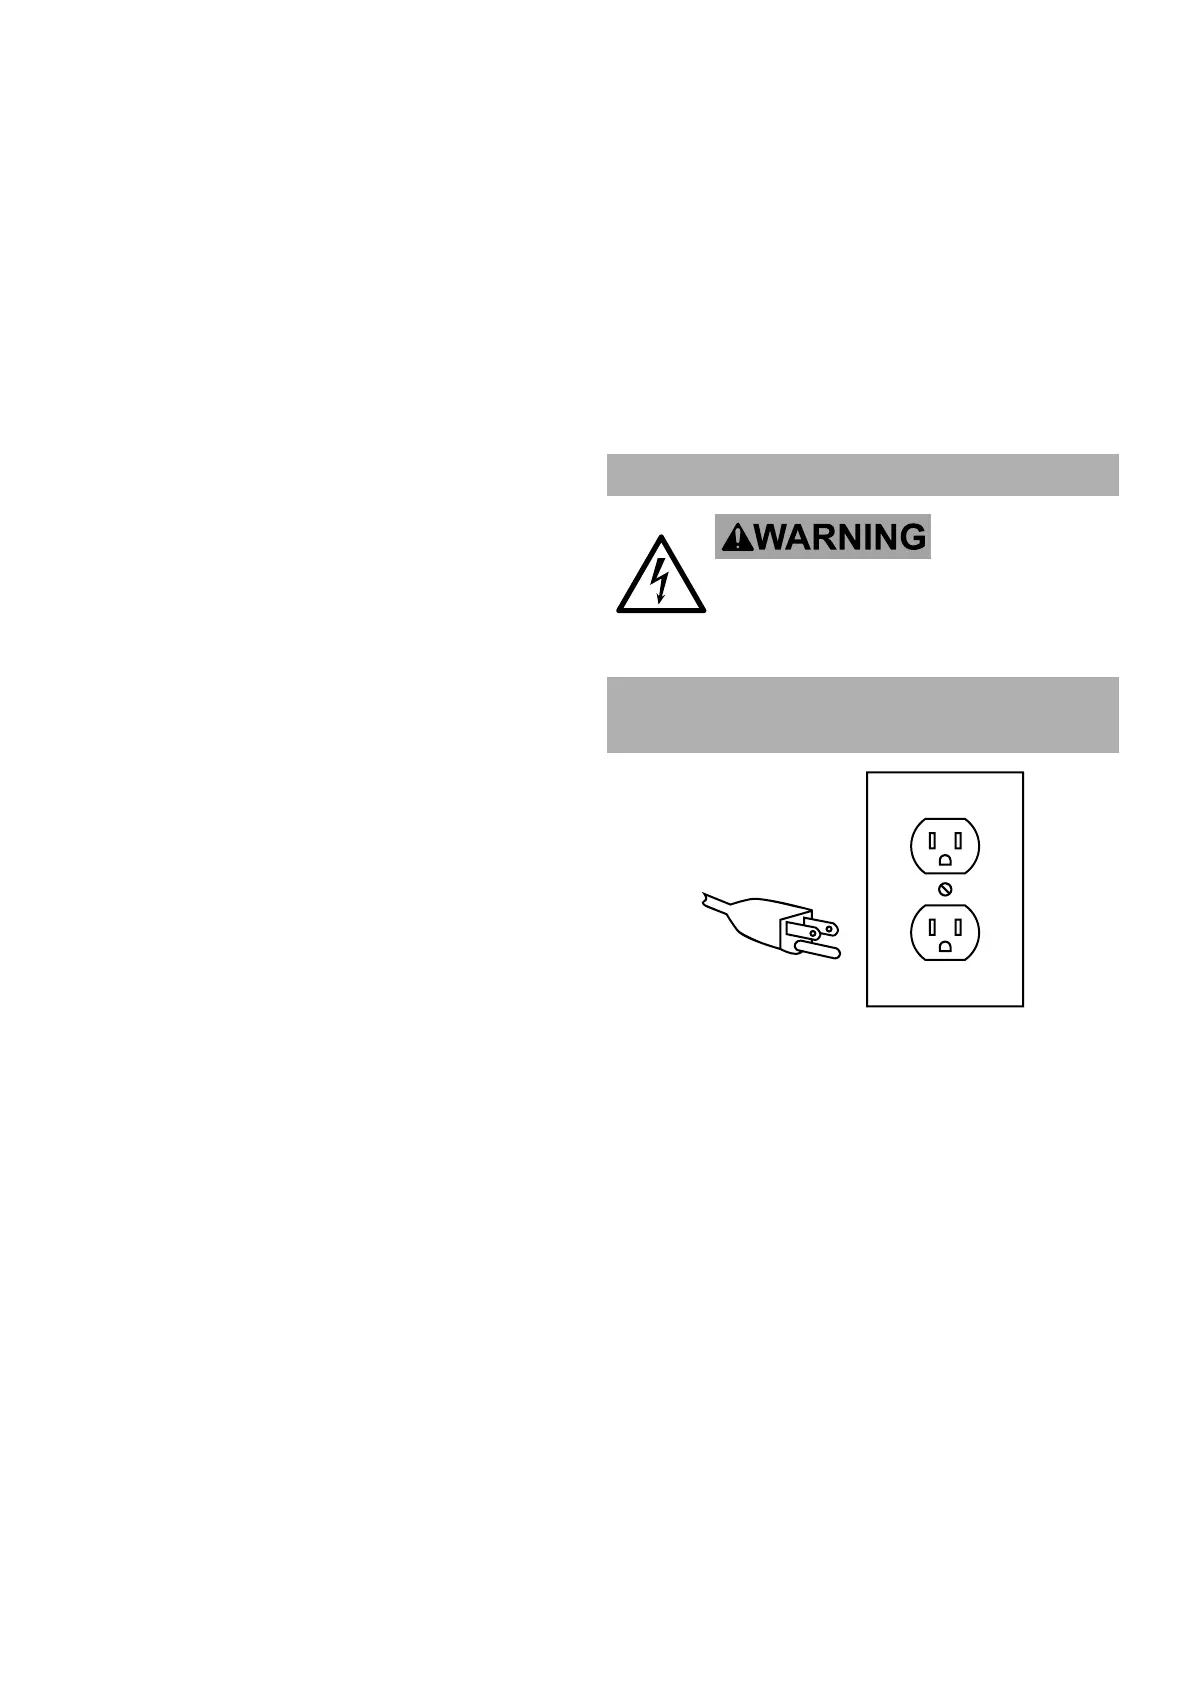
Grounding
TO PREVENT ELECTRIC SHOCK AND
DEATH FROM INCORRECT
GROUNDING WIRE CONNECTION READ
AND FOLLOW THESE INSTRUCTIONS:
Grounded Tools: Tools with
Three Prong Plugs
3-Prong Plug and Outlet
1. Tools marked with “Grounding Required” have a three
wire cord and three prong grounding plug. The plug
must be connected to a properly grounded outlet.
If the tool should electrically malfunction or break
down, grounding provides a low resistance path to
carry electricity away from the user, reducing the risk
of electric shock. (See 3-Prong Plug and Outlet.)
2. The grounding prong in the plug is connected through
the green wire inside the cord to the grounding
system in the tool. The green wire in the cord must
be the only wire connected to the tool’s grounding
system and must never be attached to an electrically
“live” terminal. (See 3-Prong Plug and Outlet.)
3. The tool must be plugged into an appropriate outlet,
properly installed and grounded in accordance with
all codes and ordinances. The plug and outlet should
look like those in the preceding illustration.
(See 3-Prong Plug and Outlet.)