Do you have a question about the HermanMiller Headway and is the answer not in the manual?
Lists the components and tools necessary for assembling the communal table.
Instructions for placing the worksurface upside down and adding support blocks if needed.
Details on joining two-piece spanner rails using a rail brace and locknuts.
Guidance on positioning spanner rails and securing them with screws.
Instructions for attaching cover buttons to the worksurface using screws.
How to join two-piece rail covers using a connector plate and securing with locknuts.
Procedure for attaching rail covers to spanner rails and worksurface edges.
Attaching leg posts and glide supports to the end panels using screws.
Securing cover buttons to end panels and connecting leg posts to spanner rails.
Attaching leg covers and orienting the table upright.
Guidelines for identifying and segregating plastic and metal components for recycling.
Instructions to reverse the installation steps for product disassembly.
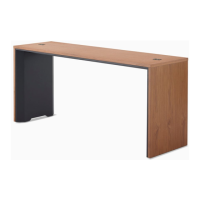
The Herman Miller Headway Communal Table is a versatile and robust furniture solution designed for collaborative workspaces, offering a blend of aesthetic appeal, functional design, and ease of assembly/disassembly for recycling. This manual details the installation process, highlighting the modular nature of the table and its components, as well as providing guidance for end-of-life material segregation and recycling.
The Headway Communal Table serves as a central hub for group activities, meetings, and shared work. Its design emphasizes stability, durability, and a clean aesthetic suitable for modern office environments. The table's modular construction allows for various configurations, particularly evident in its ability to support longer lengths (108" and 120" tables) through split components like spanner rails and rail covers. The table is designed to be assembled and disassembled with common tools, facilitating both initial setup and subsequent recycling efforts. The inclusion of features like leg covers and cover buttons contributes to a polished look while also protecting internal components.
The table utilizes a variety of fasteners and components to ensure structural integrity:
| Brand | HermanMiller |
|---|---|
| Model | Headway |
| Category | Indoor Furnishing |
| Language | English |