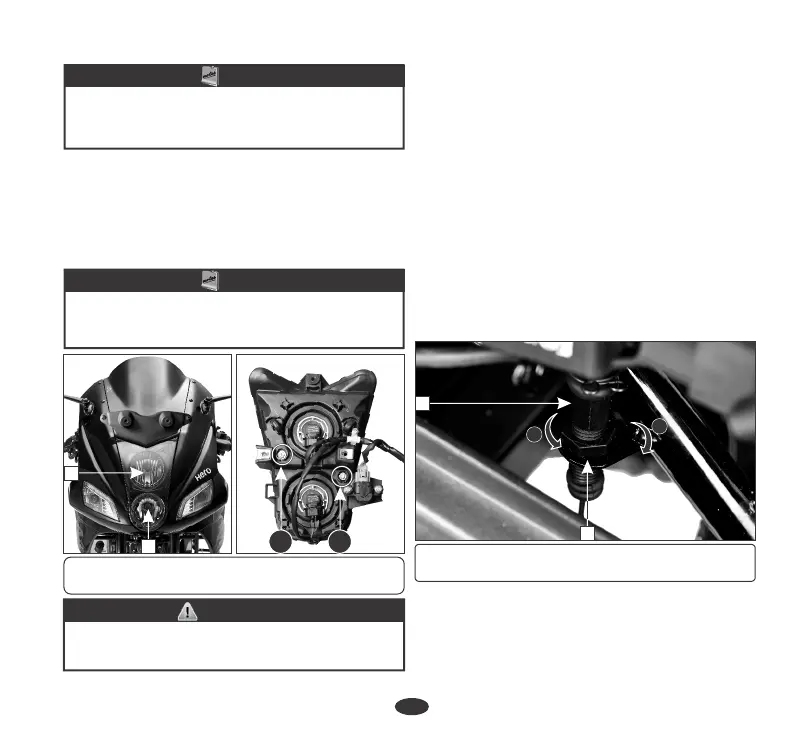
HEADLAMP ADJUSTMENT
Headlamp (twin) (1) is factory pre-set.
However in case of adjustment required,
please visit your Authorised Hero MotoCorp
workshop as per the maintenance schedule
(page 27).
Always adjust both the rear shock absorber to
the same position. Use the rear shock absorber
adjustment tool (pin spanner) (1) available in
the tool kit.
NOTE
Headlamp adjustment is done by the headlamp
adjusting screw (A) for Lo-beam and (B) for Hi-
beam located behind the headlamp assembly.
NOTE
B
A
1
2
(1) Headlamp (Lo-beam) (2) Headlamp (Hi-beam)
(A)&(B) Headlamp adjusting screws (Lo&Hi-beam)
WARNING
An improperly adjust headlamp may blind
oncoming driver or it may fail to light the road
for a safe distance.
î Turn the ignition switch to the “ON” position.
î Turn the adjusting nut (2) to position stop
lamp switch at a point where the stop lamp
glows just before the brake pedal is
depressed to the limit of its free play. Turn
the adjusting nut in direction (A) to advance
switch timing or in direction (B) to retard
switch timing.
The stop lamp switch (1) must be adjusted so
that stop lamp glows when rear brake is
applied. Rear brake free play (page 40)
should be adjusted before performing stop
lamp switch adjustment. The procedure for
adjusting stop lamp switch is as follows.
STOP LAMP SWITCH
B
A
1
2
(1) Stop lamp switch (A) Advance
(2) Adjusting nut (B) Retard
Check the side stand for proper function.
î Check the spring (1) for damage or loss of
tension and the side stand assembly for free
movement.
SIDE STAND
42
 Loading...