H8 DSP
Digital Interface Processor
User’s manual
REM IN
REM IN
Battery Ground
REMOTE OUT
Black -BATT
Cyan (light blue) KEY MEM
Red REM IN
Blue REM OUT
Yellow +BATT 12V
1 mm
2
- 16 AWG
12V
+ -
Ground
Fuse Holder
Not Provided
Suggested Fuse
T1A-delayed
5
(vedi sez. 5.2.2)
10
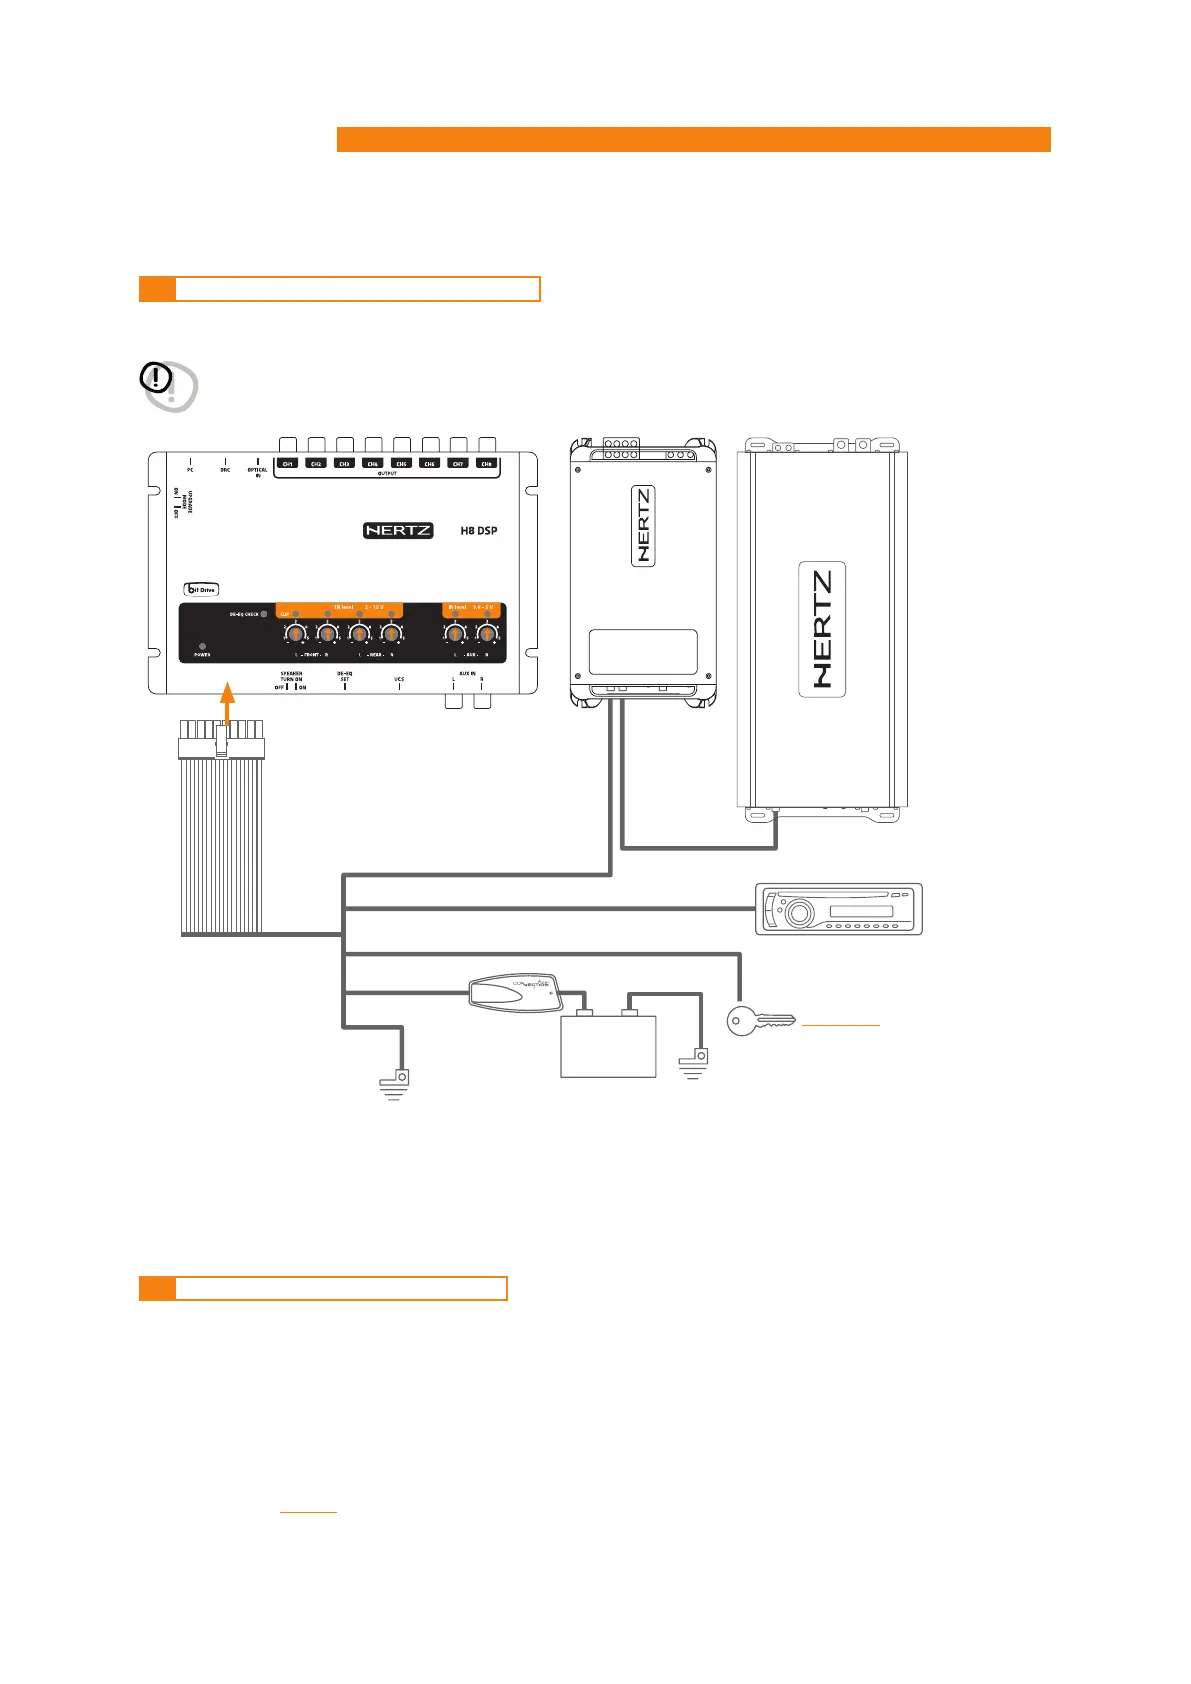
5 CONNECTIONS
Remark: the H8 DSP is internally protected by a
fuse-resistor soldered to its printed circuit
board. To replace it contact a service center.
Using an external fuse is recommended, though
it is not required.
The H8 DSP is on when the POWER ON LED lights up in white. It can be turned on / off in the following ways:
1. Press the DRC main “POWER” switch (to turn on). Keep the DRC main “POWER” switch pressed (to shut down).
In this case, no other connections Remote In / KEY MEM are required, but they can coexist.
2. Connecting one of the Remote In plugs using a signal coming from a source.
The KEY MEM connection is not required, but it can coexist.
3. Through the KEY MEM. This method is memory-dependent.
4. Through the MASTER (INPUT FL) input. The AUTO TURN ON (ART) function is enabled by connecting an amplified
head unit output to the INPUT FL input channel. This function can be disabled by moving the SPEAKER TURN ON
switch to OFF
(seei 4; 5.5).
5.1 POWER SUPPLY AND REMOTE TURN ON
5.2 HOW TO TURN THE H8 DSP ON / OFF
WARNING:
to power the device, use 1 mm2 (16 AWG) cables.
 Loading...