13
The GL also offers a Selector toggle switch to control
up to nine crane/machine motions for
independent/combined control.
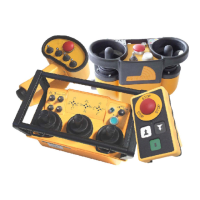
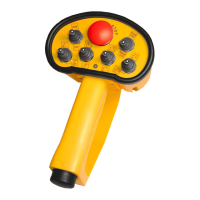
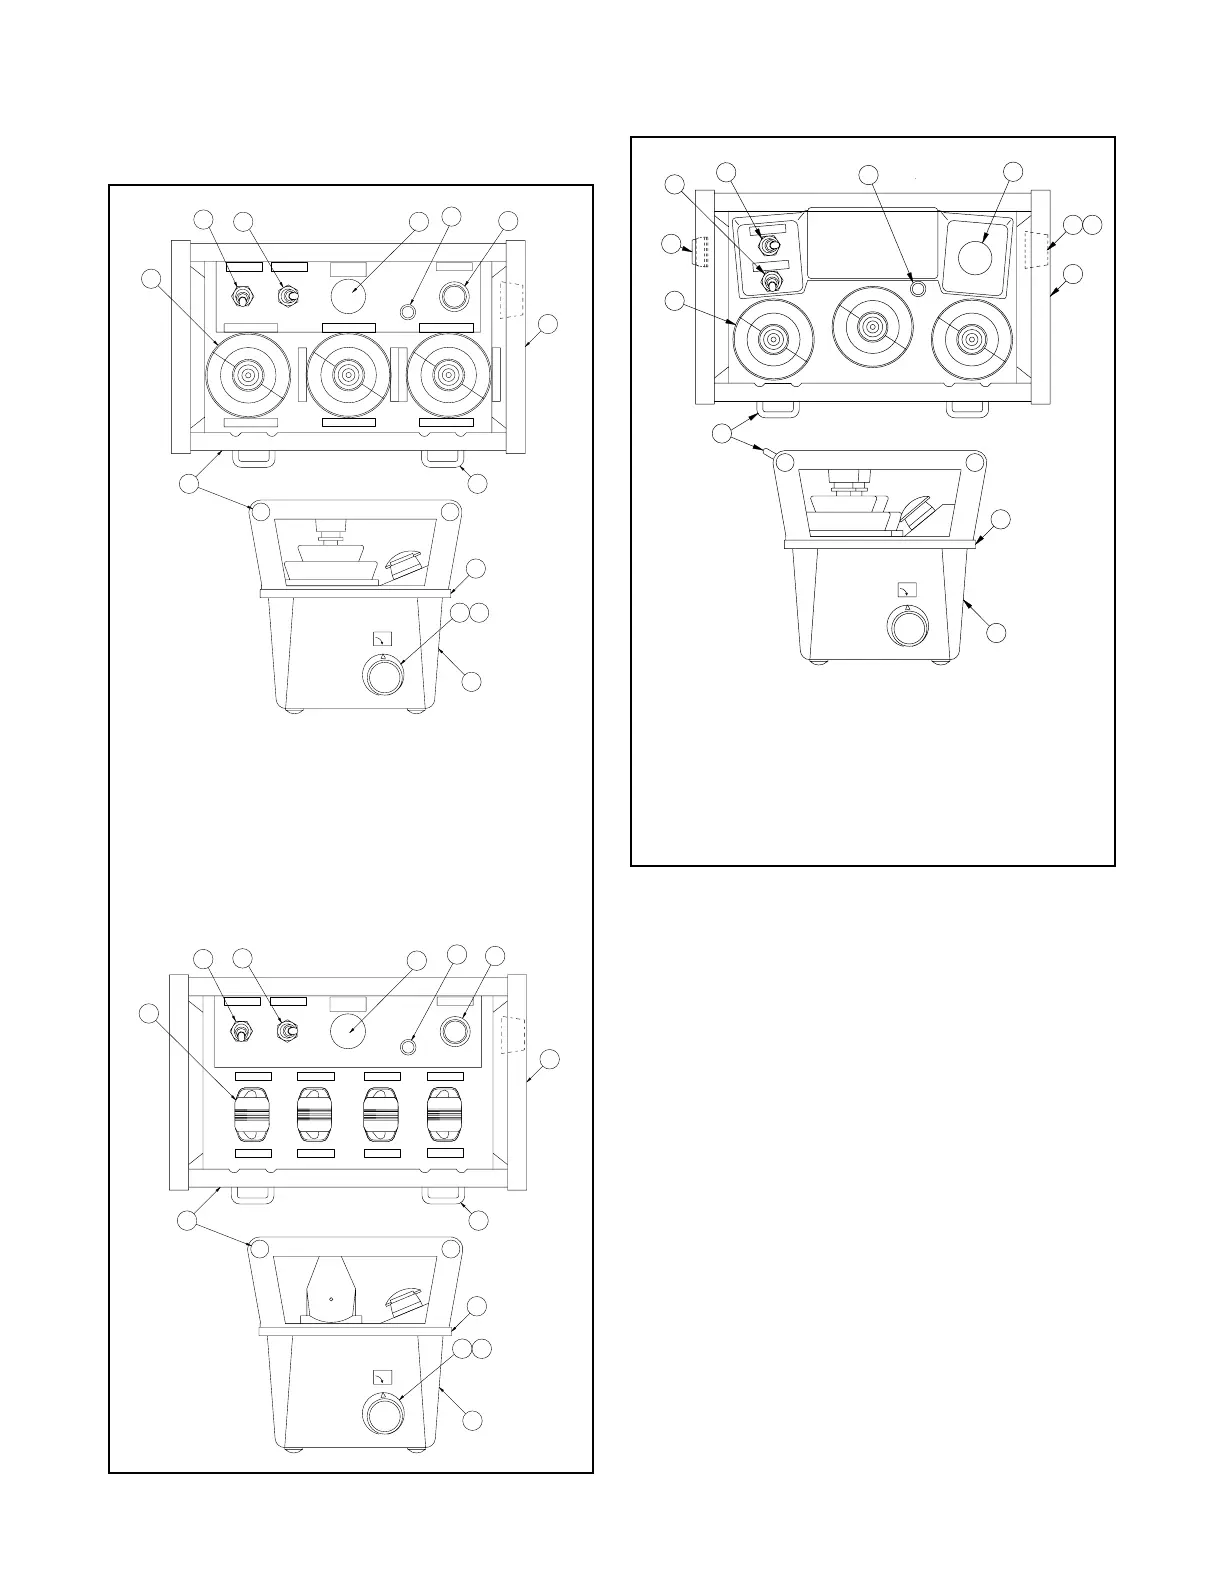
GL transmitter components are shown below.
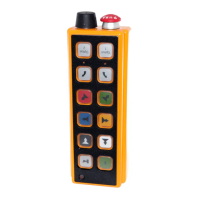
GL-3 transmitter components are shown below.
GL and GL-3 Transmitter Functions
Start/Horn Pushbutton - This pushbutton activates the
mainline contactor and sounds the horn (if provided). If
the mainline contactor is already on, pushing this
button will only sound the horn.
E-Stop Pushbutton - Press the E-Stop pushbutton to
place the receiver in the Safe mode. Pull this
pushbutton out to disengage the E-Stop. The
transmitter will then control crane/machine motions.
IMPORTANT: The E-Stop pushbutton is for emergency
stops only. DO NOT use it as an OFF switch. Use the
key switch to turn the transmitter on and off.
Power LED - The GL Power LED flashes once when
the transmitter is turned on. The transmitter initiates a
self-test to check the software. When the transmitter
passes the self-test, the light changes to flashing
green. It continues to flash green until the transmitter is
turned off.
Key Switch - The key switch turns the transmitter on
and off. The switch will only turn with the key cap fully
inserted. The switch must be in the OFF position for the
key to be removed.
Start/Horn
E-STOP
Hoist 2 Down
Hoist 2 Up
Hoist 1 Down
Hoist 1 Up
Bridge Forward
Bridge Reverse
Trolley 2 Left
Trolley 2 Right
Trolley 1 Left
Trolley 1 Right
A A+B BOption
1
5
2 3
4
6
9
11
13
10
12
8
O
I
7
Start/Horn
E-STOP
A A+B BOption
Bridge Forward
Trolley Left
Hoist Down
Rotate CW
Reverse
Right
Up
Rotate CCW
1
5
2
3
4
6
9
11
14
10
12
8
O
O
I
7
1. Option Toggle
Switch
2. Selector Toggle
Switch
3. E-Stop Pushbutton
4. Power LED
5. Start/Horn
Pushbutton
6. Key Switch
7. Key Cap
8. Handle
9. Belt Retaining
Bracket
10. Upper Housing
11. Lower Housing
12. Safety Bar
13. Joystick
14. Paddle Lever
GL
A A+B B
Option
E
E
E
M
R
G
N
C
Y
S
T
O
P
1
2
6
7
8
9
12
5
4
3
10
11
O
I
1. E-Stop Pushbutton
2. Power LED
3. Selector Toggle
Switch
4. Option Toggle
Switch
5. Start/Horn
Pushbutton
6. Key Switch
7. Key Cap
8. Handle
9. Belt Retaining
Bracket
10. Upper Housing
11. Lower Housing
12. Joystick
GL-3