18
Fig. 1
Fig. 2
Fig. 3
Fig. 4
Model Polix-2/3 and PoliSwing
Changing the dark polishing brush
and pre-cleaning brush
1.
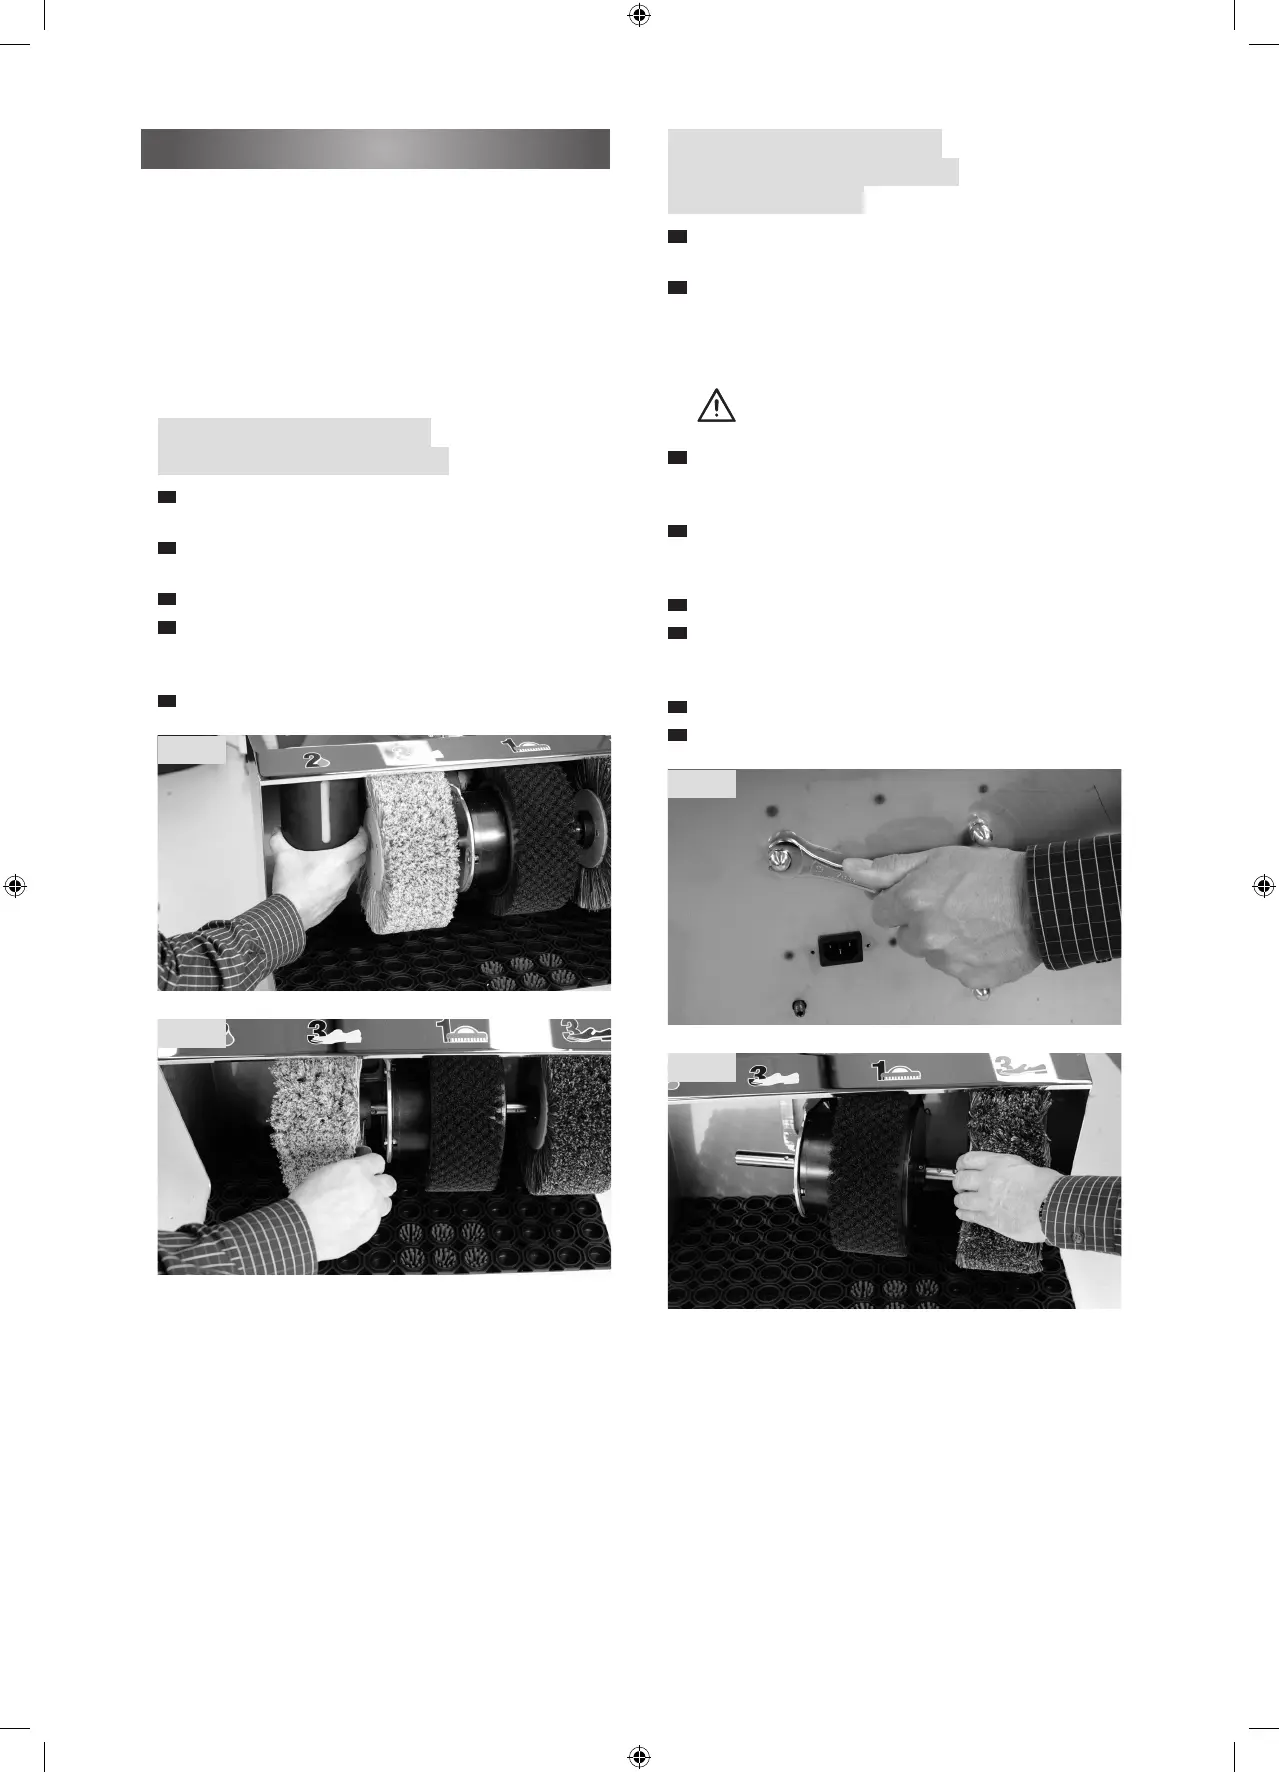
Detach the polish dispenser from the holding rail by turning it a
quarter turn, to obtain better access to the brushes (Fig. 1).
2.
The 4 nuts of the motor holder are on the rear of the machine.
With an open-end wrench (13 mm) completely unscrew the two
nuts on the right approx. 75% (do not unscrew them complete-
ly!). Completely unscrew the two nuts on the left (Fig. 3).
Complete removal of all 4 nuts and removal of the motor
holder to the front, can cause the machine cabling to
detach and tear off.
3.
Swing the motor holder away to the side in the direction of
the polish dispenser, so that the right polishing brush projects
forward and is accessible for mounting (Fig. 4).
4.
Detach the anges of the individual brushes from the shaft with
an Allen wrench (polishing brush wrench width 3 mm or pre-
cleaning brush wrench width 2.5 mm) and pull off the brush.
5.
Slide on the new brushes in the same manner.
6.
Fix the brush anges in place. In this process ensure that the
xing screws are again precisely positioned in the respective
shaft receptacle.
7.
Screw fasten the 4 nuts on the rear of the housing.
8.
Mount the polish dispenser.
Changing the brushes
Damaged or worn out brushes can damage the shoes to be cleaned
or even the shoe shine machine itself. Consequently the brushes
should be checked at regular intervals and replaced as needed. For
trouble-free operation, only use the original replacement brushes
from our company.
Always unplug the power plug from the power outlet rst! Use suitab-
le tools. Wear suitable protective gloves when removing and installing
the brushes, because danger of crushing exists and the surfaces
around the motor can reach temperatures as high as 90 °C.
Model Polix-2/3 and PoliSwing
Changing the light polishing brush
1.
Detach the polish dispenser from the holding rail by turning it a
quarter turn, to obtain better access to the brushes (Fig. 1).
2.
Unscrew the threaded union of the ange that sits on the brush
(Fig. 2) with an Allen wrench (3 mm).
3.
Pull the light polishing brush off of the shaft.
4.
Mount the replacement brush. In this process ensure that the
xing screws are again precisely positioned in the respective
shaft receptacle.
5.
Mount the replacement brush.

 Loading...