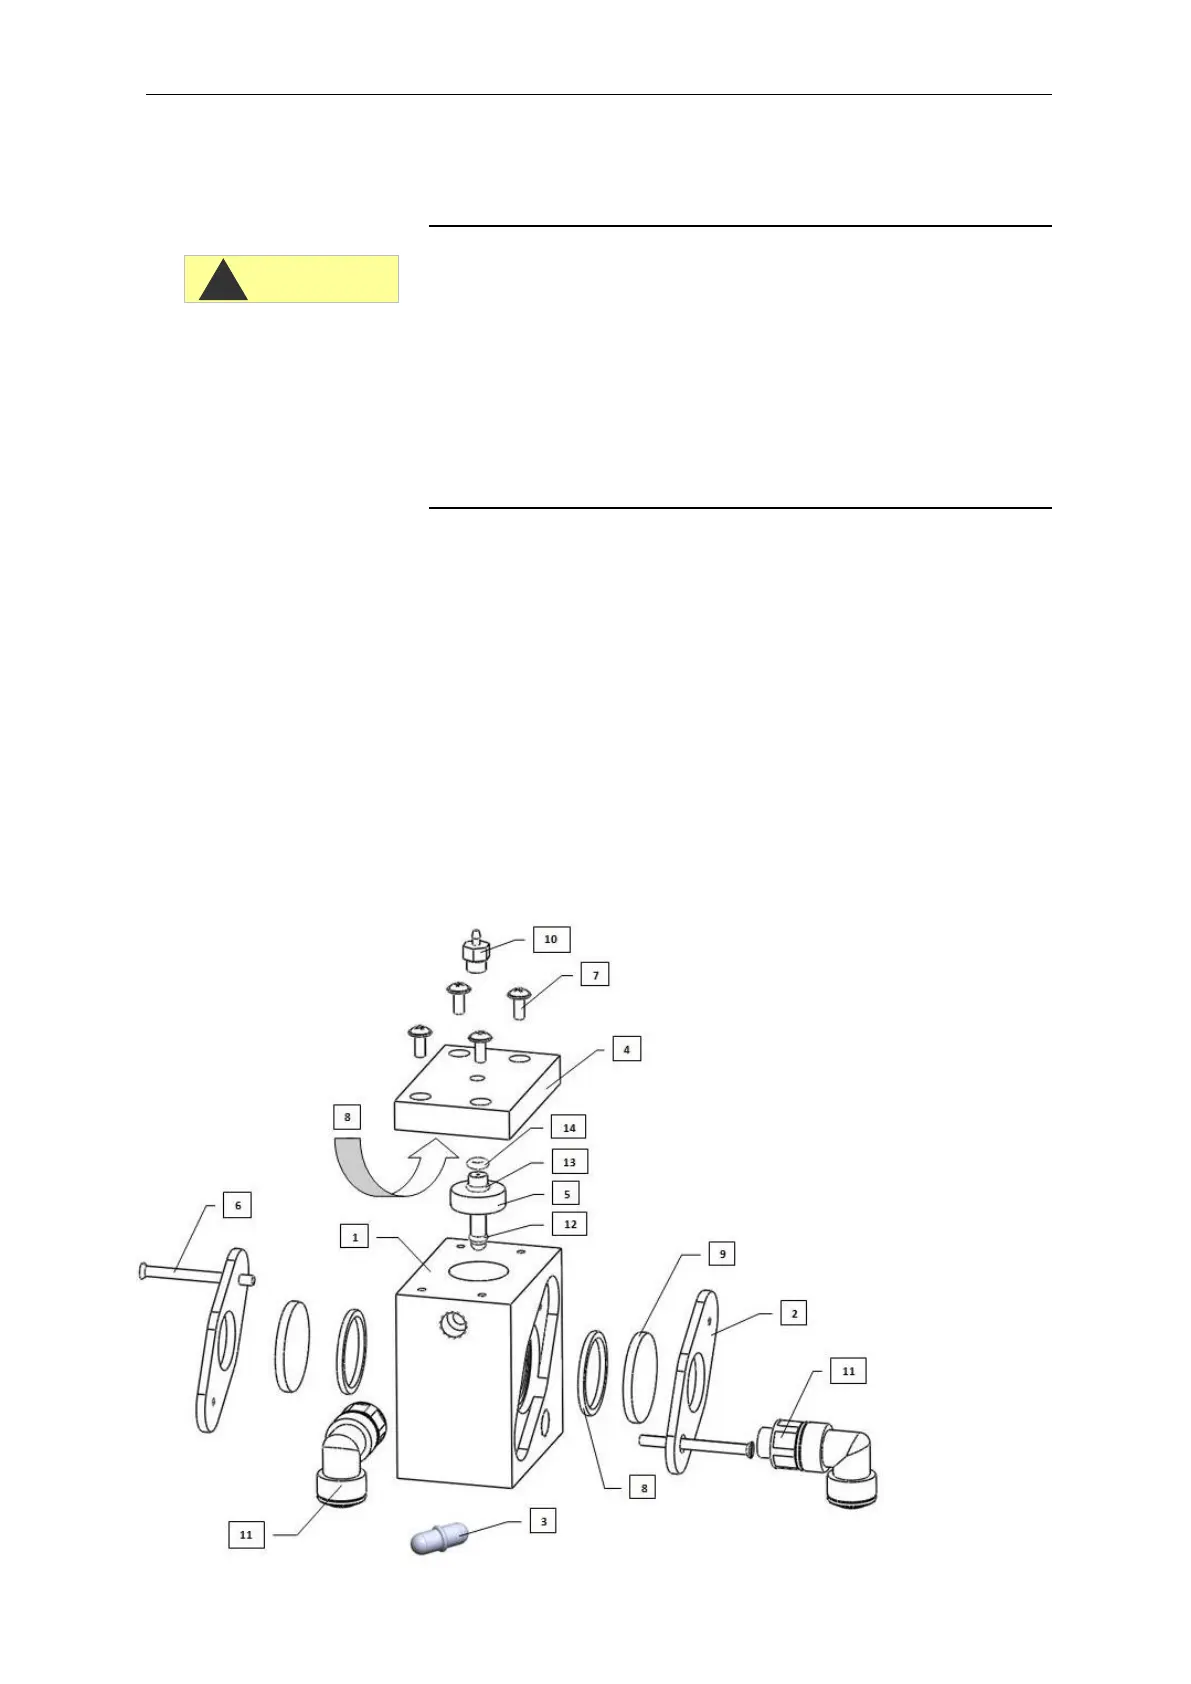
1 Measuring chamber (Article no 37615 (1-4bar)
or 37616 (0,3-1bar))
2 Sight-glass window holder (Article no. 40176)
3 Magnetic stirrer (Article no. 40050)
4 Measuring chamber cover (Article no. 37534)
5 Dosing needle (Article no. 37536)
6 Screw M3x40 (Article no. 33253)
7 Screw M3x12 (Article no. 33246)
8 Flat seal 24x2 (Article no. 33777)
9 Sight-glass window 30x3 (Article no. 40170)
10 Hose adapter (Article no. 37538)
11 Angled plug in connector (Article no. 40157)
12 O-ring 3.68x1.78 (Article no. 33797)
13 O-ring 4.5x1.5 (Article no. 11264)
14 O-ring 1.78x1.78 (Article no. 11245)
Once the measuring chamber has been fully cleaned, it can be
reinstalled. Reassemble in reverse order to disassembly.
Removal and installation of the sight glass windows
If the sight glass windows cannot be removed from the measurement
chamber, open the measurement chamber cover (4) and then
carefully push them out from the inside. Do not apply excessive force
and do not use sharp objects that may damage the sight glass
windows.
Ensure tension-free mounting of the sight glass windows. Tighten the
screws (6) equally alternating both sides. Otherwise, the sight glass
windows may break.
Once all assembly work has been completed, bleed the lines
before restarting the instrument (see the section entitled “Inserting
the indicator bottle” on page 26).