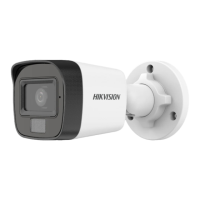
Figure 2-21 Fix Wall Mount
3. Use three PM4 screws to fix the installation plate
onto the wall mount.
Figure 2-22 Fix Installation Plate
4. Refer to steps 3 to 5 of Section 2.3.1 Ceiling
Mounting without Junction Box to finish installation.
Figure 2-23 Finish Installation
3 Menu Description
Please follow the steps below to call the menu.
Note:
The actual display may vary with your camera model.
Steps:
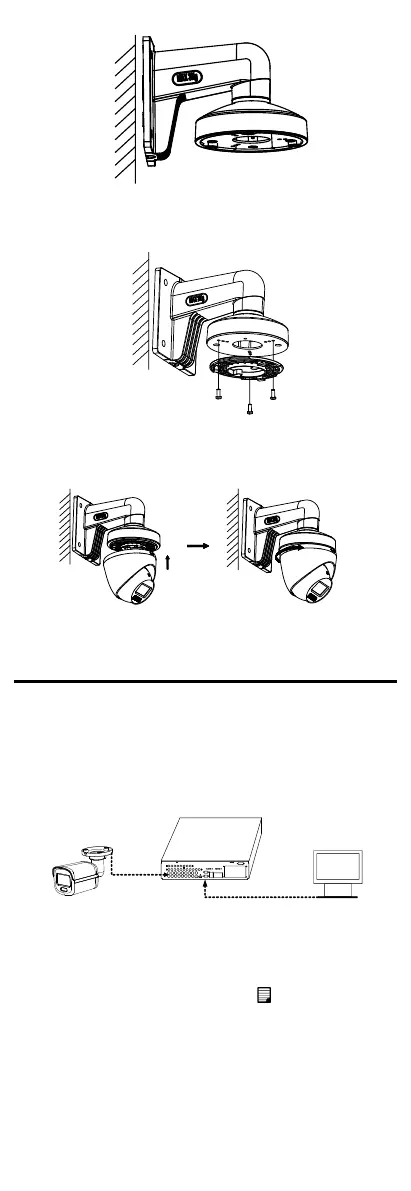
1. Connect the camera with the TVI DVR and the
monitor, as shown in figure 3-1.
Figure 3-1 Connection
2. Power on the camera, TVI DVR, and monitor to view
the image on the monitor.
3. Click PTZ Control to enter the PTZ Control interface.
4. Call the camera menu by clicking button or
calling preset No. 95.
 Loading...