DS-7200-ST Series DVR Quick Operation Guide
35
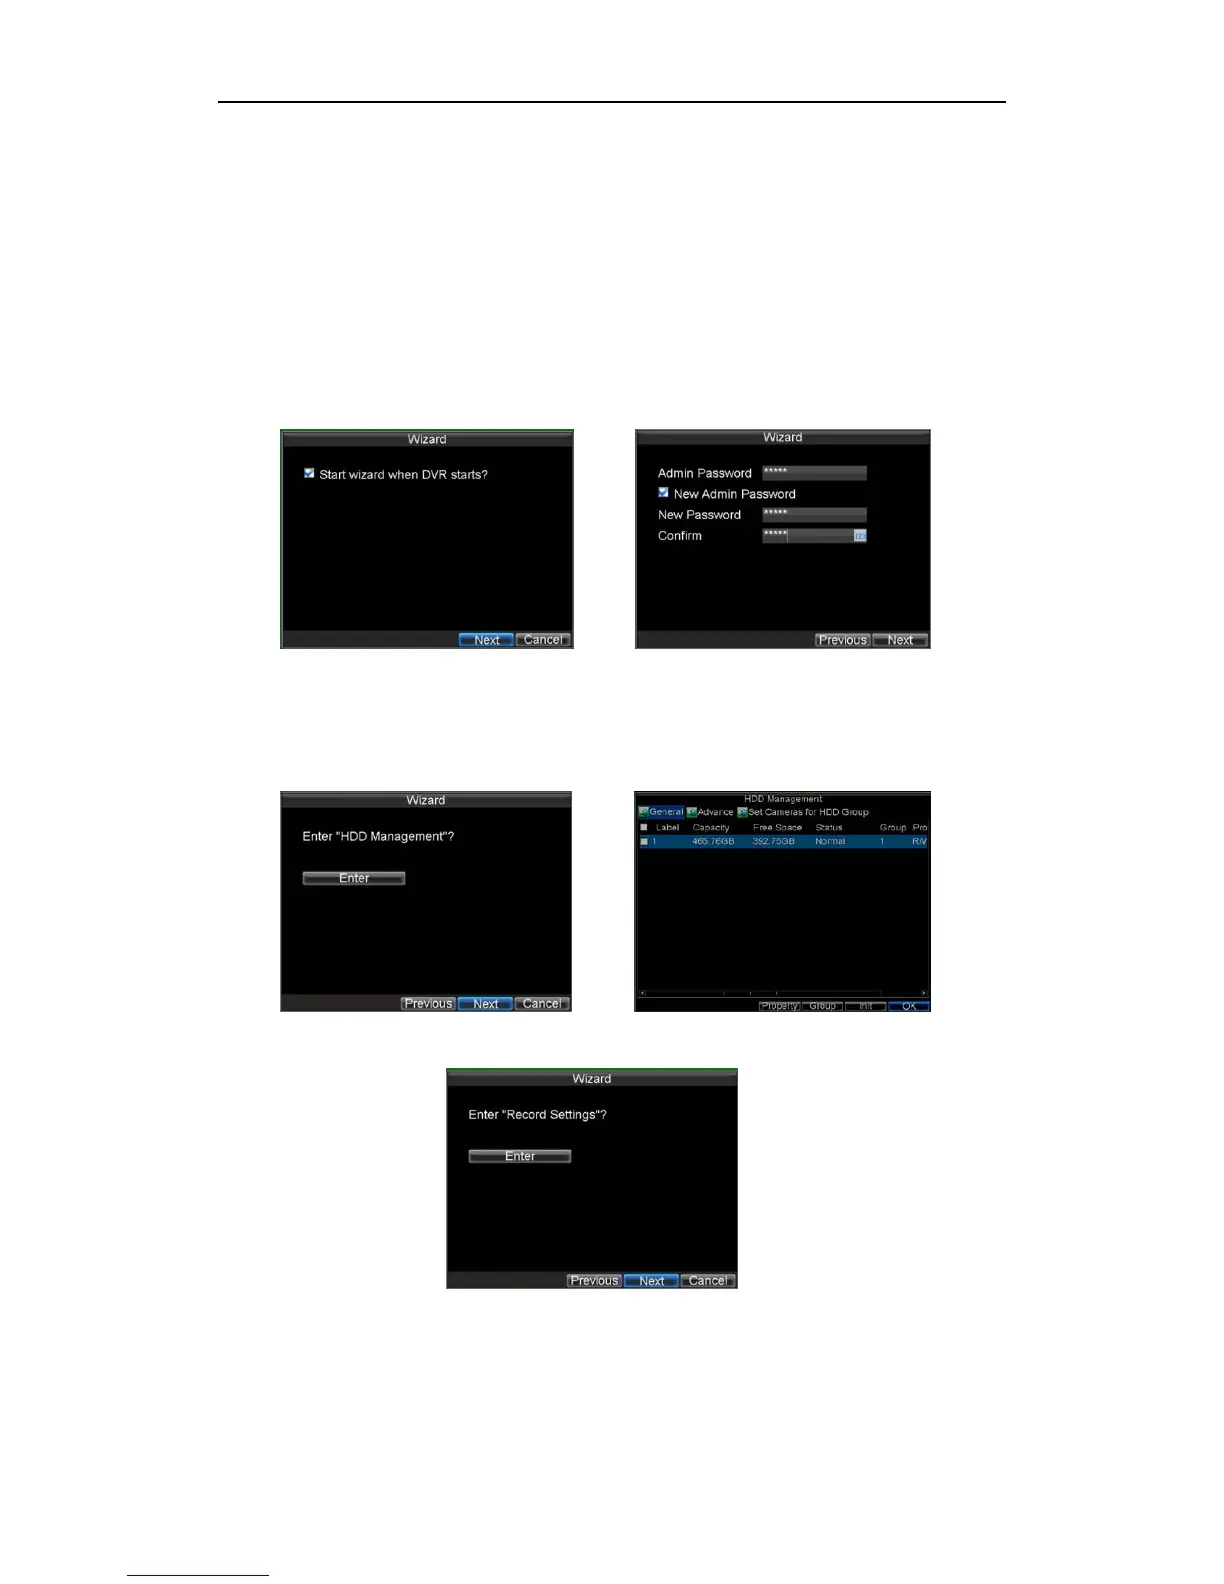
Using the Setup Wizard
By default, the Setup Wizard will start once the DVR has loaded. The Setup Wizard will walk you through some
of the more important settings of your DVR. If you do not wish to use the Setup Wizard at this time, click the
Cancel button. You may also choose to use the Setup Wizard at a later time by leaving the “Start Wizard when
DVR starts?” checkbox checked.
To start using the Setup Wizard:
1. Click the Next button on the Wizard window. This will take you to the User Permission window.
2. Navigate to the Admin Password input field. Enter the admin password into the Admin
Password input field. By default, the password is 12345.
3. To change the admin password, check the New Admin Password checkbox. Enter the new password and
confirm the password in the given fields.
4. Click the Next button. This will take you to the HDD Management window.
5. To start HDD management, click the Enter button.
6. If a new HDD was recently installed, select the HDD from the list to initialize it. Initializing the HDD will
format and remove all data from it.
7. After the HDD has been initialized, click the OK button which will take you back to the Setup Wizard window.
8. Click the Next button. This will take you to the Record Settings Window.
9. To enter the Record Settings window, click the Enter button.
10. Select the Schedule tab.
11. Click the Edit button. This will open up a new recording schedule.
12. Check both the Enable Schedule and All Day checkbox. This will enable the recording schedule and have it
record continuously all day.
13. Click the OK button. This will take you back to the Schedule tab. To copy the schedule to a different channel,
 Loading...